Stomp Inc. - Backup MyPC
Review by Omega on 05.20.2002![]()
Product provided by: Stomp Inc.
Retail Price: $79.00
Installation
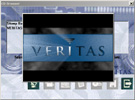
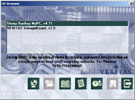
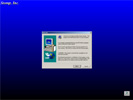
The Backup MyPC installation CD features an auto-run installation program. Upon inserting the CD to a drive with auto-play enabled (this is enabled by default), an installation prompt appears, accompanied by a pop-up animated logo. There is no way to close this logo until the animation plays out, which intrusively appears directly above the installation program. After the logo dissapears, options to Install Backup MyPC, Install DataGuard, and view a help file are available. The installation prompts include the standard agreement to the EULA, choosing the installation location, and in Windows NT-based systems there is an additional prompt to install for all users or just the current user. The installation suggests the user restart the computer prior to using Backup MyPC. Overall, the installation process is intuitive, easy-to-use, and gives enough configuration options for most users, despite the unavoidable banner at the beginning. A minor flaw somewhere in the installation program causes a slight delay between clicking install and responding by even reading the CD.
Scheduling
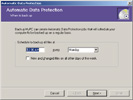
The first time the program is run, a prompt appears for scheduling regular backups. While some advanced users may be annoyed by things other than the general user interface appearing at startup, the prompt is nevertheless useful. If scheduling is not enabled after the first time the program is run, the same prompt is available from the Tools menu in the program.
Back-Up
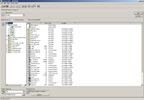
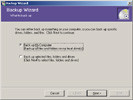
A backup can be run either from a backup wizard or a regular backup. The wizard doesn't offer the range of configuration available in the standard backup, but will be suitable for most users. Opting for standard backup, the user is presented with the following options
- File system browser/selection
- Media type selection
- Data compression options
- Media overwrite options
- Media name
- Password protection
- File type exclusions
- Reporting options
- Back up system state toggle
- All file backup vs. New/changed file backup selection
While backing up more than one or two gigabytes of data onto regular CD-Rs or CD-RWs might not be a viable solution, using a DVD burner, or backing up small amounts of data to CDs is a nice option. For those with exorbitant amounts of free hard drive space, the option to back up files to a file is probably the fastest backup available by a significant margin. And while some users might not have a tape backup drive available to them, or don't want to purchase additional hardware simply for backing up data, this common form or backup is relatively inexpensive, reusable, and features moderate speed. Media spanning is available for all forms of backup available; this is particularily important for users backing up large volumes, or backing up onto small media.
After all settings are specified to the user's liking and "Start" is pressed, the backup process begins. Depending on what form of media was selected, or the level of compression enabled, the speed of backup will vary. Clearly backing up to a local hard drive is probably the fastest backup option available, followed by network drive backup, with other forms magnetic or optical backup following. (Note: The speed of backup will depend on the speed of the system the backup is being run from, as well as the maximum transmission rate to, or write speed of the backup media, in addition to the previously mentioned factors.) If a backup is run overnight, or scheduled to be run when no one attends the workstation, media spanning is not a logical choice.
A backup was run of approximately 7.1 GB of data. Much of this was already compressed (ex. mp3, jpg, zip), so high compression rates were not expected. Running with maximum compression (slowest backup, with most CPU usage), the resulting backup fit on 8.5, 800 MB CD-Rs (about 6.6 GB). Data verification was also completed successfully. One thing to keep in mind when running a backup involving media spanning is to carefully label and store all media, to avoid future confusion and problems.


(Note: Images shown are not from the 7.1 GB backup
discussed above, but a smaller backup to a local file.)
Restoring
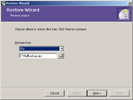
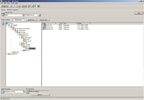
Again, as with backing up, there are two methods for restoring data—a wizard, and standard restore. The backup wizard can be run from the initial startup screen or from a button in the regular interface. The wizard brings the user through a step-by-step process where the restore source, file selection, and overwrite options can be selected. While the restore wizard is nice for a linear, step-by-step process, the standard restoration process is also quite simple. After inserting the media and selecting the appropriate backup source, the media's content is displayed. From here, a full, or partial restore can be preformed by utilizing check-boxes neighboring all files and folders. Single folders, folder trees, or single files can be restored by simply browsing the backup, and checking the desired items. One fairly impressive feature is the software's ability to retain and restore NTFS file permissions if desired. Through the configuration options available for restoring data, the files and folders can be restored to the following locations
- The original location, following the same directory structure
- A new location, different from where it was backed up, but following the same folder structure
- A new location, different from where it was backed up, but all files in a single folder
| Continue to page three | ||
| Back to page one |


