![]()
BIOS and Overclocking
MSI has elected to go with UEFI BIOS for this board; let’s see what changes that brings:
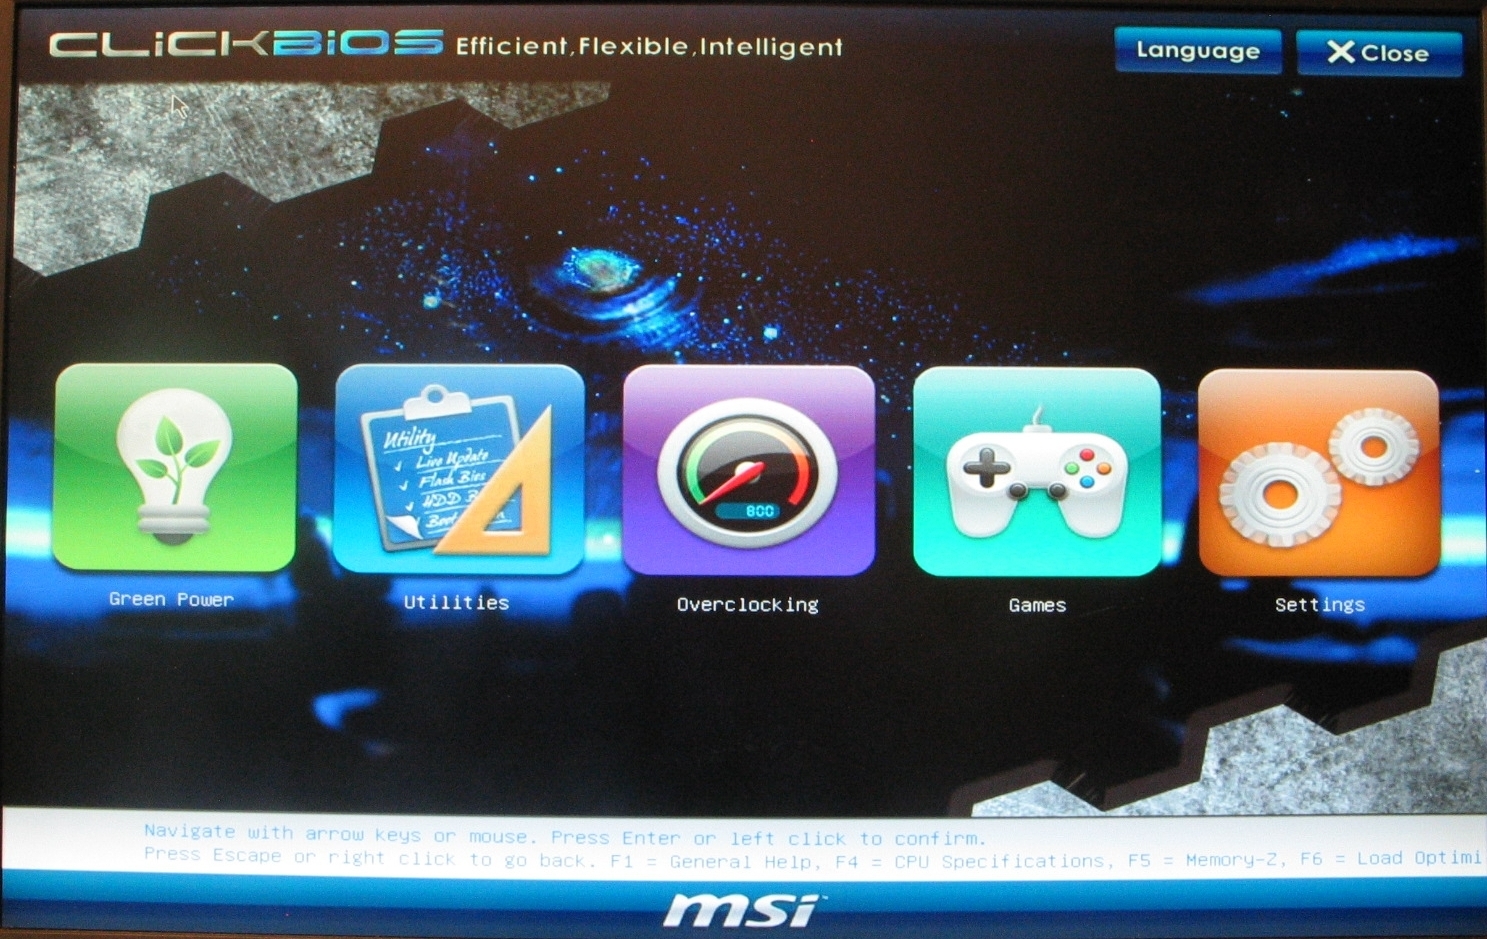
One of the first things you’ll notice upon entering the BIOS is how colorful and GUI-fied it is; this is to facilitate mouse navigation. The other oddity is the Games entry; MSI has packaged several simple games on the driver DVD, and they can be launched from the BIOS without even installing an OS. Cute, but ultimately a bit pointless, as anybody buying this board is going to be installing a full OS.
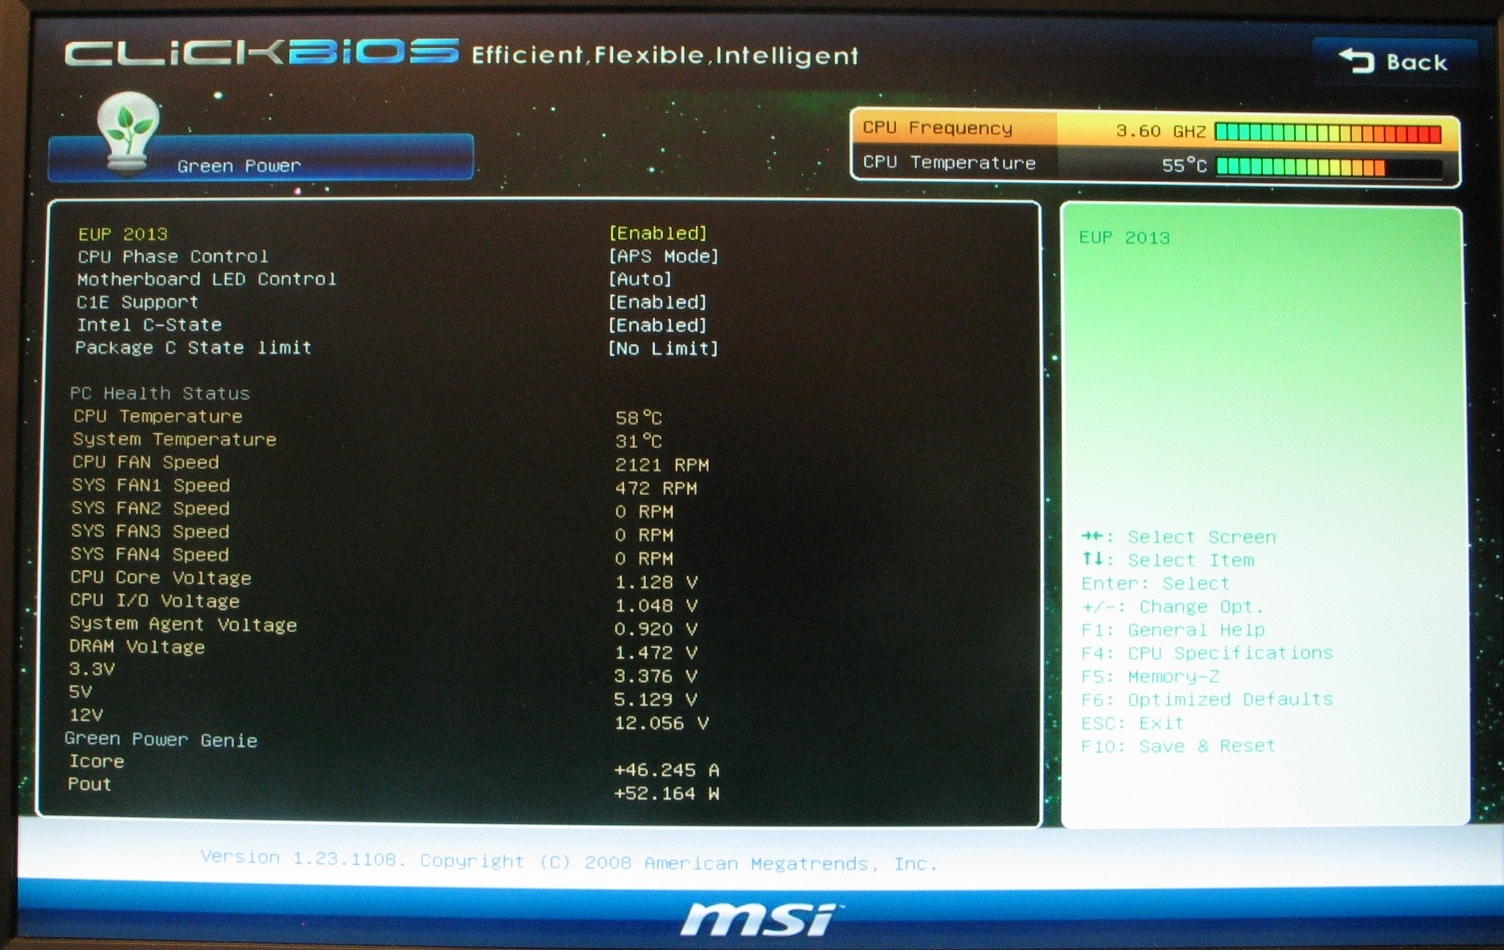
Selecting the Green Power option, we see a screen that provides options for the board and CPU power scaling features, as well as a quick overview of the important system stats like temperatures, fan speeds, and voltages. Most of these options are simple toggles, though the EUP 2013 option lets you toggle that and decide whether the BIOS powers the system on when AC power is restored. Note that turning the EUP 2013 option on will reduce the system’s power consumption to 0.5W when shut down, but Wake-on-LAN, scheduled booting and other such features will be disabled.
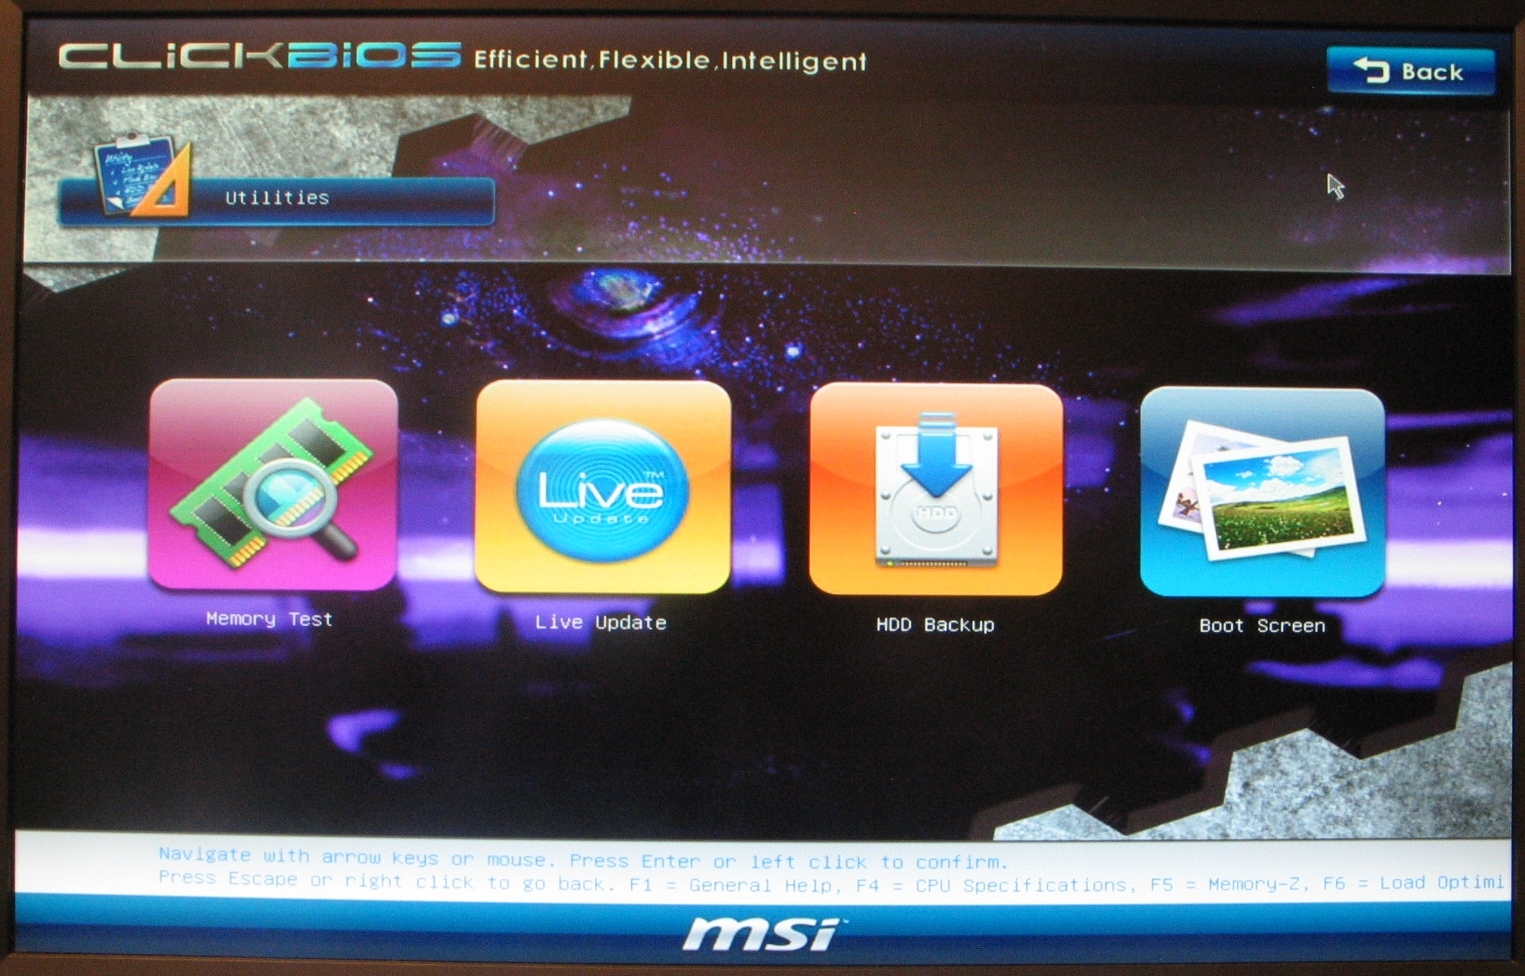
The Utilities option brings us to another candy-coated option screen, where you can access some basic tools like a memory tester, BIOS firmware updater, a simple backup utility, and a program for changing the boot splash screen image. Note that for all but the memory test, you’ll need to have a DVD drive connected with the MSI driver DVD inserted to access these tools.
 |
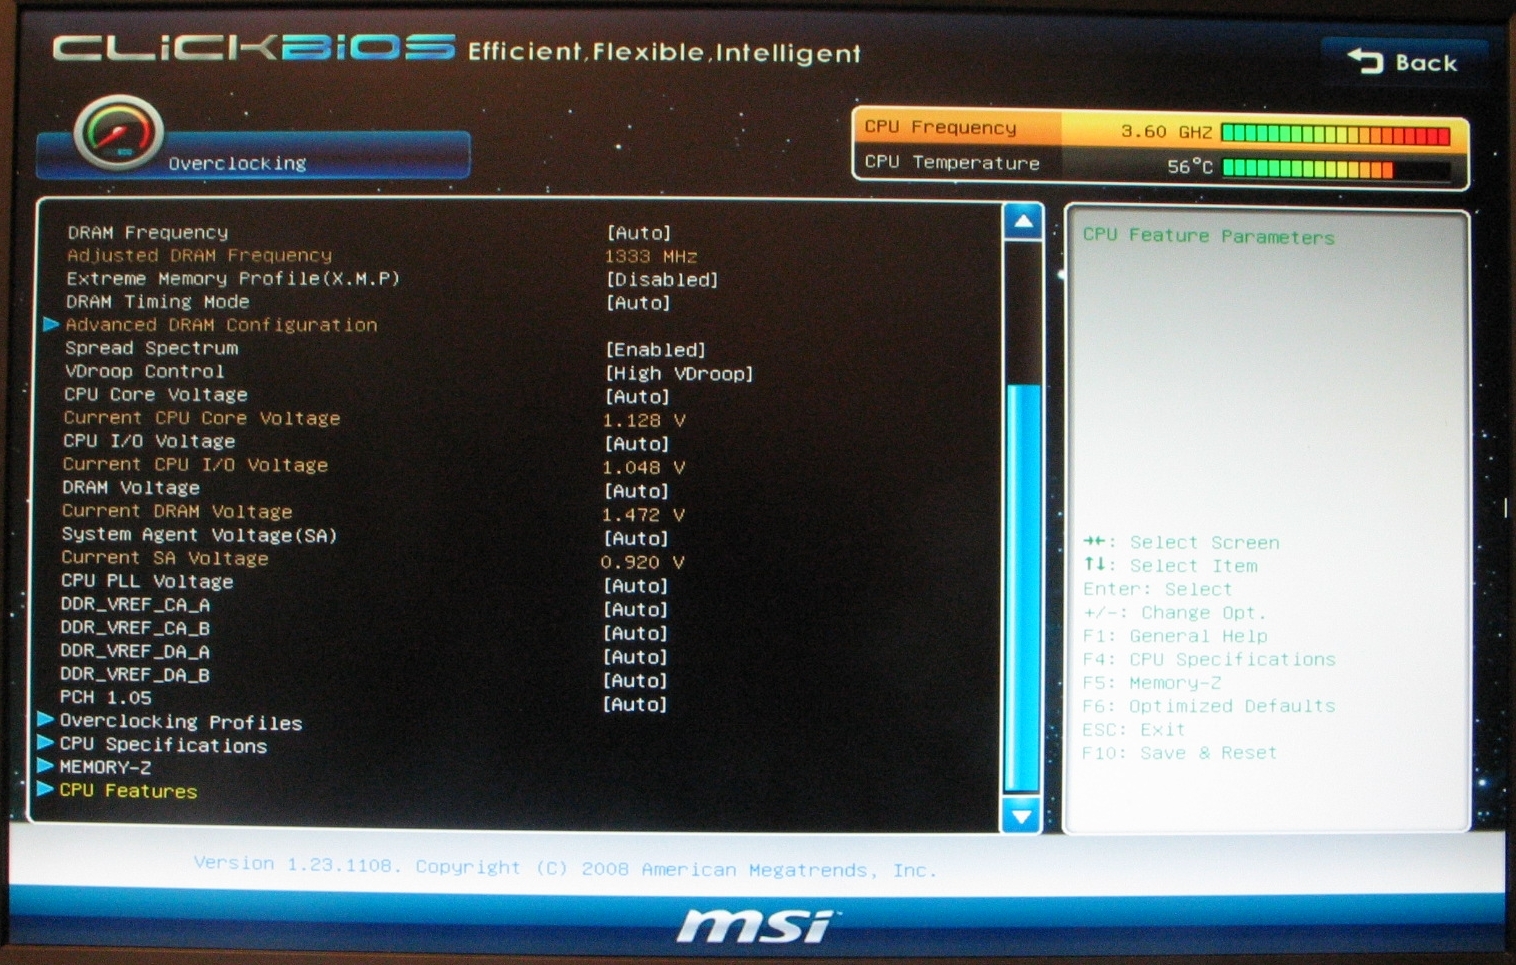 |
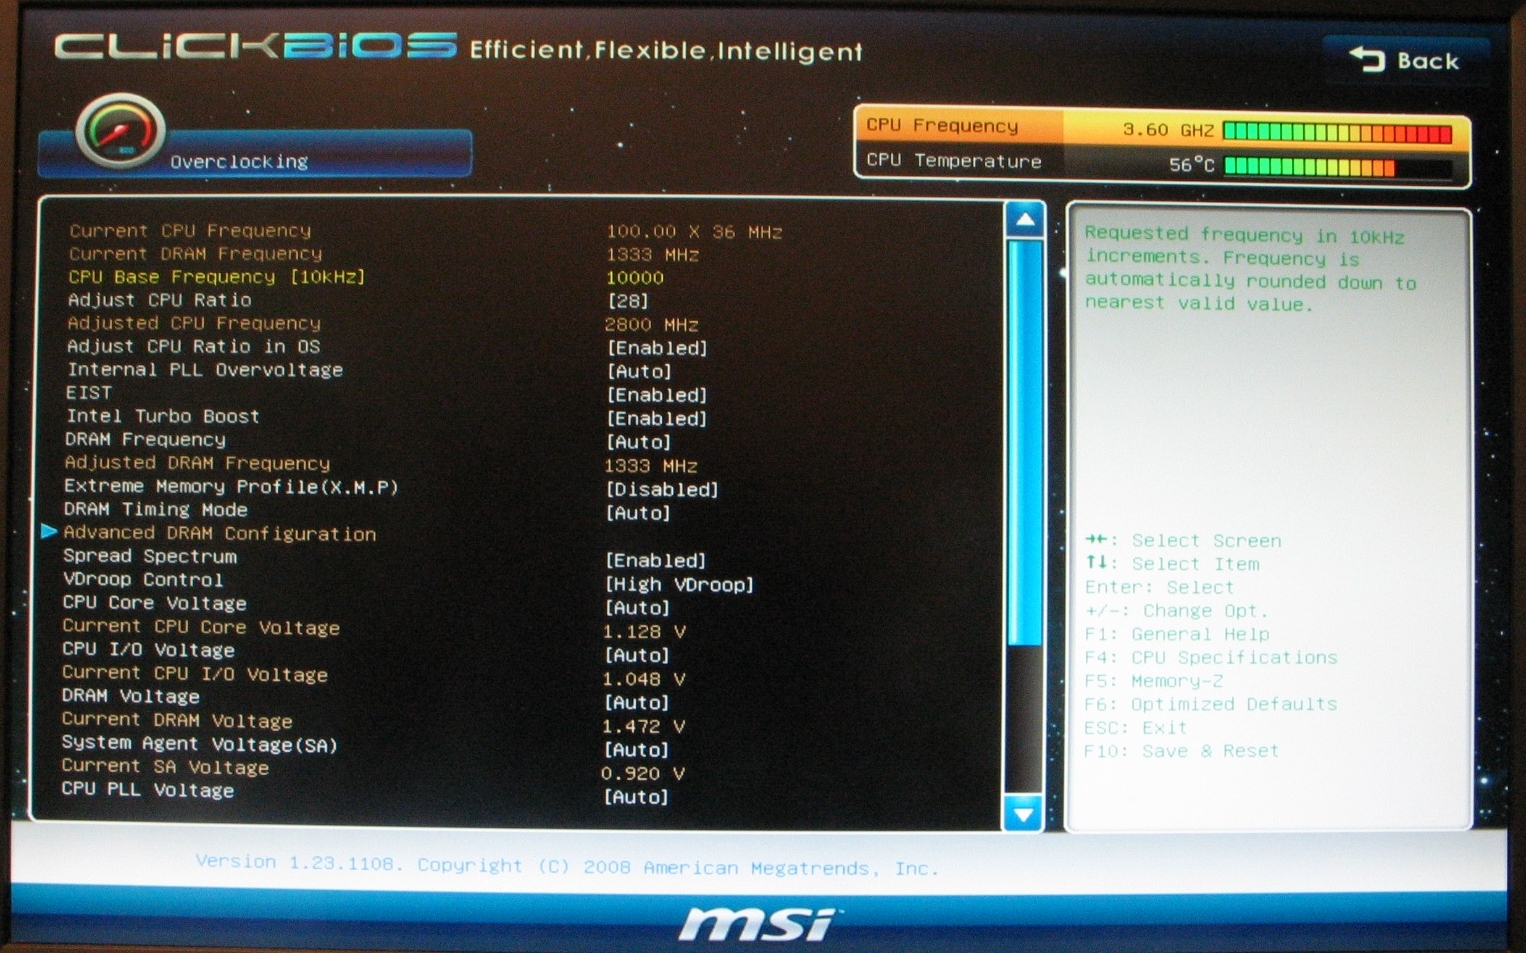
The Overclocking option gets us to all the adjustments you’re likely to need while overclocking, logically enough. CPU base clock and multiplier, DRAM timings, and just about every voltage you can think of are accessible and adjustable from here. There are also several sub-screens accessible from here, detailed below.
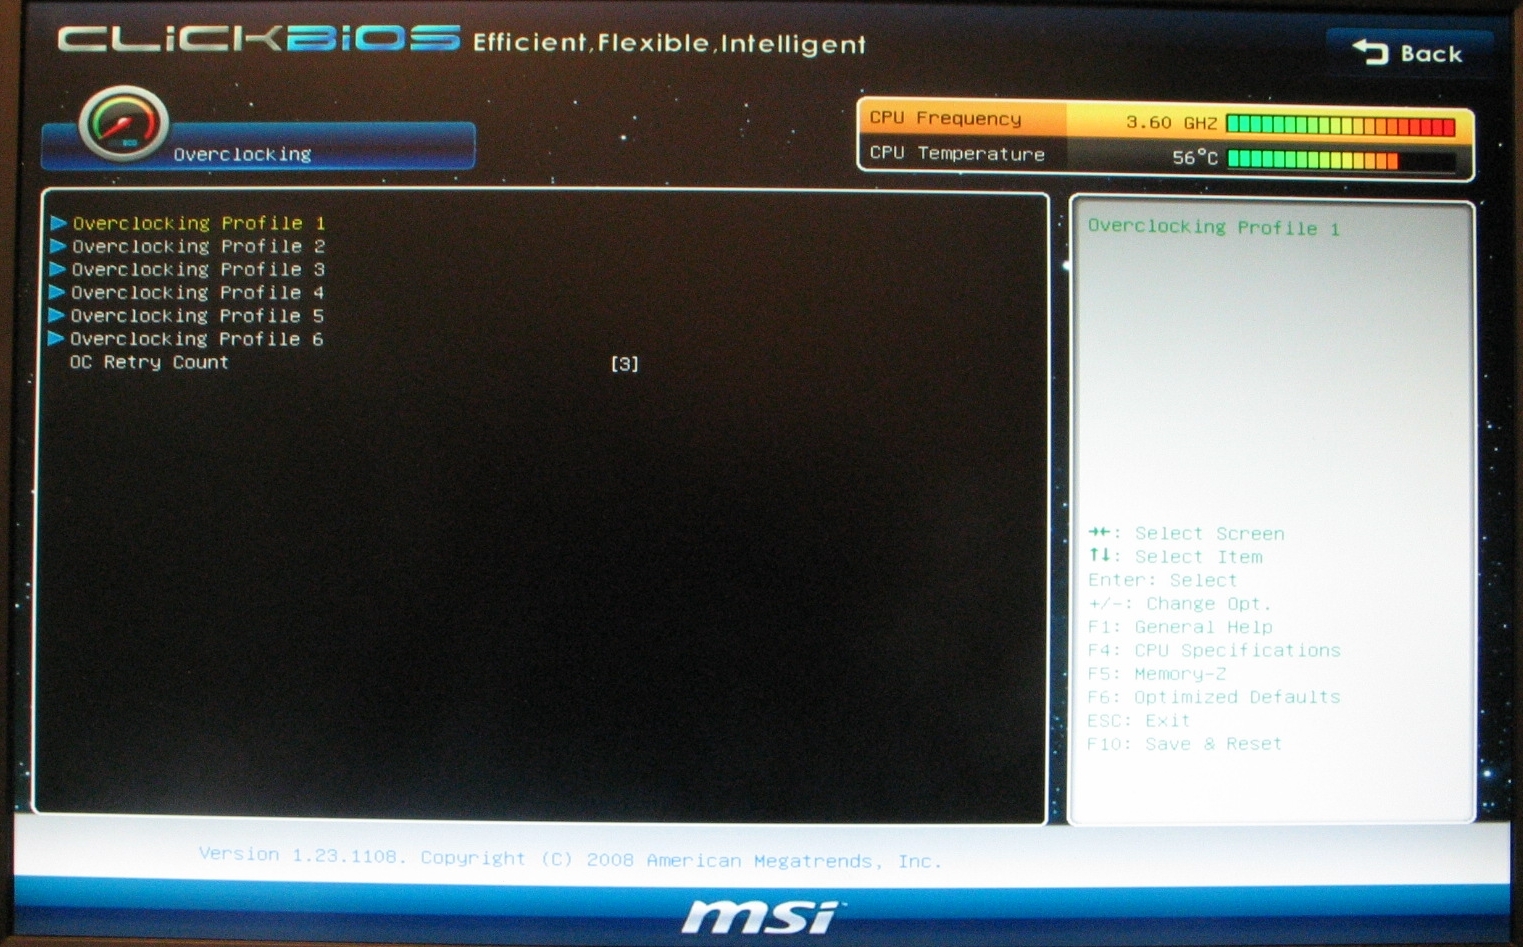
From here, you can store up to six settings profiles, which lets you store several known good overclock states. Here is also where you tell the board how many times you want it to try overclock settings on boot before reverting to safe defaults.
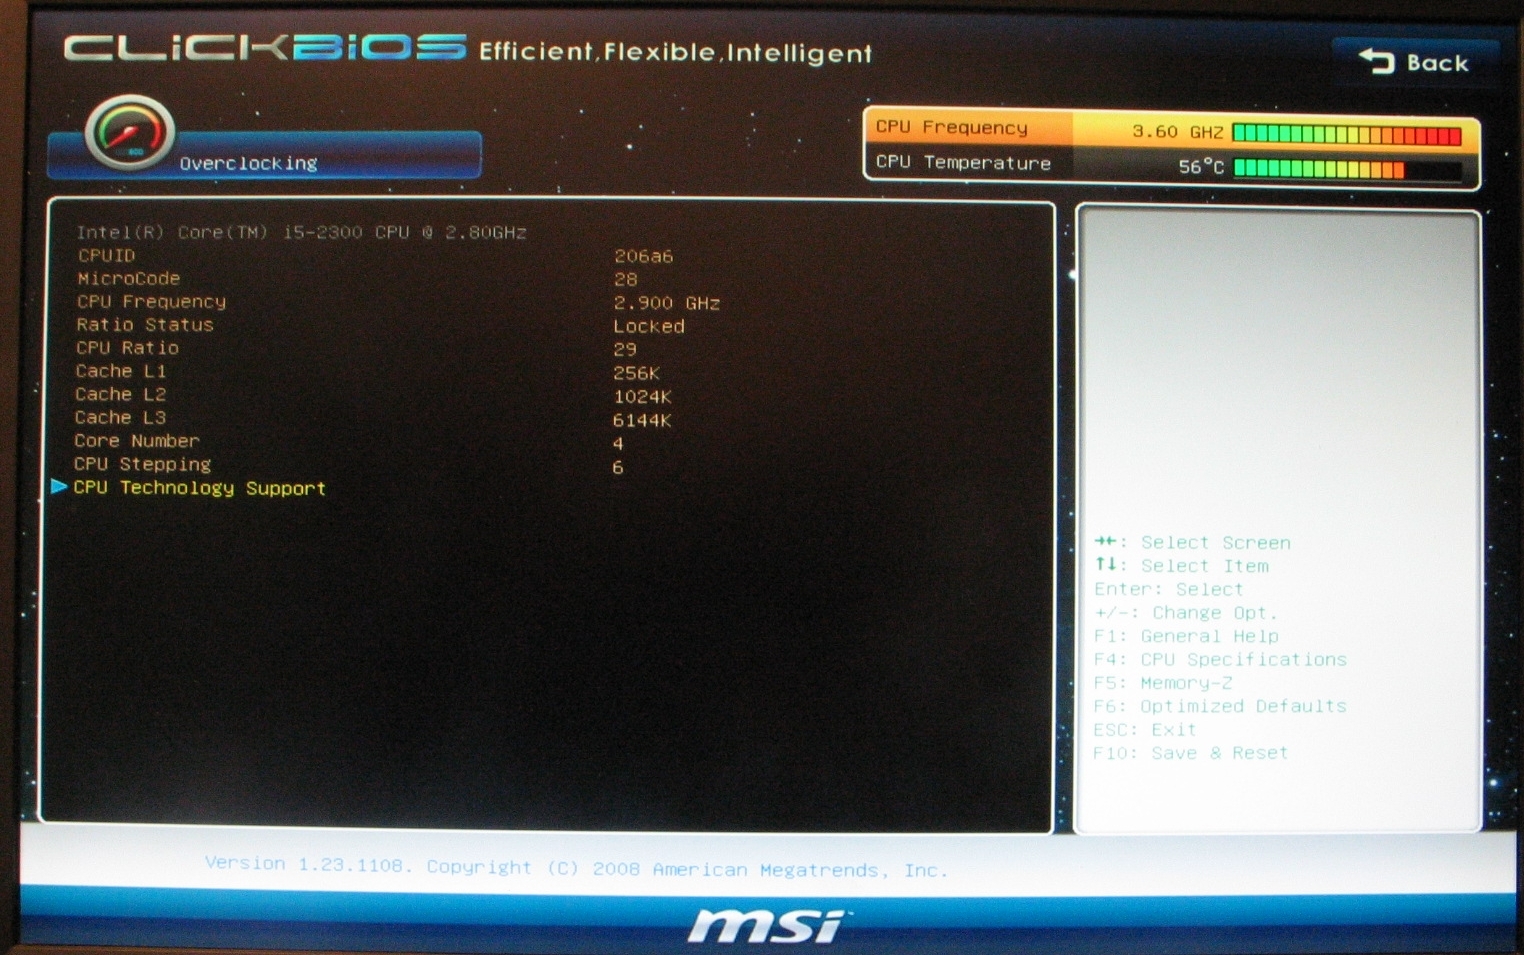
Here’s where you can get a quick look at details for the CPU you’ve installed, including whether the chip is multiplier-locked or not.

Another purely informational page, this one gives you the details about your installed memory modules, including any supported overclock profiles.
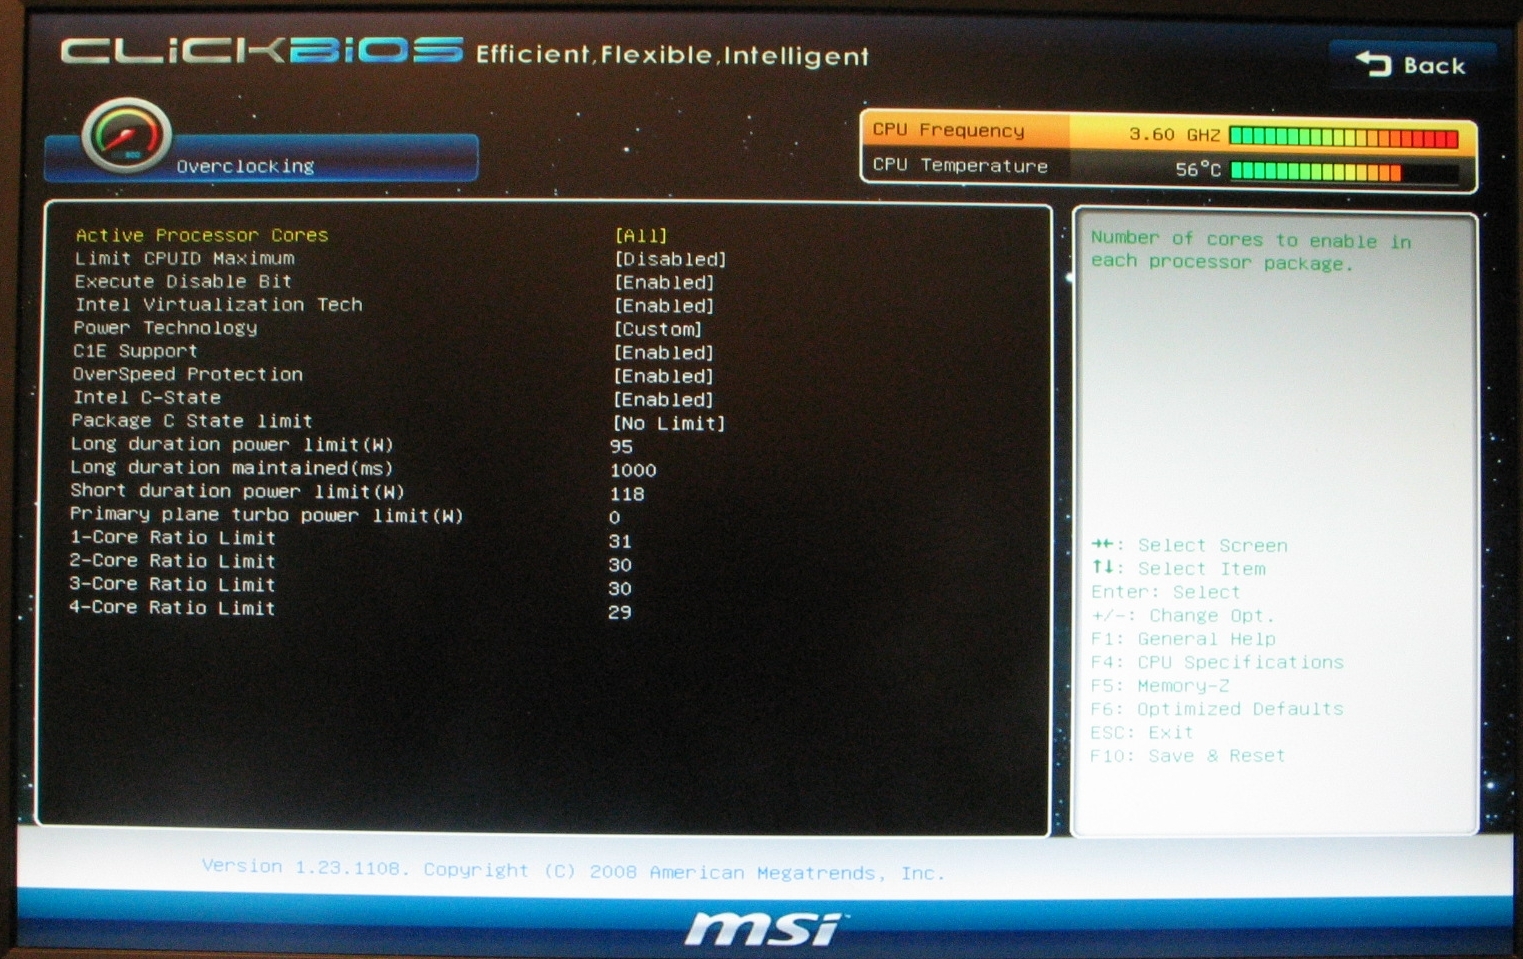
Here’s where you can twiddle the bits for features like the NX bit, VT support, C1E power states, and per-core ratio limits.
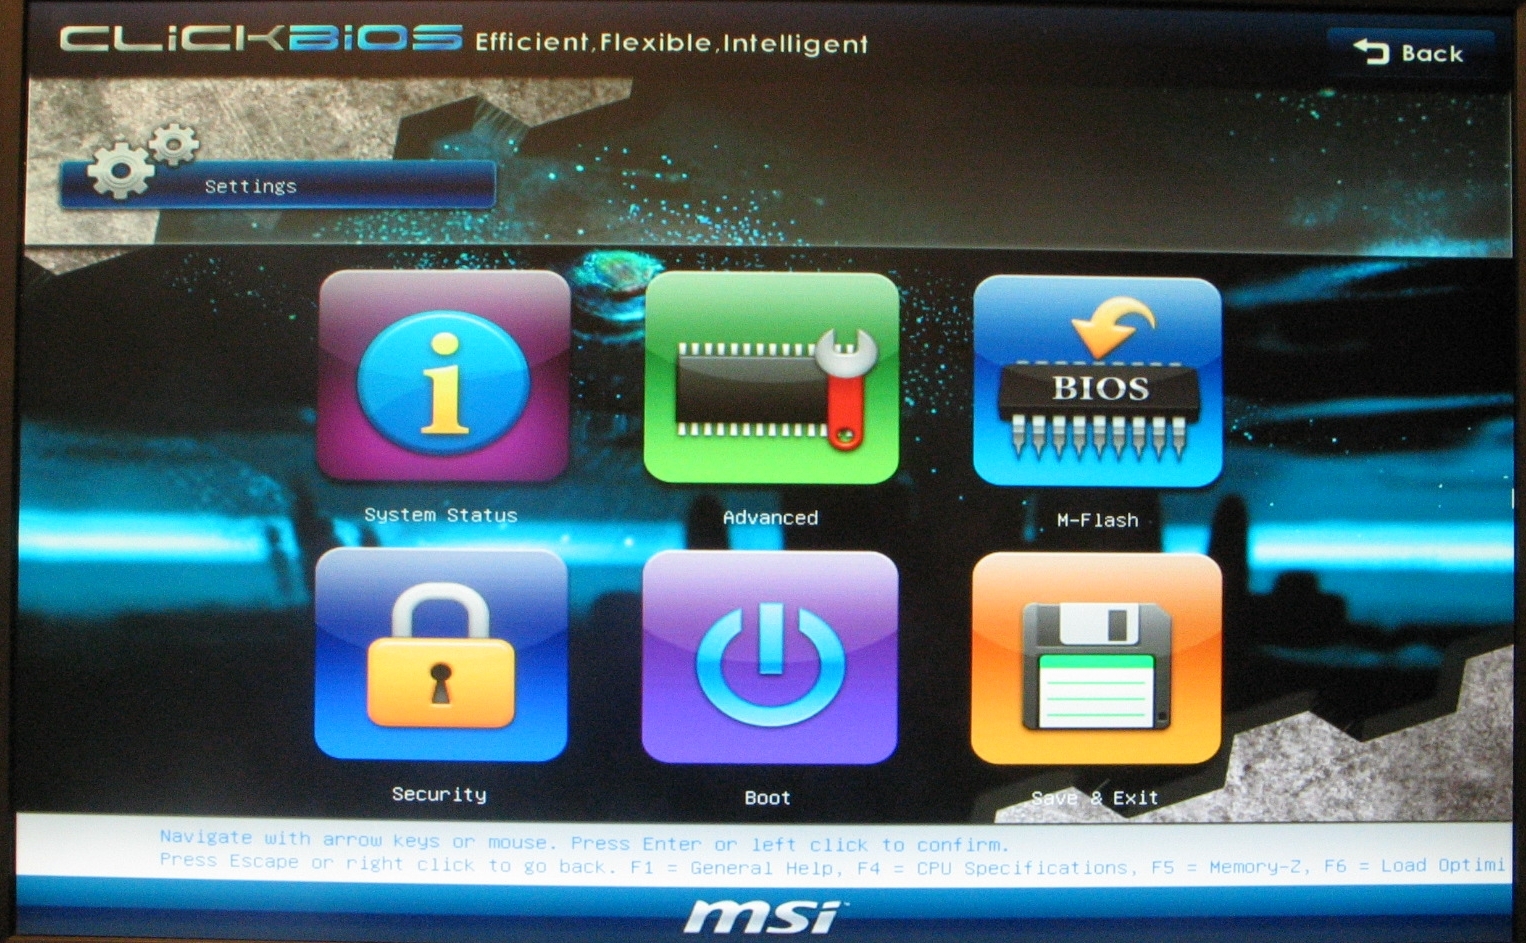
Skipping over the games button, a click on the last button on the main screen brings us to this one. Not much to say here, so let’s move on to the sub-menus.
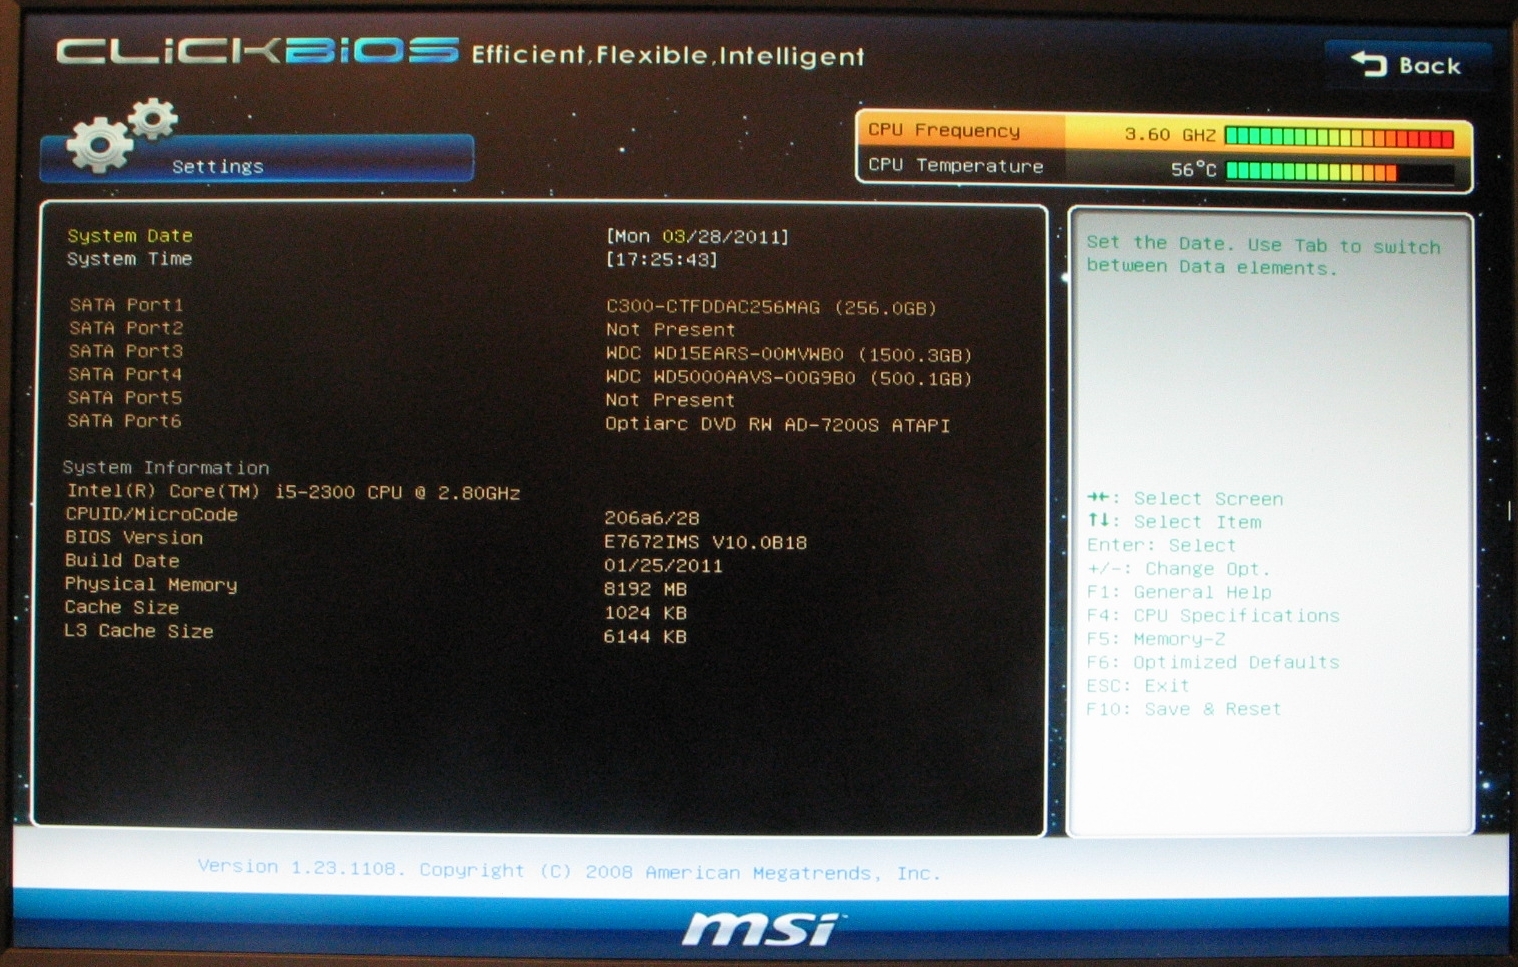
This screen gives us yet another overview of installed components, this time giving us a rundown of installed SATA drives as well as some basic CPU info. If you need to adjust the system clock, here’s where you do that as well.
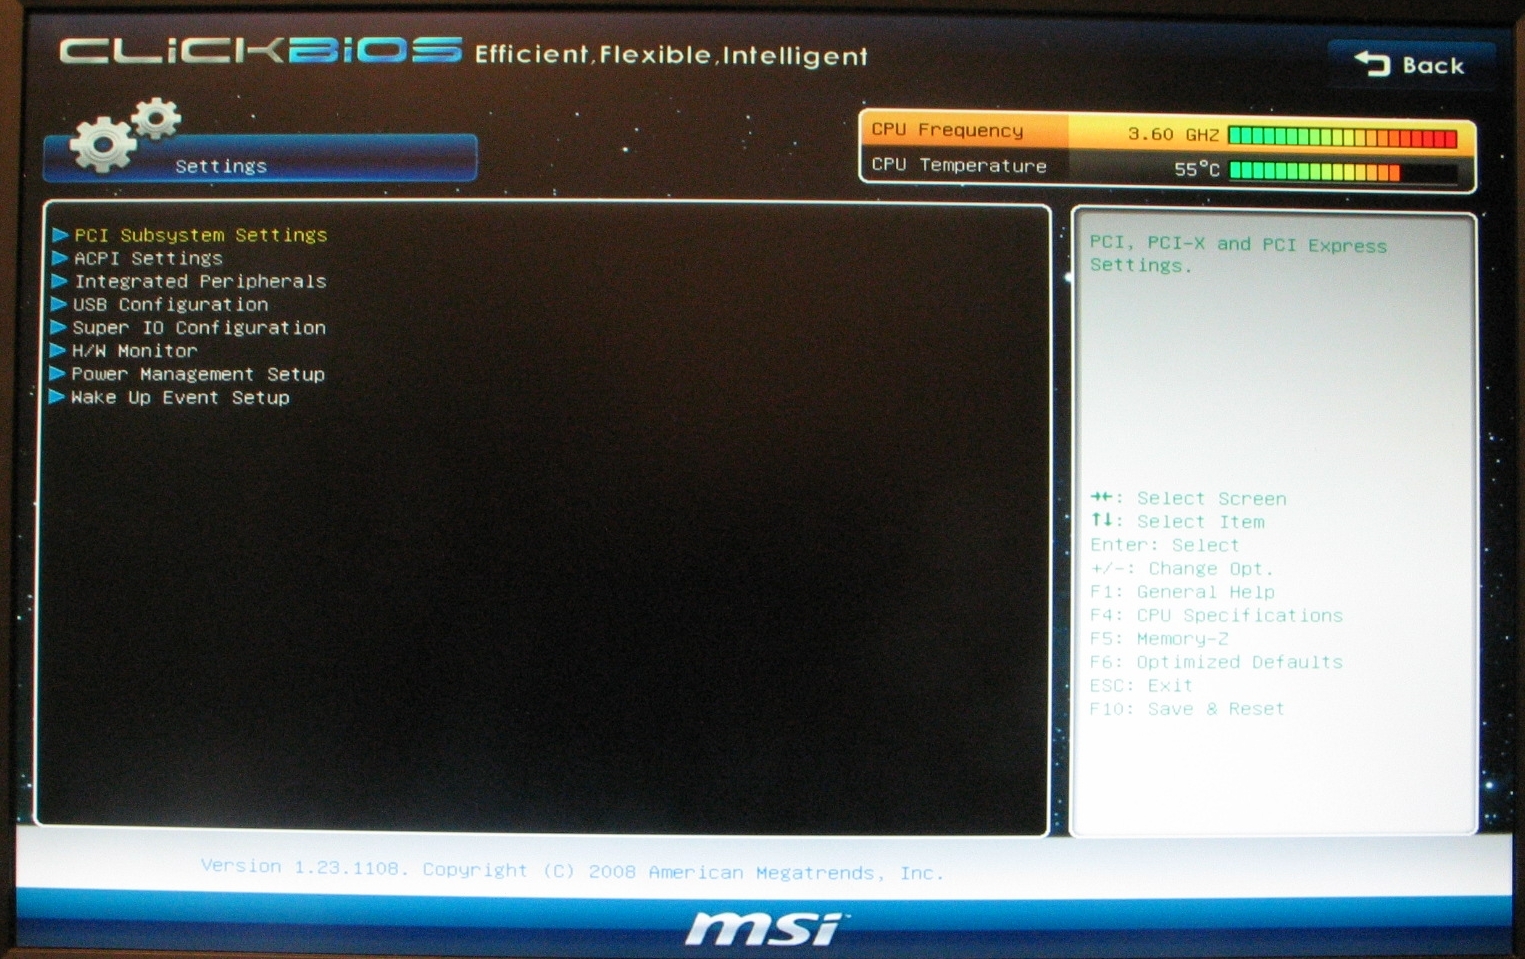
Yet another menu of menus here; let’s dive in.
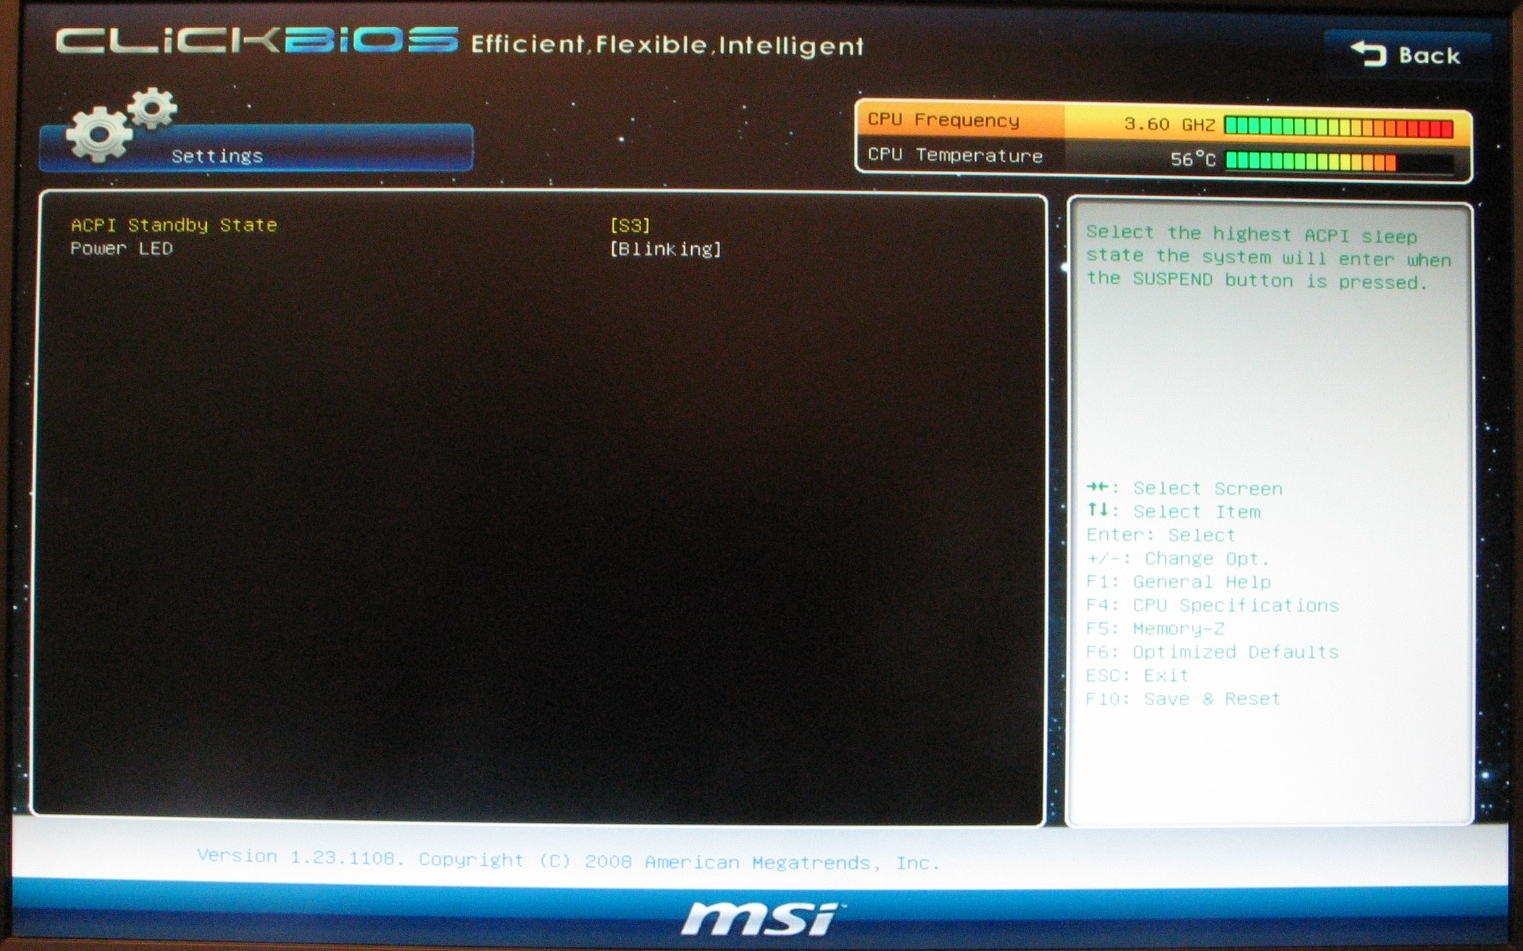
Here you choose how deeply your PC sleeps when you tell it to, as well as what the power LED should be doing when it’s asleep.
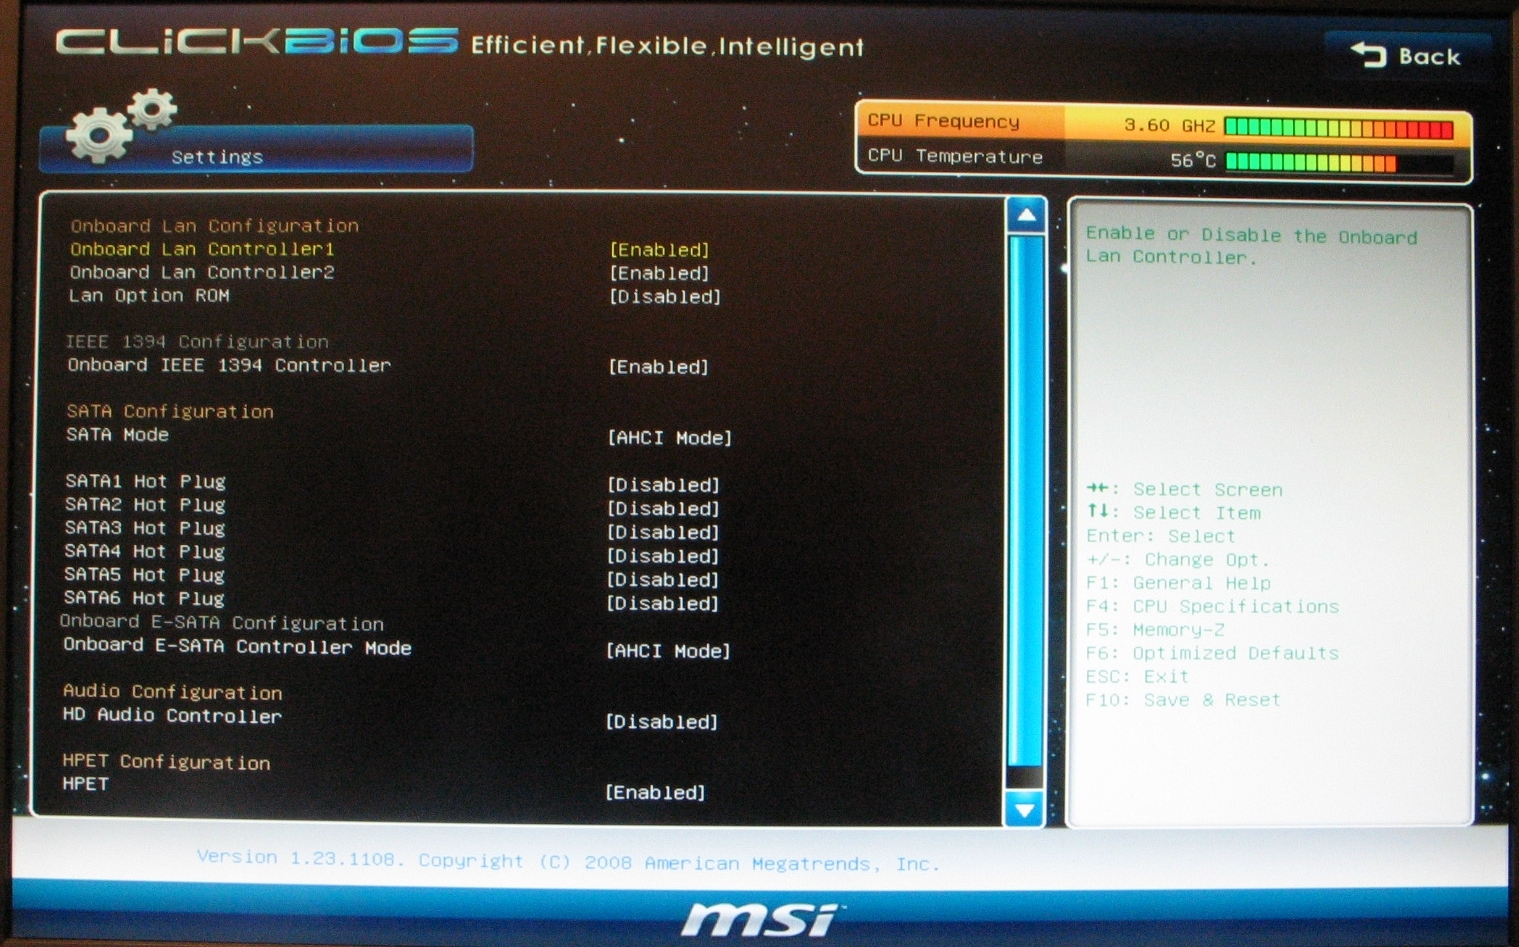
Here’s where you can adjust settings for the various I/O peripherals on the board. Each of the two GigE Ethernet controllers can be flipped on or off independently, though toggling WoL and LAN boot is done globally. Of particular interest here are the options for the SATA controllers.
Each of the six internal SATA ports can be set to hot-plug mode, which allows you to dismount and remove drives from a running system. Obviously, enabling this on the drive that contains your OS partition is a Bad Idea. If you want fancy features like hot-plugging and native command queuing, you’ll want to set the SATA mode to AHCI. If you plan on building a RAID array, set it to RAID mode. IDE mode is available for compatibility’s sake, but should be regarded as a fallback.
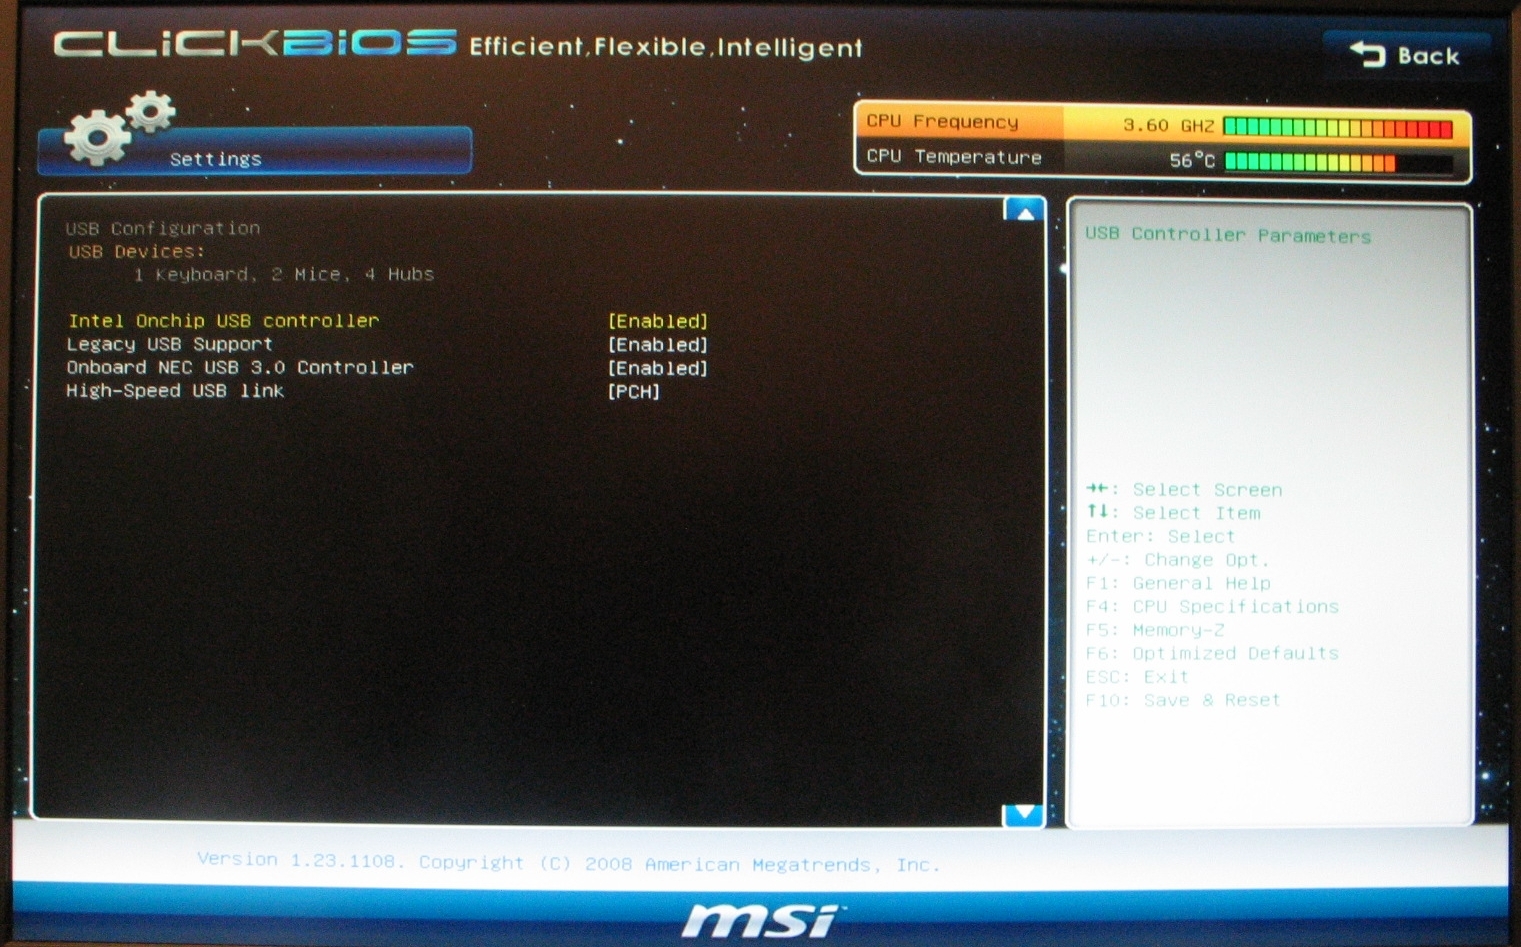
Here’s where you can flip on and off both the Intel and NEC USB controllers. Unless you’re doing something strange, you shouldn’t need to touch this.
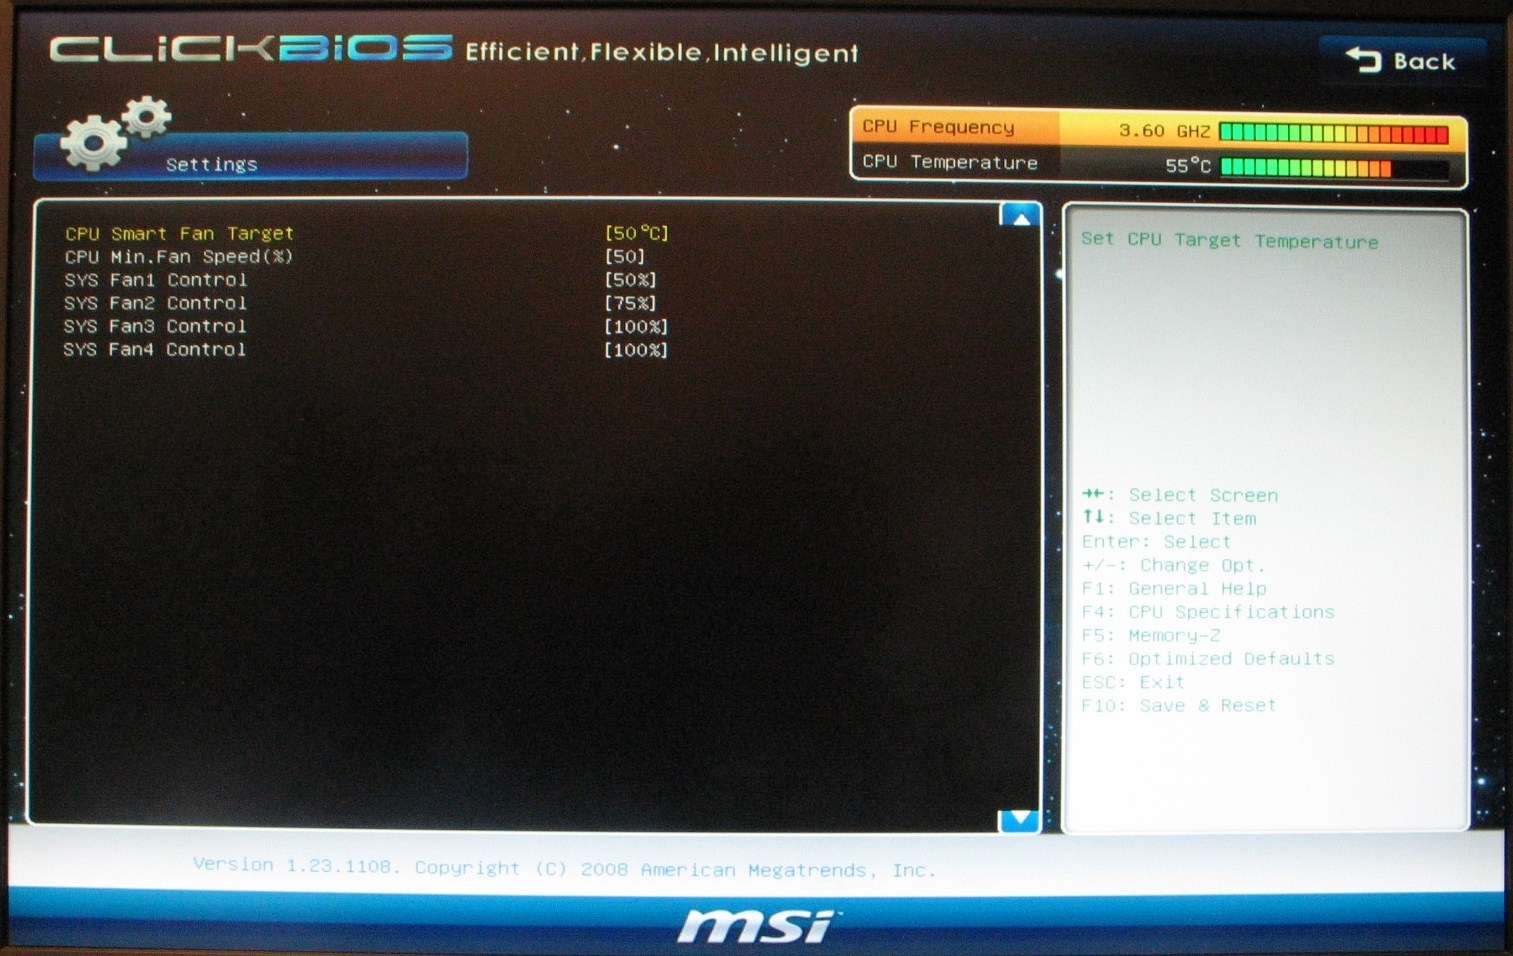
Here’s where you set speed scaling for the CPU and system fans, as well as a target temperature for the CPU. The control isn’t terribly fine-grained, but it does cover all of the board’s fan headers, which will probably be enough for most.
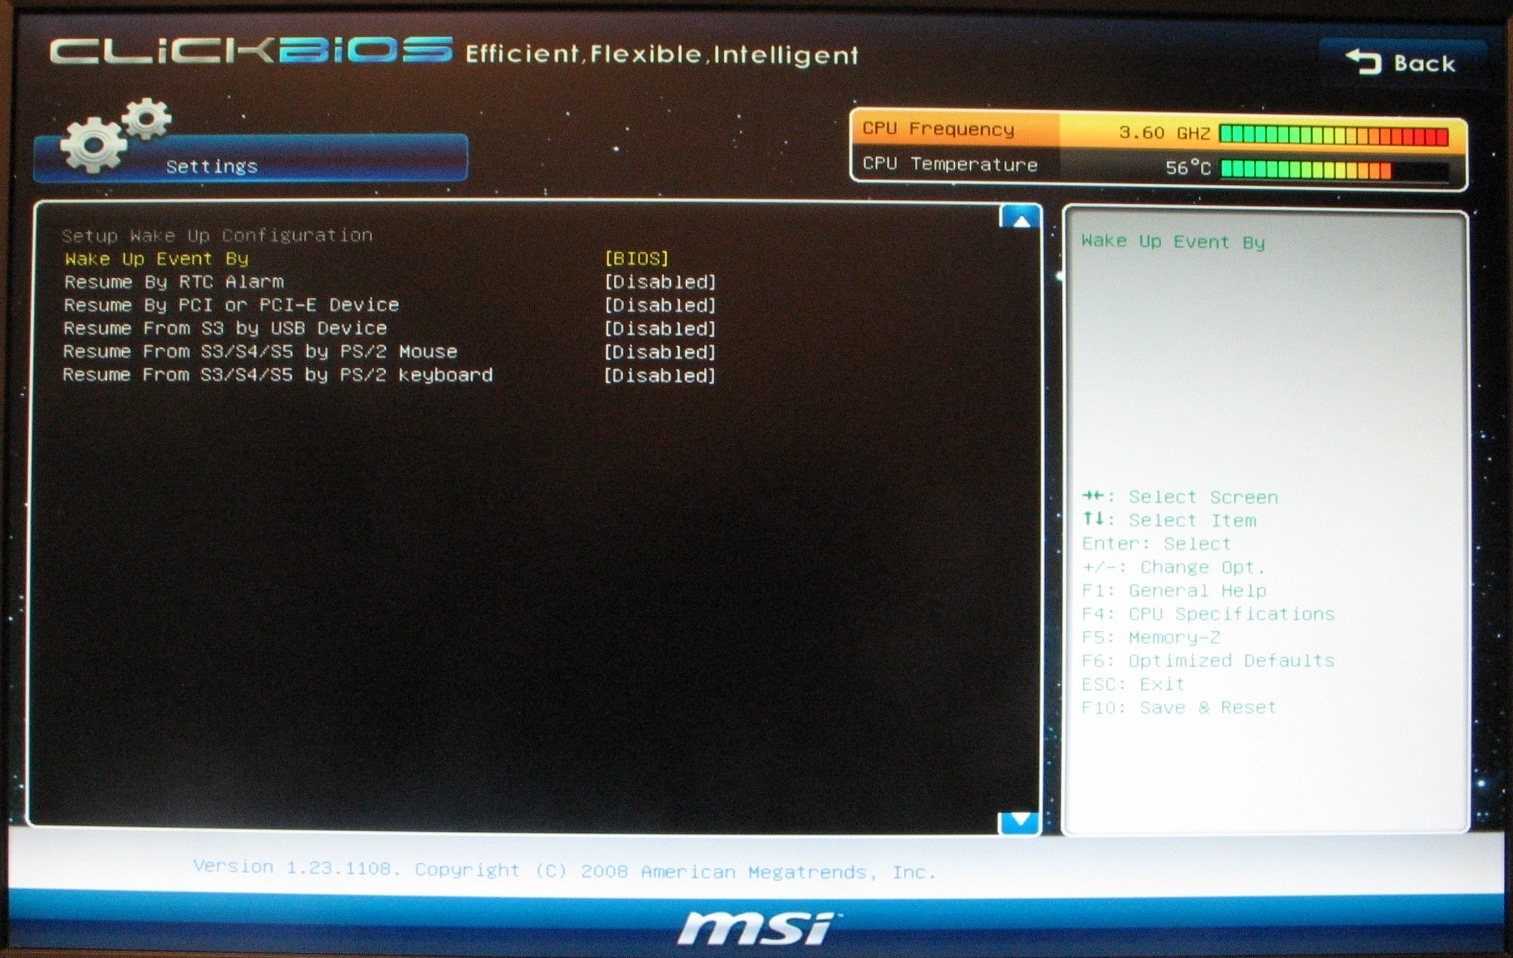
If you need your system to turn itself on when prompted by something other than the power button, here’s where you set that up. It can be set to boot on a schedule, or when prompted by a wake-up signal from a PCI card, a USB device, or a PS/2 mouse or keyboard.
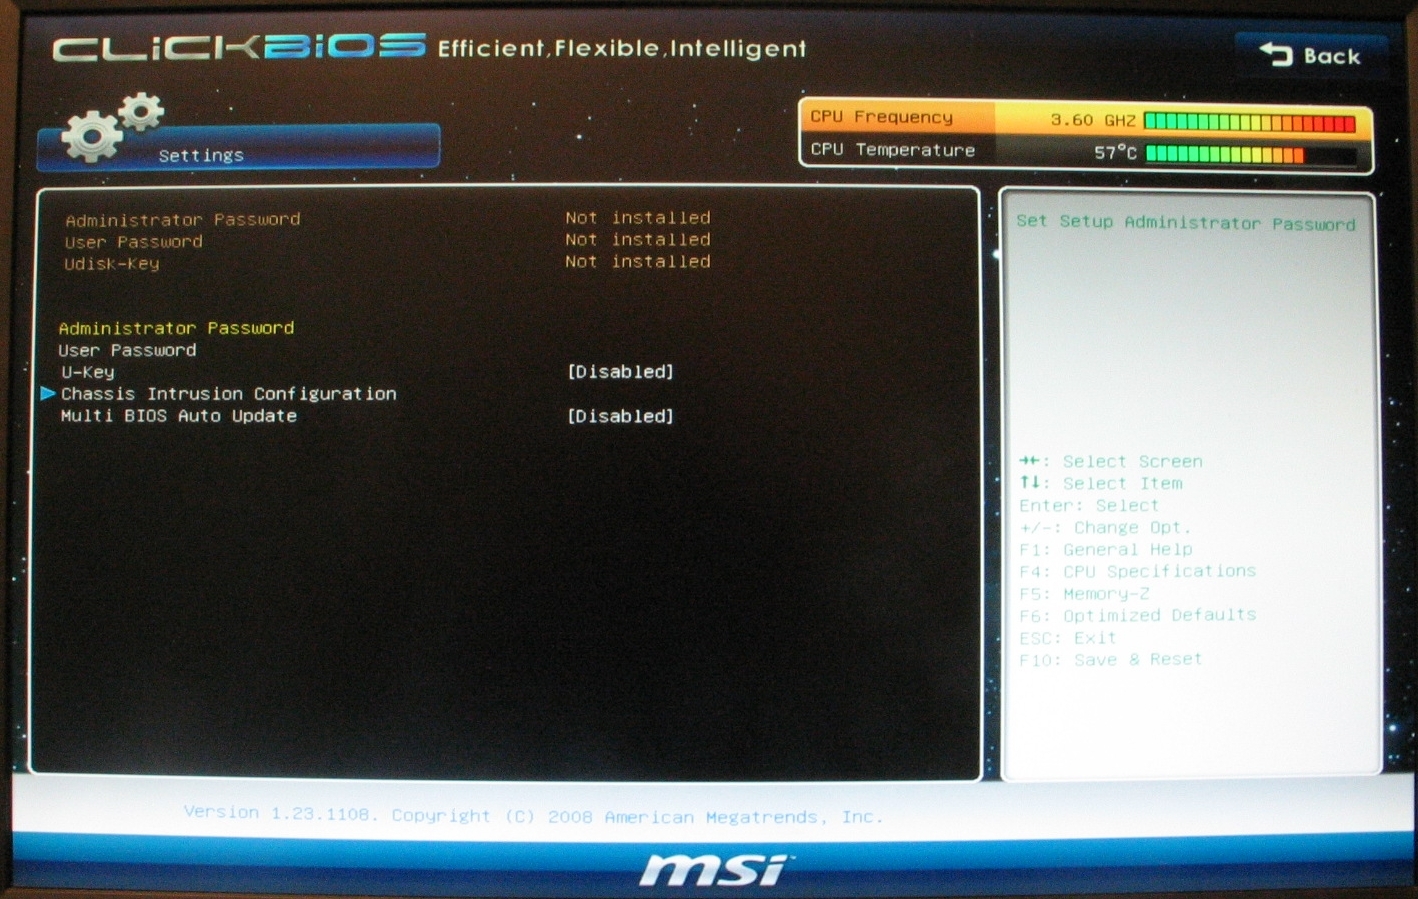
From the Settings menu, the Security option brings us here, where you can set not only user and admin passwords, but also any chassis intrusion detection features your case might provide. This board also supports using a USB flash drive as a key of sorts, to prevent unauthorized booting of the machine. That said, anybody with access to your machine can just reach back and hit the clear CMOS button to bypass this, but it’s nice for locking down a machine in a physically secured environment. You can also choose here whether you want the board’s backup BIOS to be flashable or not.
 |
 |
||
 |
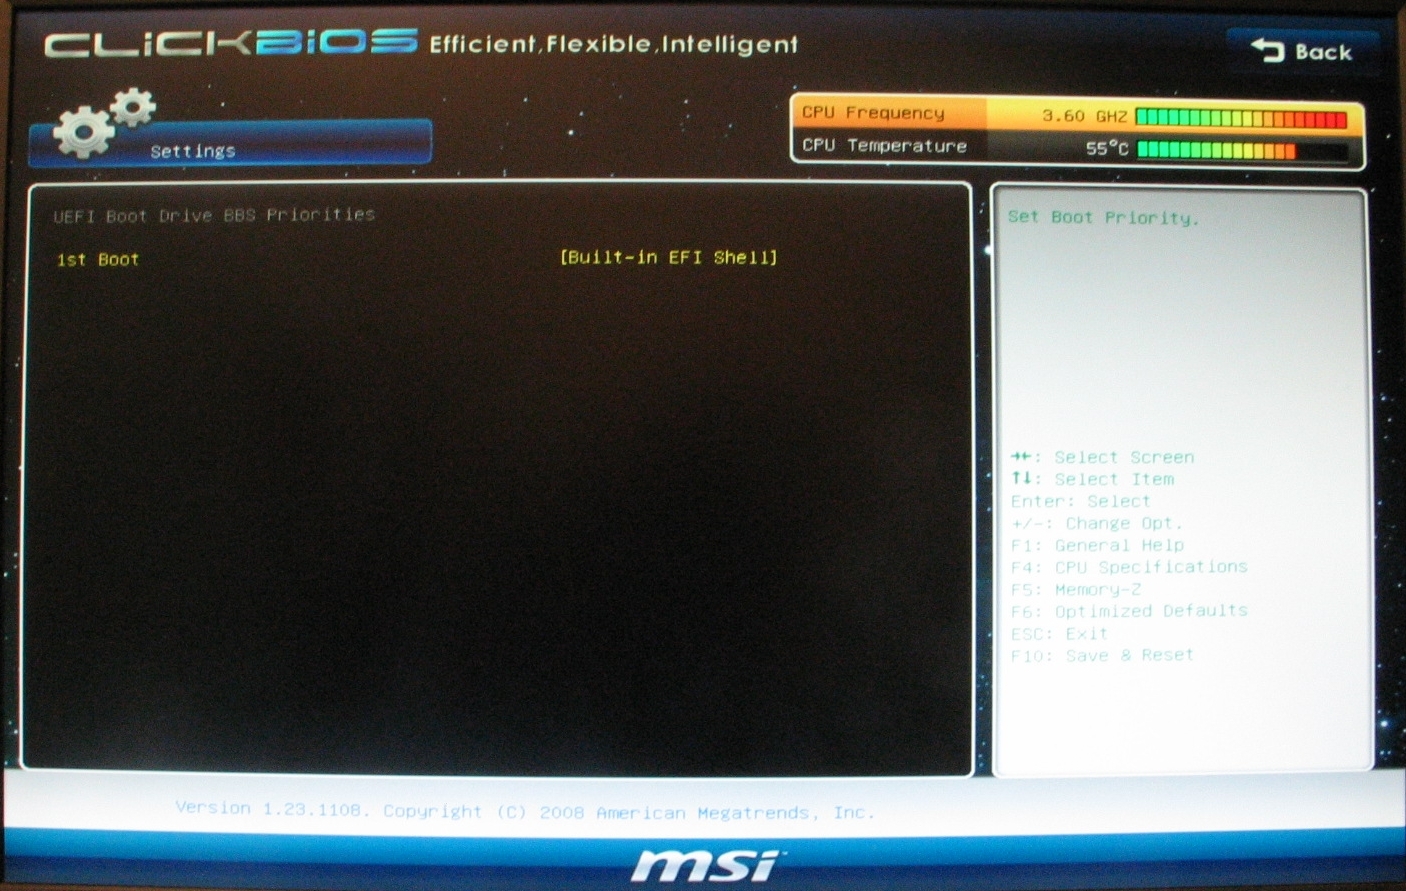 |
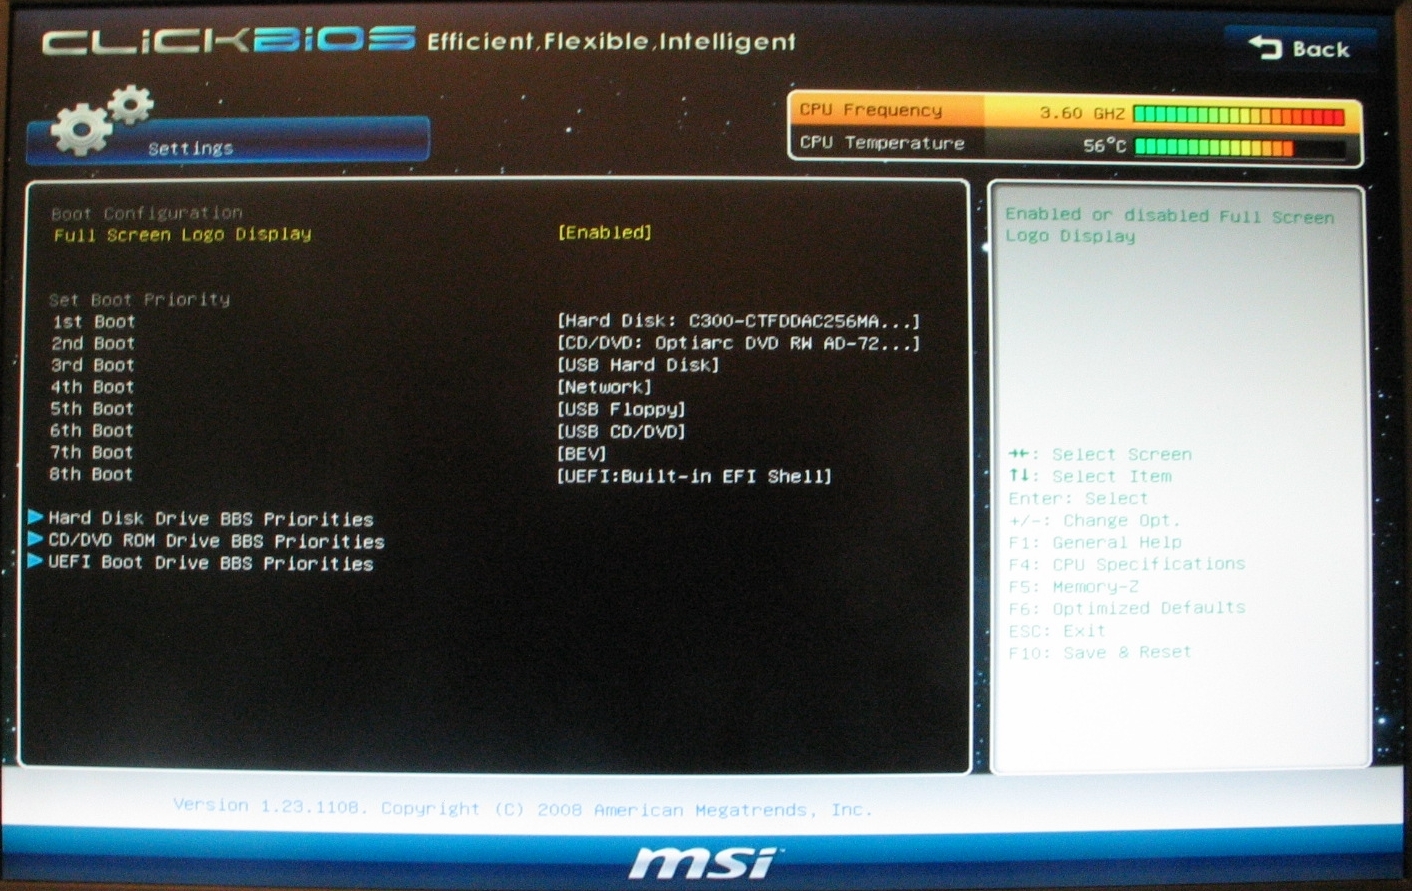
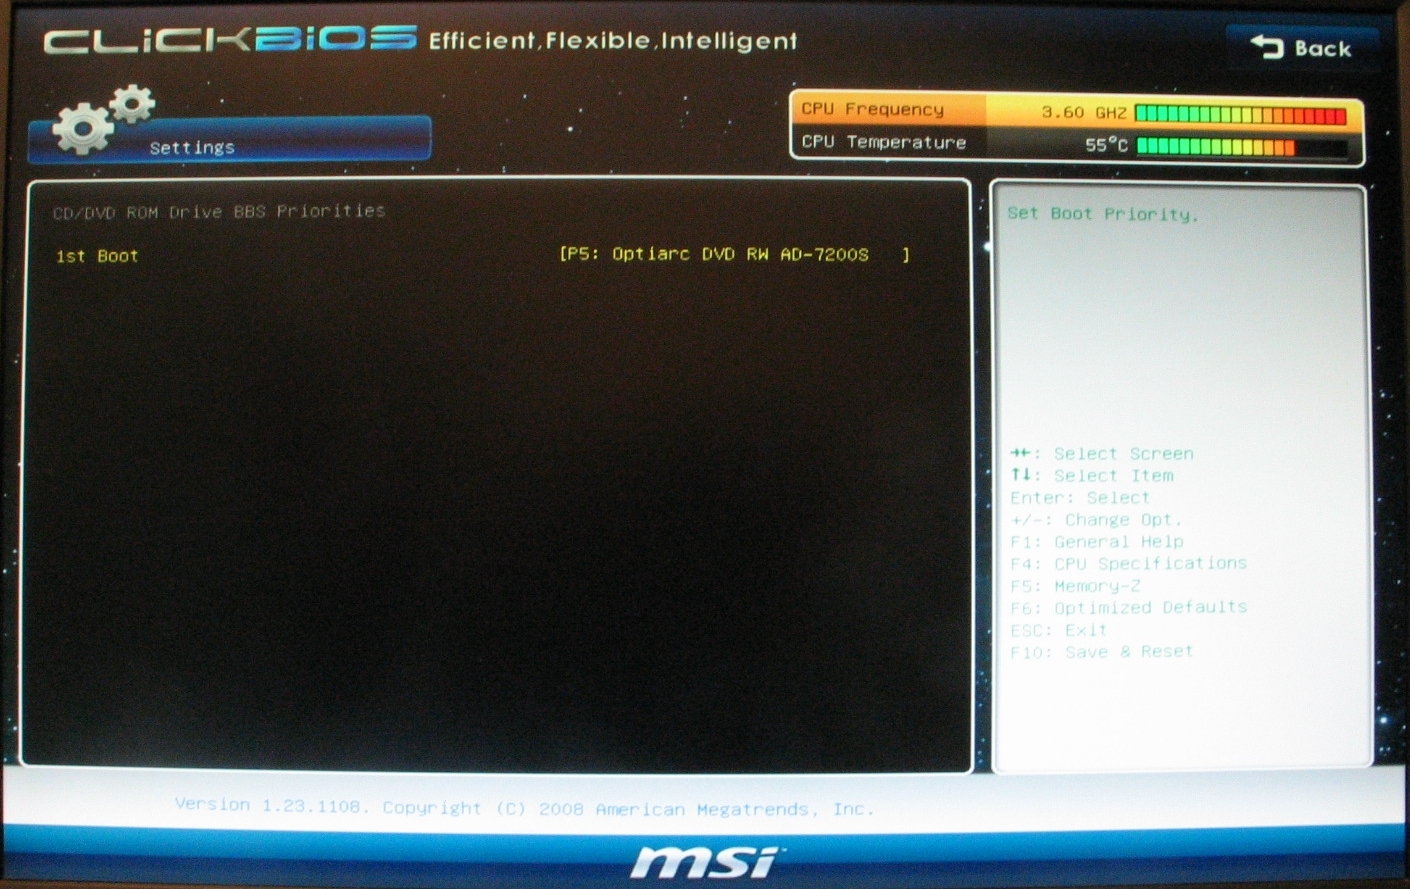
Again from the Settings menu, the Boot option brings us here. If you don’t like having that splash screen pop up in place of the POST messages, you can disable it here. Setting boot priority is a multi-pronged affair: you choose which type of device you want to boot from first, second, third, &c. here, and then order each category of devices in the appropriate sub-menu.

[…] MSI P67A-GD80 Motherboard @ TechwareLabs […]
[…] TechwareLabs Evocarlos @ MSI forums *expect to see more reviews in the coming […]
[…] MotherboardsMSI P67A-GD80 @ TechwareLabs […]
[…] MSI P67A-GD80 Motherboard | TechwareLabs […]
[…] MotherboardsMSI P67A-GD80 @ TechwareLabs […]
[…] MSI P67A-GD80 Motherboard @ Techwarelabs […]
[…] by storm. MSI's swinging for the bleachers here, let's see if they hit a Grand Slam or a foul ball.http://www.techwarelabs.com/msi-p67a-gd80-motherboard/DiggLeave a Reply Click here to cancel reply. Name (required) Mail (will not be published) […]
[…] P67A-GD80 Motherboard – TechwareLabs […]