

|


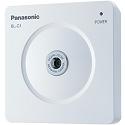
Panasonic BL-C1A Network Camera
 |
The BL-C1A is not a complicated camera by any definition. The camera came with a power source, a stand which can be mounted horizontal or vertical surfaces with two small screws and the camera itself. The setup is plugging in the power and a RJ45 network cable. That is it for the physical side of the setup. Of course the running of a power source and a network cable to the location may be the challenge, but the rest of the setup will not be any harder than the plugging in of power and the RJ45 network cable. The BL-C1A comes with a CD containing documentation and the setup program which was very easy to follow and use. We assigned a static IP address to our camera in about 5 minutes.
 |
 |
Brief photos of the setup of the camera setup progam.
Once the camera had a static IP address, we opened an internet browser and navigated the menus to see the features BL-C1A has. The Web page interface was pretty basic as far as features. The Single menu gave us the ability to adjust the camera viewing from 640 X 480 to 320X240 resolutions. The higher the resolution, the slower the refresh was, but at 640X480 the quality of the image didn't diminish. The user is also able to adjust brightness of the image being view by clicking on the + and - buttons on the home page. Along with the brightness buttons, the webpage menu provided us with the option to adjust the refresh of the images to when motion is detected or every 3, 5, 10, 30, 60 seconds. Finally the last setting is the image quality from "favor Clarity," to "Standard," to "Favor Motion." This is simply adjusting the frame rate refresh. The camera was actually impressive once the lights in the room were shut off. The camera was able to adjust to the low amount of light that was left in the room.

Click on photo for larger view.
The other menu buttons such as Multi give you the ability to look at multiple cameras at once. This since TWL only had on BL-C1A we couldn’t go into depth on these options. The heart of maintaining the camera is done through the Setup and Maintenance menus. Shown below.
 |
 |
Click on photos for larger view
The camera is designed for the average home user to follow some simple menu driven options to set the camera up to be accessed from the internet. It took TWL about 20 minutes to follow these instructions and post our camera on the internet and access it from a mobile phone with internet access.