Testing:
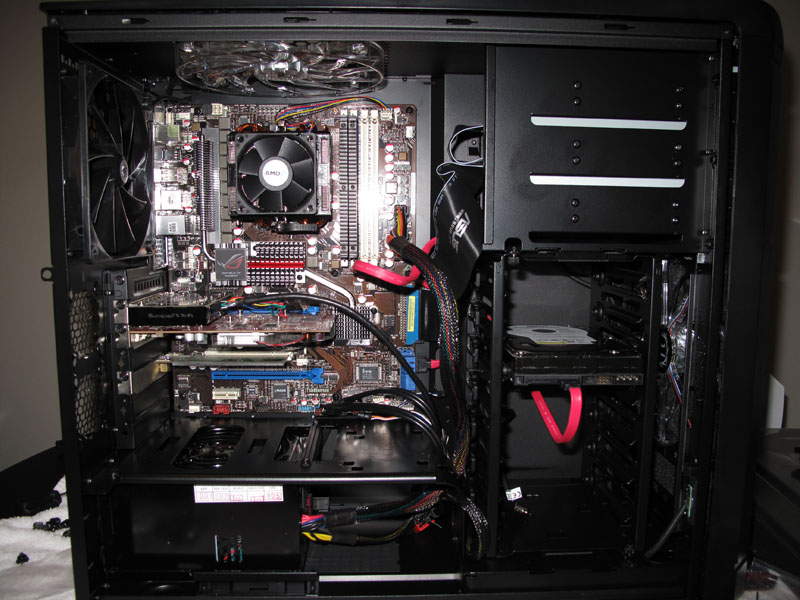
Installing my rig into this case was a mixed experience. At times I was happily surprised at how easy something was, and at other times I was frustrated at how difficult something simple was. Mounting the motherboard was simple and straightforward, with no issues or dangerous edges. Installing the power supply was a little strange, because it was a pretty tight fit, especially with the included support tray. This was a bit of a surprise, especially since the PSU I am using is the Thermaltake TR2 RX 850W. Personally, I think it is better to have a fairly tight fit than to have the PSU be loose.
 |
 |
Next I chose to install my optical drives and my hard drive. I was pleasantly surprised when I went to remove the front panel, finding a convenient release handle at the bottom of the front panel. This was then followed up by disappointment when I found that there were metal inserts for each of the 5.25″ bays which I had to remove. Personally, I don’t think that these metal pieces are necessary, especially if they are accompanied a plastic piece on the front panel as well. I ran into yet another speed bump when installing the optical drives. Installing the screws was harder than I expected. The screw holes needed to be lined up absolutely perfectly, and the screw perfectly level in order to work. It was nothing too terrible, but still quite frustrating.
 |
 |
At first glance, the HDD bays look like they are quick release, and all you have to do is slide in the drive. This is fairly accurate, but not entirely. The case comes with some screws that you can hand screw into the drive. These screws then sit on a rail, which connects to the quick release. The only tricky thing here is that one rail is shorter than the other, so you need to make sure you line up the screws correctly.
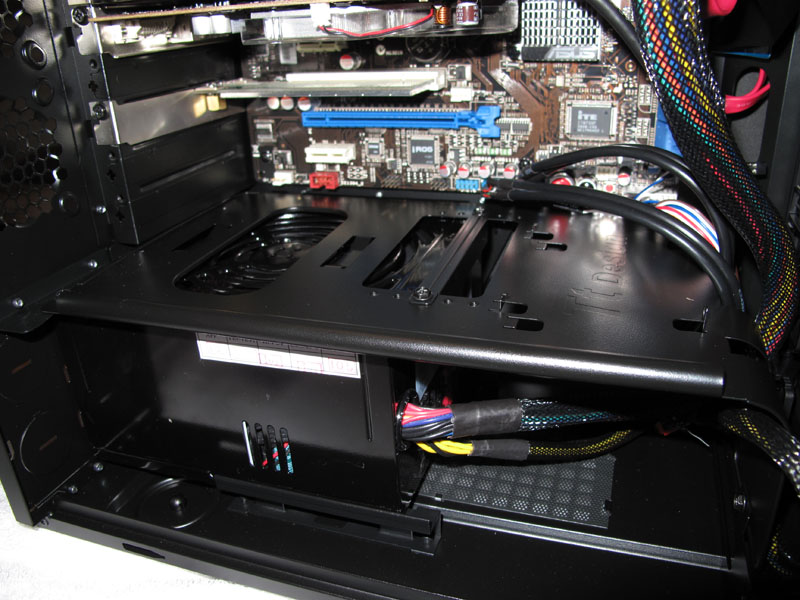
Overall though, wiring up the case was not bad. There is a convenient clip near the back of the HDD bay (pictured above) that helps keep wires in order. Wiring up the PSU was also simple, there is plenty of room in the case to route your wires out of the way of any fans or heatsinks.
Conclusions:
Overall, I am satisfied with this case. There were some great aspects and some disappointing ones. I was pleased with the provided clamp for wiring, and the convenient handle to remove the front piece. There is also a lock for the keyboard and mouse wires, which greatly helps organize the cables that are external to your case. I was disappointed that many of the Input/Output plates are not replaceable. It would have been easy to include quick connectors for the 5.25″ bays or have the option of using quick connectors instead of screws. The one thing that was truly devastating was that there was no place for a card reader in this case. That would have been a nice addition, but it is something that I can live without.
The fans are very quiet, and move air quite well. The LEDs are cool, if you are into that sort of thing, but can easily be turned off. The fan speed adjustment is easy, via a knob on the front panel, and can quiet the fans further, if you don’t need extreme air flow. Overall I am very happy with this case. It looks great, is nearly silent, and was not too difficult to install. I would recommend the Element G to any gamer who wants good cooling, but doesn’t want to go all the way to liquid cooling. This is yet another great chassis offering from Thermaltake. You can snag the Element G from Newegg for $144.99.

What is the color of the “L” in TechwareLabs?