The Pacific RL240 Kit was installed into the following system:
- CPU – Intel’s Core i7 5775c processor
- Motherboard – ASRock Z97 Extreme4
- RAM – Mushkin Enhanced 16GB
- GPU – MSI 670GTX
- PSU – Thermaltake 1000Watt
- Case – Thermaltake Core X71
- OS – Windows 10 64-bit Professional
The building process was definitely something out of the ordinary. The kit does not include any instructions or walk-through videos on how to mount or fill it, so if you are a beginner to liquid cooling and liquid cooling installations, we recommend watching a few YouTube videos to get used to the process. All in all it took our most experienced builder (Jason Jacobs) 4 hours of work to take apart the whole system, put it together in the Thermaltake X71 case (review coming soon!) with the components listed above.
The longest part of the process is the placement and location of all the piping used so that if when you cut the pipes to the needed size you do not miscalculate the measurement and have to purchase more piping.
Thermal Testing:
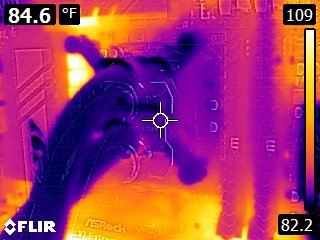
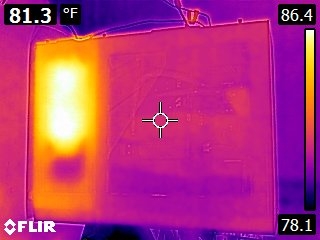
We used both a Flir E8 as well as the new Flir One thermal cameras to really take a look at what was going on inside our system after the install. The Flir thermal images automatically adjust the image colors to represent hot and cold areas. What this means is that a table with an ice cube on it will show the table in bright orange (warm/hot) with the ice cube in purple (cool/cold). That same image with a hand it it will change the table from orange to a blue/purple and the hand in orange. What this means is that in the following images, not all orange things are hot and not all purple/blue things are cold. The image has been adjusted to show things in color relation to other temperatures within the same image.


What is interesting about these pictures is to note how the heat from the CPU has been drawn away from the rest of the system. Your CPU will no longer generate heat which can affect system stability by heating up the motherboard, chipsets, RAM, etc. The heat produced by the CPU is drawn away and expelled out of the case by the radiator. Additionally its interesting to note just how much heat is generated now in comparison by the GPU.
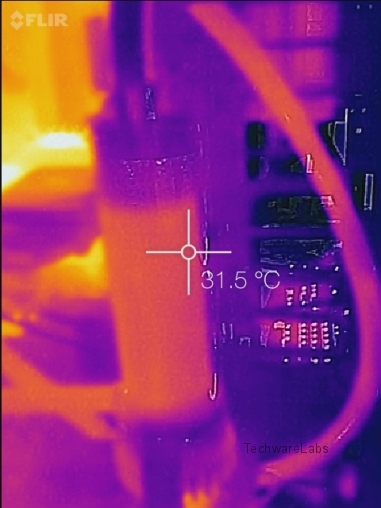
A close look at the CPU socket in relation to the motherboard, caps, and slots, shows how effective the RL240 kit is at absorbing and conducting heat away from the system.
Now lets take a look at the heat from a distance.


Series 1


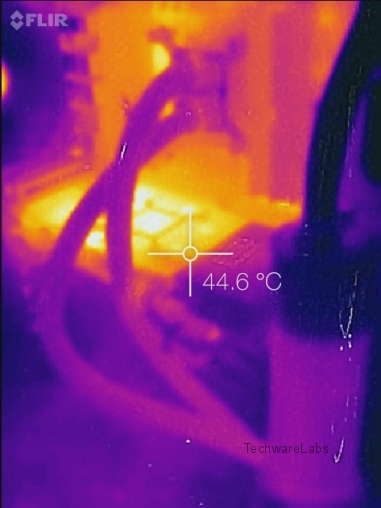
Series 2


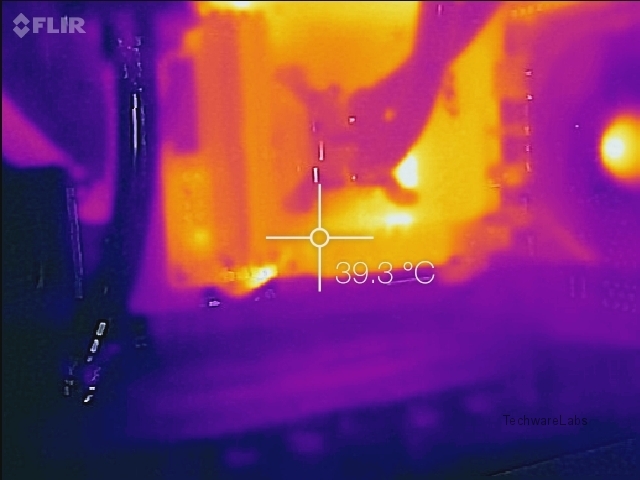
Series 3
These views put things in perspective and show how the heat from the CPU is being conducted to the radiator and outside the case. In Series 1 we see the water block picking up heat and remaining relatively cool as it carries heat away from the block and towards the radiator. Series 2 shows the system as a whole with the hot spot now being primarily the video card. Finally Series 3 shows the power supply on the far left image with power cord, and then the remaining images showing how the radiator has absorbed the heat and is actively expelling it outside the case.

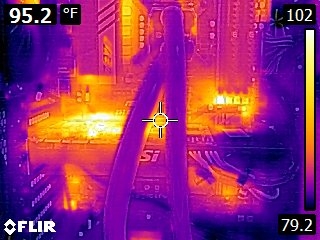
Here is the result after running the rig for 1 hour with Furmark.

[…] TechwareLabs beats the heat with the Thermaltake Pacific RL240 Watercooling Kit […]