
Close Window
XClio 1000
| Author: | Matt A |
| Date: | 2009.01.23 |
| Topic: | Cases |
| Provider: | XClio |
| Manufacturer: | XClio |

| Author: | Matt A |
| Date: | 2009.01.23 |
| Topic: | Cases |
| Provider: | XClio |
| Manufacturer: | XClio |
When I first received the XClio 1000 Flagship PC case to review, a number of things struck me instantly. First was the size of the box, measuring in at a whopping 25.5" x 11.5" x 28" and weighing in at a hefty 45lbs. Another thing that I found interesting was that unlike most case boxes, this one opened from the sides, instead of from the top flaps. In practice, this proves to be very helpful to get the case out of the box. The outer packing is not very helpful in telling you much about the case, other than supplying a number of images of the case in all its full glory (i.e. all lit up). The case itself comes in black, with a number of 120mm fans mounted around the case. All of the fans that come with the case are LED fans with the option to set them to green, red ,blue or cycle ( color will change every 4-5 Seconds and appears to add in off colors of white, purple, gold and teal ). The majority of the lights are controlled by a fan controller mounted on the top of this case. My initial thoughts of this case were WOW this thing is massive. After my initial reaction, I started taking a good look at all the case has to offer I must say I am pretty psyched about this case. I am pleased to present to you, the XClio Flagship PC case the XClio 1000.
"With passion about continual innovation, XClio has fulfilled all users’ desire for greater heat dissipate ability and larger expansion capacity –XClio 1000, a high-end heat-dissipated model which has never appeared all around the world yet. Eight high efficient RGB fans can produce massive air flow circulating in the case which can satisfy all kind of users’ thermal demand including gaming or server. Our exclusive Smart HDD Modular system even enlarges the expansion and makes the installation more easily and efficiently. XClio 1000 presents a huge capacity for larger expansion demand, smart tool-less design let users install easier, and revolutionary air flow equipment can protect hardware components and makes it performs more efficiently."
| Model | XClio |
|---|---|
| Brand | 1000 |
| Type | Super Tower |
| Case Color | Black and Titanium Finish |
| Case Material | 1.0 MM SECC ( Steel, Electro galvanized, Cold Rolled, Coil), ABS Plastic |
| Motherboard Compatibility | Micro ATX, Standard ATX, MP dual CPU(12'x13') |
| External 5.25" Drive Bays | 3 or 6 or 12 ( "Smart HDD Modular System") |
| External 3.5" Drive Bays | 3 or 6 or 12 ( "Smart HDD Modular System") |
| Expansion slots | 8 |
| Top I/O ports | USB2.0, Audio,IEE1394 (Fire wire), E-SATA |
| Dimensions | 590 x 240 x 660mm (D*W*H) |
| Top Smart Panel | Top panel Fan & Side panel Fan smart controller (RPM VR, on/off Switch, RGB LED selection) |
Cooling System |
|
Case Chassis - Front |
180mm * 3PCS (VR Controller, on/off Switch, RGB LED selection) |
| Case Chassis -Side | 180mm * 3PCS (VR Controller, on/off Switch, RGB LED selection) |
| Case Chassis -Top | 180mm * 2PCS (VR Controller, on/off Switch, RGB LED selection) |
| Case Chassis - Rear | 1PC 120mm/140mm Optional (Not included) |
 |
 |
 |
As you can see from the above pictures, what I said about the box of the XClio 1000 being plain was true. There is very little to hint at the gem of a case that waits within. The box we received was a little battered, but the packaging kept the case completely intact and without a scratch. The packaging itself was very plain and simple. Styrofoam caps on top and bottom, plastic wrap surrounding the case itself. All of the fans are all factory pre-installed and can be replaced if you ever need to via four screws accessible from the inside.
 |
 |
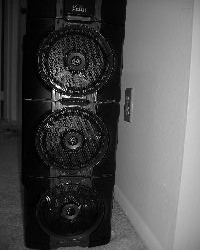
Here we see the front of the case mounted with the three stock 120mm multi color ball bearing fan. Each fan has the ability to be individually controlled via the controls located just inside each fan door, while fan speed is controlled outside the door with a little slider. Each fan in the case has four color modes, blue, green, red and mixed color (rotating between blue/green, yellow, purple and purple/green). The side panel also has three fans but instead of being individually controlled these are controlled as a set from the fan controller (bottom picture). The last picture shows the back panel with two spots for fans (not included), I/O panel and power supply slot. I found it very interesting that the power supply slot was not at the top or bottom of the case, but about 2/3rds of the way down the case. This leads me to believe that this case is designed to internally support some water cooling parts.
 |
 |
On the top left of the XClio 1000 we have the fan controller and the front I/O panel featuring 2 Usb, 1 Fire wire, 1 E-Sata, power and reset buttons as well as the standard headset and mic jacks. Above that panel you have the power for the top and side panel fans, the fan speed control and the light color selector. The middle picture was taken from XClios website, it just shows the three doors, each with its own fan and fan controller. The final shot is of the top two 180mm fans, which are also controlled by the top fan controller. These fans are set up to be exhaust, meaning they blow out of the case instead of into the case like the front mounted and side mounted fans do.
The picture of the XClio 1000 on the right shows the inside of the case with the rail running through the middle being the power supply mount. This placement of the power supply kind of puzzled me as there is a lot of room between the top of the power supply and the top of the case. The only reason I could figure for this was for either a liquid cooling set up albeit a small one, or strictly for air flow purposes from the top 5.25" mounts. The right shot has a picture of the "SMART drive bays" and the standard 5.25 drive bays with punch outs. These punch outs are secured with screws from the front and are a bit frustrating to put in, but are pretty easy to take out. One hitch I ran into was on the hard drive bays, they only come out from the front and in order to do that you need to remove all the punch outs, this can be very irritating once you have the machine full as screws seem to enjoy jumping down the front of the other panels in the front. If you enjoy hide and seek then you will probably enjoy find the screw while installing drives. As a side note the cables you see in the pictures are the front panel connections to your motherboard as well as the 4 pin Molex power cable.
 |
This picture taken from XClio's web site shows a better view of the SMART drive bays that they have chosen to use. These bays can hold four drives and takes up two 5.25" bays. Each drive is snapped into a plastic carrier which in turn slides into the Smart bay itself. The cables are fed either directly to the mother board or routed through the back The issue I had was with accessing the bays themselves. Each 5.25" bay is secured by both a screw in plate and a clip in plastic face plate. The face plate comes off easily but getting at the screws to remove the metal screw in the EMF plates was a bit of a pain because they are recessed within the case. When the screws are removed they tend to fall down the front bezel of the case. This results in the game of "hide and seek" that I mentioned previously in this review. I am pleased to report that this case does not appear to have the sharp edges that accompanied the Thermaltake Kandalf case we reviewed not too long ago. The resulting lack of a tetanus shot pleased me immensely .
 |
Test Rig:
Motherboard |
Asus P5B Deluxe |
Processor |
Intel Q6600 cooled by the Vantec AeroFlow FX92 |
RAM |
AData Vitesta G-Series Memory 4gb DDR2-800 |
PSU |
Antec 500watt power supply |
Secondary HDD |
Seagate Barracuda 7200.9 500GB |
Primary HDD |
Western Digital Raptor 150gb 10k SATA Hard drive |
GPU |
EVGA Nvidia 8800GT KO Video Card |
Sound Card |
Sound blaster X-fi XtremeGamer Fatal1ty pro Series |
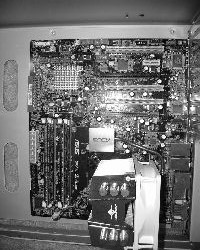
First before beginning, I would like to take the time to say this has been one of the most enjoyable cases to work on. That being said let us begin. First thing I did was set the standoffs for standard ATX. By default the case does not have any pre-set, so I went to the bag of screws and parts and grabbed the proper amount for ATX mother boards. After lining up the proper holes and setting the I/O back plate, the motherboard went in very easy, this was mainly due to the large amount of open space to work with inside the case. The only stickler I had was lining up the holes properly for an ATX motherboard. As the holes are all predrilled for ATX, MP dual, and Micro ATX, this is really not an issue. I just thought it would be nice if the standoffs were pre-inserted for what makes up the majority of mother boards, ATX.
 |
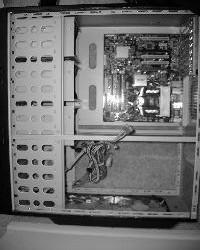 |
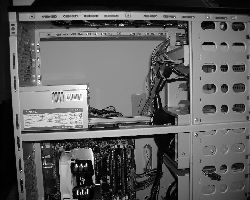
As you can see in the pictures, even after the motherboard is installed there is still quite a lot of space around the board. The two holes to the left of the motherboard are fed through slots for cables; these slots lead to a space about 1/2 an inch wide behind the back panel. Once the motherboard is installed, its time for the power supply installation which much like the motherboard goes very smoothly due to the large amount of room available. One thing I'd like to note about the power supply mount is that it has rubber on the mounting surfaces which in practice reduces the amount of noise that vibration of the power supply causes.
 |
 |
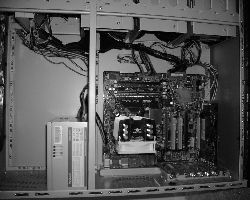 |
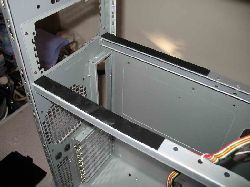
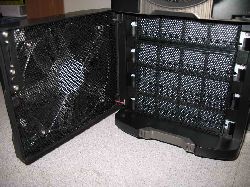
As you can see from the two pictures above, there is a lot of available room for expansion or just about any size motherboard or power supply you could want. One of the big benefits to having all this room is the ability to have virtually any size graphics card. Now all that's left is to install my remaining components. Going back to my original statements about the new SMART hard drive enclosure, as you can see below the plastic front plates and the metal EMF shielding. EMF shielding is used for grounding out high frequency magnetic, static and microwave fields, this is very useful for a computer as static can potentially damage or destroy the sensitive components that make up a computer. Unfortunately for all the good these shields are doing they are also a pain to remove requiring the unclipping of the front plastic and the removal of screws holding individual EMF plates on, you must remove three plates in order to remove one hard drive bay. Each hard drive enclosure or batch of three 5.25" bays has its own 180mm colored fan accounting for the three fans on the front of the case. By supplying this much cooling to these areas you do several things, you create a great steady airflow throughout the system as well as providing powerful cooling on your drives, there is nothing like a large fan to keep things frosty.
 |
 |
|---|
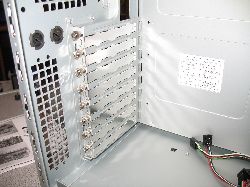
The 8800GT and the X-FI sound card went in without a hitch thanks to the great idea for the expansion slot covers. They also decided to use aluminum blockers secured with thumb screws. These thumbscrews require a little force or a screwdriver to remove the first time as they are tightened pretty well. Other than that though they come off and go back on pretty easily. There are enough slots (8) for just about as many cards as your motherboard could possibly handle.
 |
After the break its time for the light show...
 |
 |
 |
 |
These shots are from XClio's web site, the ones below are from my own shots.
Personally the XClio 1000 case was one of the most enjoyable cases I have ever had the pleasure to work with; the case is beautiful if a bit on the large side. And while not completely tool less, it didn't require anything more than what is required to install a motherboard. One of my biggest fears for this case was that it would be loud, and to an extent it is... IF you turn up all the fans to high. Although doing so is completely unnecessary, placing all the fans on low provides more than adequate cooling and is still quieter than the Antec Twelve Hundred case we reviewed sometime ago; which also featured numerous fans to provide great cooling. As an air cooling case, the XClio is one of the best. It has all the features you could look for in a case such as amazing cooling, fan controller, and bright lights... now who doesn't like bright lights? Humor aside, if the lights bother you there is an option to turn them off. A few things I would probably do different with this case is, I would make it easier to remove the front EMF panels and I would also provide a way to synchronize all of the lights when you set them to cycle through the colors. This is especially noticeable when you set the front lights as these are all controlled independently. For $299.99, at time of publication, there may be a better case to suit your needs, especially with the current economy. Other than those three minor points this case is amazing!