

Peltier Condensation Prevention
Article by Jason on 09.09.2003
Thinking Outside the Cube:
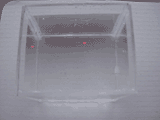
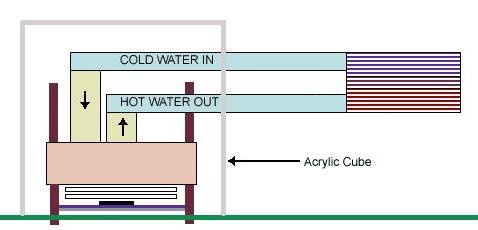
| The concept behind my modification was to create an acrylic or plexiglas container around the assembly with two holes in the top for the water leads. The container would have to be airtight and conform to a tight space just around the socket. In height it would have to allow for the restraining bolts for the water block and the base would have to be sealed to the motherboard. Previously I used silicone on the area inside the socket, around the socket and an area of 6"X6" behind the motherboard. The back of the motherboard must be insulated as the cold from the CPU will soak into the motherboard and the back can sometimes form condensation. The work I had done around the socket would come in handy as I used the silicone there as the base for where the acrylic container would sit. In theory the socket was already airtight. Both the front and back had been coated with silicone including the holes where the bolts for the water block came through. Creating the container was next. Any measurements I could give you for the container would be meaningless to you as the area around your socket will change depending upon the motherboard. |
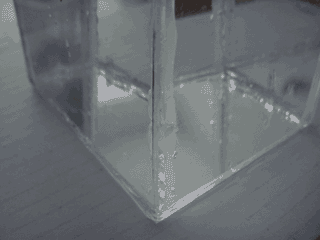 |
The container was built using acrylic in this case. The sides were held together using superglue (cyanoacrylate ester). One word of caution, superglue will instantly spread and cure when in contact with water so do not fill your container to test it until after it has fully dried. I took the further step as you can see to coat the inside joints with a thin layer of silicone. I used GEII clear silicone in this case. |
 |
 |
 |
 |
 |
** Discuss this article with Jason and other readers in our forums! **
| « Back a Page | Page 4 » |