

|


FSP Group Everest 900 Watt Power Supply
![]()
Packaging
The first thing you notice about the FSP Group Everest 900 is how heavy the box is. It has a neat green look with not many markings on it. This gives the box a neat clean look to it, but it kind of hurts their image by not properly advertising the features. This product is stacked in features, but they aren’t well displayed and advertised.
 |
 |
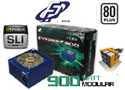
Front of the box |
Back of the box |
Here is the only real list of features that they have, once again this power supply is loaded, but they don’t do a good job of explaining what each item means. Below that is a picture of the power supply after opening the box. As you can see it has this beautiful deep blue shade to it that is semi-reflective. As with any good packaging scheme the first thing you see after opening the box is the product itself with all the cables and mess hidden from view. First impressions matter
Features |
Inside the box |


These two pictures show the accessories; since this is a modular power supply it has a lot of various connectors and a pouch to keep the unused ones in. This way you don’t lose your extra PCI-E connectors for when you upgrade to that crossfire or SLI system.
Accessories |
|


Here is a set of pictures of the actual power supply. Notice the interesting paint job on it as well as the cable sheathing. This makes the power supply as attractive as a power supply can get. If you look closely you can see the connectors that the modular plugs all slide into. Below that is the handy sticker to keep you from plugging a cable into the wrong slot. Rest assured that they designed the plugs in such a way that you cannot insert them into the wrong slots.
Close up of the fan |
Connections |


As advertised on the previous page, the power supply also comes with easy to use molex connectors. These really come in handy as I had to about break some of them to get my old power supply off. If you’ve every changed out a power supply you know exactly why a press and release molex is useful. All you have to do is depress the two tabs and it will slide right out, it’s as easy as that. In the picture on the right if you look up close you can see a few of the insides of the power supply. The fan has clear blades to allow you to easily see inside.
The smart molex connectors |
Close up of the fan |


Installation
 |
 |
Power supply in the case |
Installing a power supply is an easy task; you first remove the old one, and then fasten the four screws to bolt the new one in place. After that, select which connectors you need, and plug them in. The hardest part is finding enough room in your case to put everything inside. If you’re into cable routing, that would be a good thing to do now as well. Check this out if you’re interested in cable routing, it can help drop the temperature of your case a few degrees as well as make it look better
Back of the case |
All wired up |


Now that we’ve installed the power supply it’s time to see how it performs.