

| Killer Notebooks Assassin |

|
|


Construction:
Flipping the unit upside-down, it is nice to see the many cooling fans the Assassin has inside it. Clearly seeen in this image are the four main intake fans on the underside. Always make certain to never cover the underside fans, by accidentally placing it on any soft surface such as couches, beds, etc. The best solution is to place the Assassin atop of a laptop cooler designed for large laptops. There are quite a few of them available, such as the NotePal from CoolerMaster.

To remove the back panel and look at the insides of the Assassin, we first remove the battery from the laptop which comes away quite easily by pushing a spring loaded slide switch that releases the compartment containing the 12 cell pack. We then remove the CD/DVD-RW Dual Burner by using another slide switch. These slide switches make taking your laptop apart very easy.
Next, we remove the screws from the underside panel which allowed the panel to be lifted off and away from the unit. Always remember to use a grounding strap, preferably on an ESD mat (Electro-Static Discharge) before attempting getting into your system.
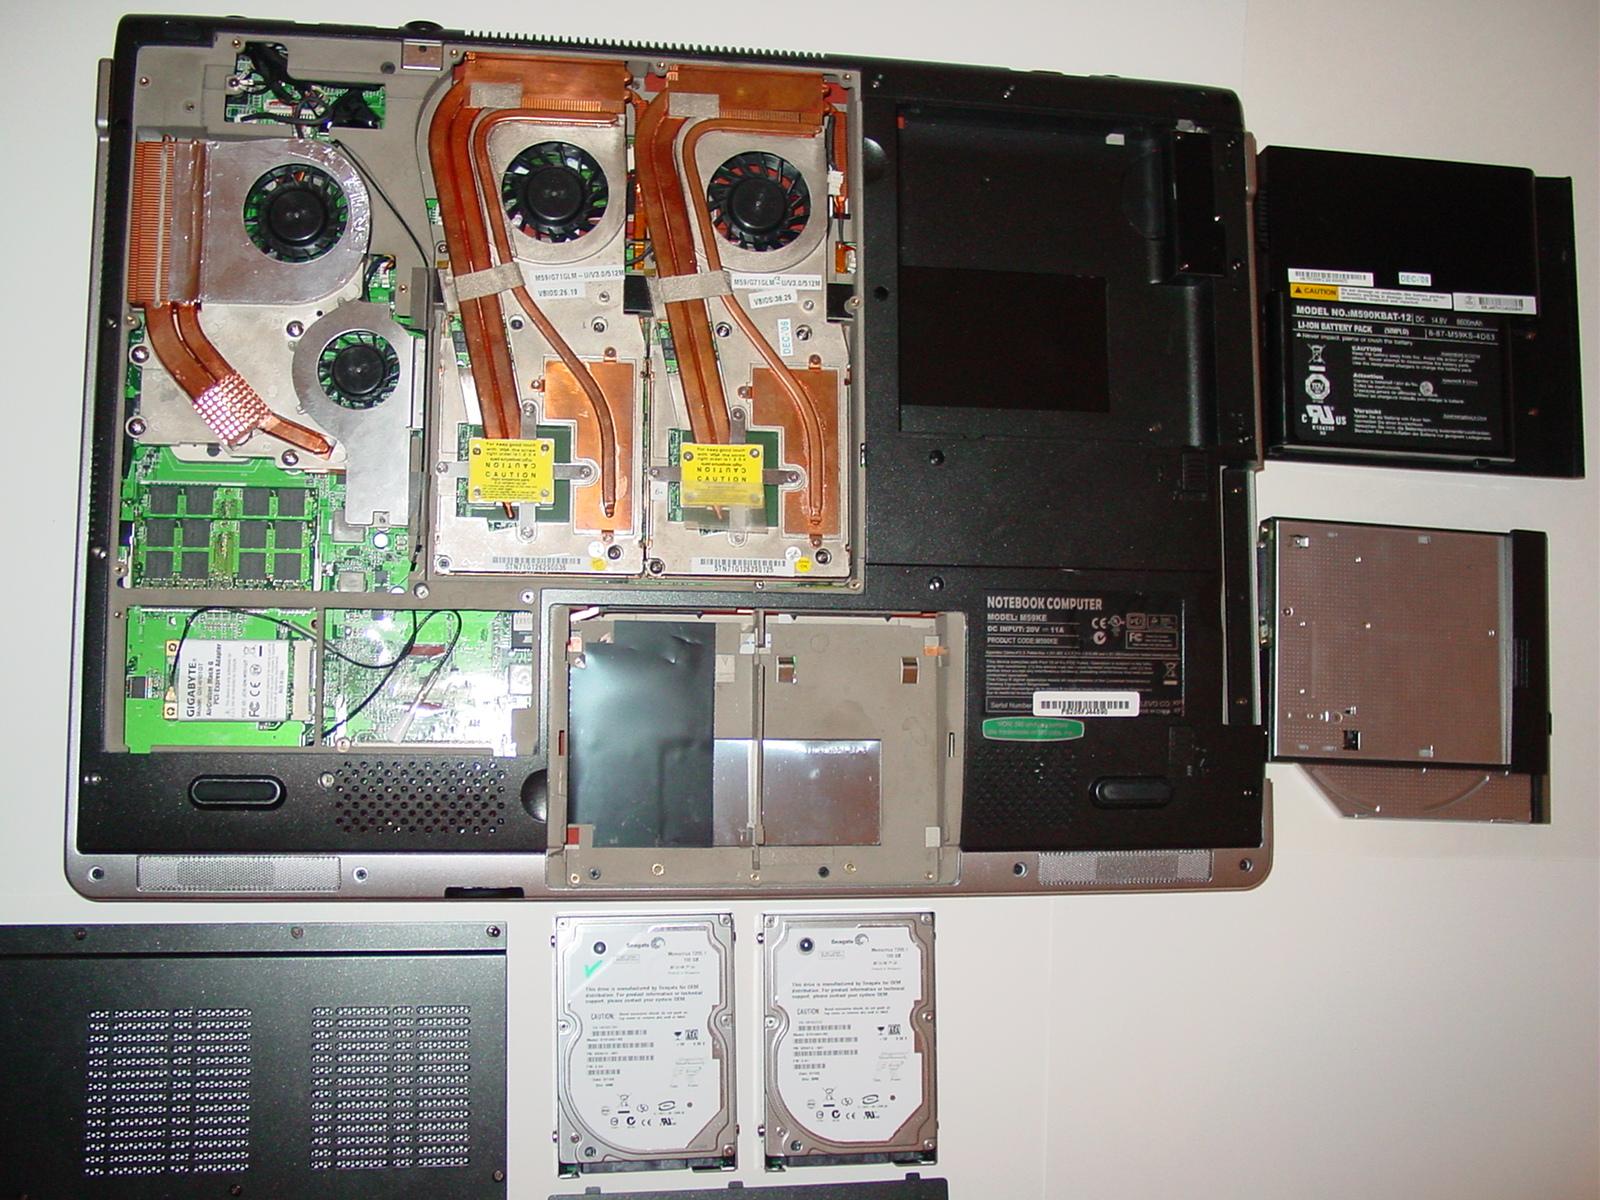
Notice how clean and organized the above image shows the insides to be. The cpu and ram cooling areas are located to the upper left, the center area is neatly consumed by the two nVidia Quadro 2500M video cards with their own respective cooling solutions. At the top right is where the battery (currently off to the far right) plugs in, while below the battery sits the optical drive compartment which is easily removed by simply moving another slide switch.
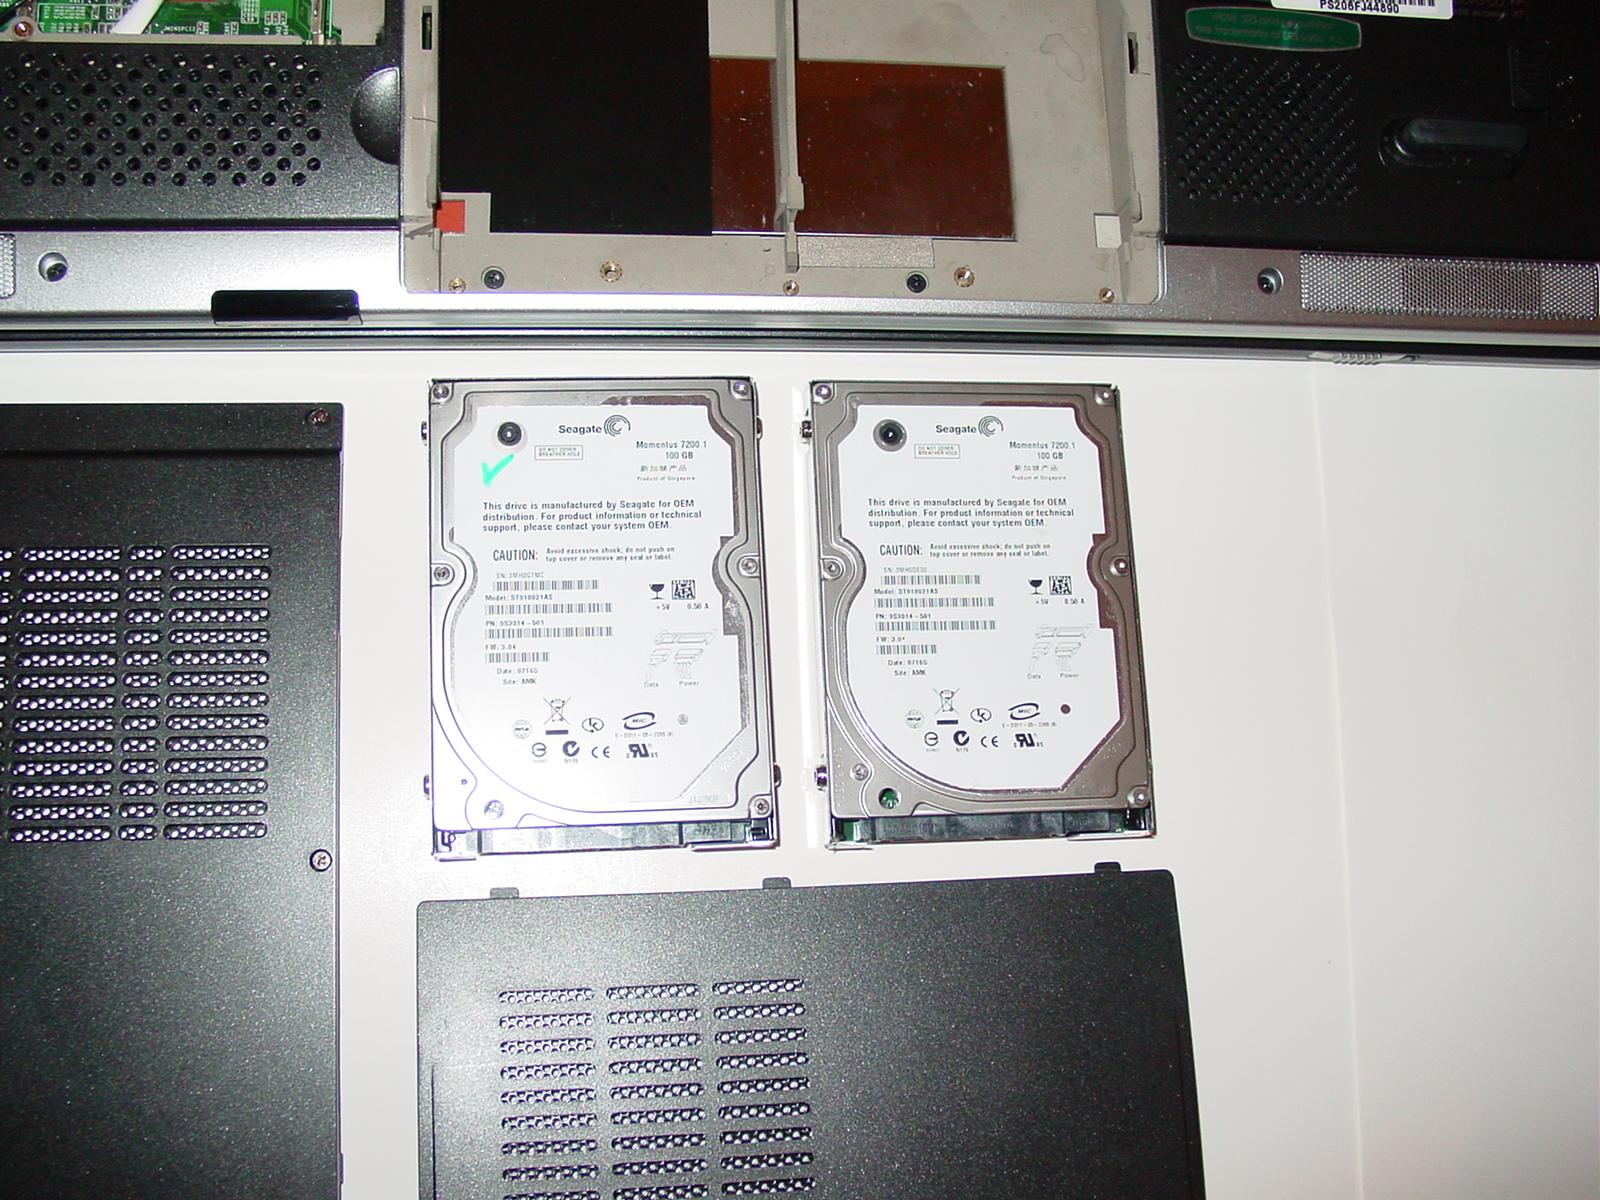
At the bottom left you can easily see the 802.11G wireless network card and antennae. To the left and bottom center is the compartment that houses the two Seagate hard drives in raid-0 stripe. One word on this is that this was the best hard drive fixture/compartment in a laptop I have seen to date. Each drive has 2 screws on either side holding it inside a removeable container, and the heads on these same screws actually fall into slots on both sides of the compartment for a flawless slide-in method of removing and re-installing your hard drives. The only screws needed to be removed to slide the drives out were the three screws holding the cover to the compartment, once the outside cover is removed no more screws need to be accessed for removing or installing the drives.
| « Assassin Features | Assassin Weight, Storage, battery Life, and Display » |