

| Promise FastTrak TX4200 |
|
|


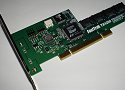
If you've never worked with a RAID setup before, this may be a little difficult for you to understand at first. Though on the bright side you will unlikely come across any huge problems no matter what skill level you are as the Manual included on the CD and the Quick Start Guide included in the package is very well documented and helpful.
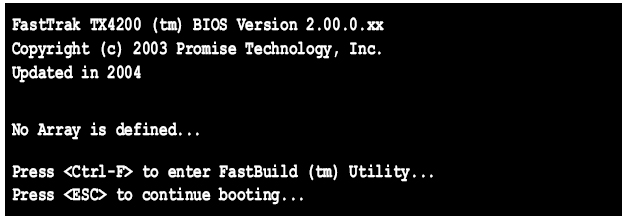
When the card is installed, every time you boot up your system you will get a FastTrak TX4200 BIOS screen, and to enter it you hit CTRL + F. You can just boot your system by hitting ESC, or just let it be and it will boot normal after a few seconds.
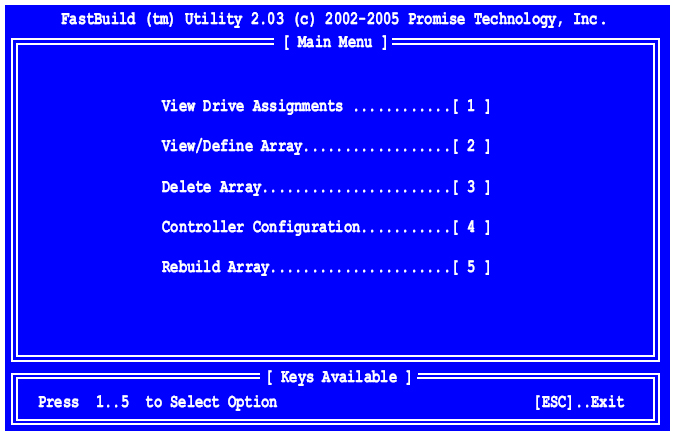
From here on, the BIOS (FastBuild Utlity) is pretty straight forward, allowing you to view drive assignments, view/define array, delete array, controller configuration, and rebuild array. You can also do an auto setup via the BIOS that is recommended for most users.
Now after the BIOS is setup, comes the drivers and software installation. Now here we get to the goods, the Promise Array Management software, which to say the least is amazing. With the PAM software you can do nearly anything your heart desires with your RAID setup, there is so many options and features for beginners and advanced users alike. And as stated below by Promise, it is also excellent for LAN setups.
Promise Array Management (PAM) is a software application designed specifically for monitoring and managing Promise Technology RAID products, such as the FastTrak TX2200 and TX4200 Serial ATA RAID Controller cards. Promise includes BIOS-based RAID management utilities with each of its products. PAM, however, runs over a local area network and makes possible RAID monitoring and management from any computer on the network and even over Internet. This allows your IT manager to watch your RAIDs and take care of them over the network.
There are three components to PAM. Depending on your installation, all three may be on the same workstation or work separately across your network:
Monitoring Utility – The Monitoring Utility is a Graphic User Interface (GUI) that reports on the condition of the RAID logical disk. It receives and displays reports on RAID condition and operation through the Message Server. The Monitoring Utility works on any PC with a TCP/IP network connection to your RAID. When installed on the computer that operates the RAID, the Monitoring Utility also provides a complete set of RAID management tools.
Message Server – The Message Server is the link connecting a PC with the Monitoring Utility. Normally, the Message Server runs on a network file server. But it can also run on the PC controlling the RAID.
Message Agent – The Message Agent runs on the PC that controls the RAID, called the “RAID PC”. It directly monitors the RAID and sends messages through the Message Server to all PCs running the Monitoring Utility.
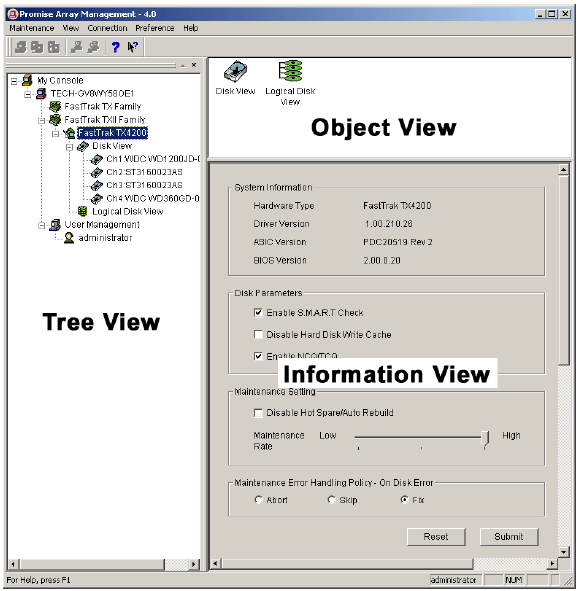
When installing the software you will have to make a username and password, and login each time you wish to configure your RAID setup. After that you are in full control. You can manage your drives through Promise Array Management just as you would with the FastBuild Utility on boot-up, and more. There is way to many options and features to cover throughout the PAM software but if you do want more information on the PAM software and its capabilities, then you can take a look at the manual for PAM on www.promise.com.
| « A Closer Look | Benchmarks & Conclusion » |