

|
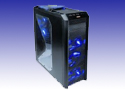


Antec Twelve Hundred Gaming Chassis
![]()
Detailed Specifications and Features
This is the antivibration mounting brackets, it's designed to increase the lifespan of your hard drives by isolating them from vibrations. |
Anti-vibration mountings |
All 5 of the fans the Antec Twelve Hundred has come with fan controllers. The back two 120mm fans and the 200mm fan are controlled in the back, the intake fans are controlled in the front. Each of these has an adjustable knob. If you click the full size image the flash isn't as dominant. The flash is required to get these items of small detail to show up properly. If you want to get an idea how inconspicuous each of these knobs are, check out the full size images and see if you can spot them.
 |
 |
Back panel controls |
Front panel controls |
Here are the bottom 3 bays, these constitute 9 of the 12 total bays. Notice that one has a fan bracket on it to allow you to install an extra 120mm fan to improve air flow. Pay careful attention to the air filter and where it sits in each bay. The air filter simply pops out and is washable in the sink to allow easy cleaning. Each of the bays is sturdy (read: heavy) and comes with a 120 mm fan in the front. These fans all are intake fans by default, but removing just a few screws will allow you to change that if you so choose.
 |
 |
The fan in each bay |
The front panel of the bay |
 |
 |
The dust screen removed |
Closeup of the dust screen |
This is the location on the side panel that you could install the extra 120mm fan into. If you end up water cooling your rig, you can remove one of the fans from the back and place it here. This fan slot contains an air filter and is the perfect location to flood your video card with cool air.
 |
Side panel fan slot |
These are the extra components that the case comes with. Most of these will be required if you want to install a floppy disk drive. The screws and standoffs are all you need to completely connect your system.
 |
Accessories |
Here is the front panel of the case. From left to right we have the reset button, 2 x USB 2.0, eSATA, hard drive light, HD audio in, HD audio out, and finally the power button. This panel gives you easy access to all the stuff you may need (or need in the future with the eSATA) to quickly hook devices into your computer.
 |
Front panel |
This is the bundle of cables you have to attach to your motherboard, makes you cringe a bit doesn't it? Connecting these allows all of the above mentioned buttons, lights, and connections to work properly. These all need to be attached properly to your motherboard. For details, consult your motherboards manual.
 |
Wires to the front panel |
Here is the PSU spot (at the bottom of the case). Notice that if the cut out part is removed, a larger, non-standard power supply can be installed. You can also easily see the 4 grommets that the power supply will sit on to help isolate any vibrations the fans would make.
 |
Power supply slot |
The huge 200mm fan on the back of the case has 3 speeds, and the LED lights on it can be turned on and off via the panel on the back of the case. It has the same style grill on it as the front of the Antec Twelve Hundred.
 |
200mm blowhole fan |
Finally, here is the water cooling platform if you're interested in water cooling your rig.
 |
Water cooling stand |
Real Time Pricing: