

|


Cooler Master RC-1100 Cosmos S Case
External Impressions of the Cosmos S RC-1100 case:
Let's get to that size comparison I promised earlier. After ripping off the protective plastic wrap, we are left with this masterpiece of a case. In case you were wondering, that is a 2 liter bottle in the picture! As another measure to test the size of this case, I compared it to another case I have sitting around. You may or may not have read my review of the GMC R-2 TOAST case, but this Cosmos S case towers in comparison to the micro-ATX sized TOAST case. In fact, the Cosmos S case is so big that, if the top exhaust fan were removed, the TOAST case would completely fit inside of it!

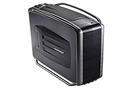
The dream-car influence is immediately noticeable in this glorious case! The color scheme is also much more sleek and stylish when compared to the original Cosmos case. The way that the side panels fits flush with the rest of the case makes it look very seamless, just like the sexy lines of a super-fast sports car! The panels are also made of a slick looking anodized piece of brushed aluminum. The support bars/handles allow for easy carrying of this case, as well as provide acoustic insulation to help keep this beast tame and purring instead of angry and snarling. You can tell that the mesh is pretty fine on the side panel because you can get a good idea of what the other side of it looks like. The Cosmos S badge is proudly displayed on the side of the case. Let's move on to some more pictures of the case and explore some additional features.


So far we have some pictures of the top and back of the Cosmos S case. The first picture on the back shows the top mesh panel and the opened I/O drawer. I was a little surprised to see that none of the ports were labeled, but later came to realize that they actually were via a back light! I thought this was very cool, but you can't really tell which side is the microphone and which is the headphone port without turning the computer on. The second picture shows how all of this can hide away if you aren't using it, again this adds to the sleek factor. The power "button" is actually a touch sensor and only requires the touch of a finger to turn on and off. One drawback to this feature is that anything resembling a finger can turn it on, such as a cat that walks on it or a dog that sniffs it or any number of other possibilities. One major thing you notice is the absence of a reset button. Personally, I don't see this as a very important item to include because how often do you actually use the button? On the same token, if you do have to end up using the button, you are going to be a little frustrated with the lack of one. If you want to add a reset button, it shouldn't be that hard as this case is very, very mod-able. There is plenty of space inside to put the new button and plenty of real estate to mount it. Moving on to the third picture, I was specifically trying to show the levers used to remove the side panels of the case, but I also got a pretty good close-up of the water cooling grommets. These are used to allow the passage of water lines associated with a water cooled setup. The last picture just shows the layout of the back of the case, directly below the solid expansion slots, good for keeping dust out of the system, is the opening for the PSU. Let's move on to some more pictures of the outside of the case.


Let us move on to the final pictures of this section. The first picture shows a simple yet very attractive right side panel with the Cooler Master logo proudly displayed. The second picture shows the reverse, left side, panel in all of its glory again, without any obstructions or the protective covering this time. You can see that both sides of the case use the same anodized brushed aluminum for a sophisticated and sleek look, while remaining very light for being so large. The next image shows the case head on. The front isn't very busy, looks fairly simple, yet still remains very classy. The little orange racing stripe on the top recalls the dream car styling mentioned earlier. The gunmetal colored sides are actually there to help secure the mesh inserts and click in place. In order to install an optical drive, you must open both of them before you have access to removing the mesh insert. The side panels definitely help to keep the surface of this case very, very smooth and continuous. The last picture actually shows the bottom of the case. Cooler Master even put a lot of thought into the bottom of the case, the top corresponds to the back of the case and the bottom corresponds to the front of the case. The huge mesh section on top is actually a vent designed specifically to help keep the power supply cool. The bars on the perimeter of the case actually raise it a good deal off of the ground to promote maximum airflow. The bottom filter is removable to clean when it starts to collect the dust it prevents from entering the case. This is an additional mounting place for a 120mm fan to bring additional cold air into the case. Now that we have explored the whole of the outside of the case, let's move on to the interior...