

|
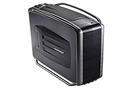


Cooler Master RC-1100 Cosmos S Case
Internal exploration and observation of the Cosmos S RC-1100 case:
Next up is the inside of the case. I opened the case with the nifty little levers and was surprised at the fan I saw. I knew there was a 200mm fan on the inside, but it was hard for me to imagine since the biggest fan i am used to working with is only 120mm. It was shocking to actually see, and it made me really think about how serious 150cfm of airflow actually was. Shall we take a look at some more pictures? I think so:


The first picture is just of the inside of the left side panel, showing the massive fan that I talked about. You can also see that this panel has a lot of mesh, keeping it very cool inside at all times. You also get a very good look at the quality of construction with the side panel. Tthe mesh panel is screwed in place instead of riveted, meaning you can take it out, modify it and replace it if you wish. Also something to take note of is the number of mounting areas in the side panel as this adds to the quality. They could have just attached it at either corner, or on either side and been done, but Cooler Master takes pride in its quality, as you can tell.
The next picture shows the nifty little latches in place that actually hold the side panel on. These are attached to that lever in the back of the Cosmos S case that I showed on a previous page. The bottom of the panel has a groove that you slide the case into while you are installing it, then you push it against the case, the latches snap, and it is installed. This is by far the easiest to install side panel I have come across and it saves so much time, even when compared to a case with nice thumb screws.
Moving on we see the top of the case, after the top panel was removed by unscrewing the single thumb screw that was shown in the same image as the latch on a previous page. It appears as though there is enough room to mount the fans on top or beneath the aluminum mesh visible in this picture, it may also be possible to install a radiator on one side and the fans on the other to maximize the amount of room available inside the case, not that this case is lacking space in any way.
The last picture above shows the two cooling vents on the bottom of the case, one for the PSU and the other for a 120mm fan. The air filter for the fan is accessible only from the outside of the case and the filter for the PSU is accessible only from the inside of the case, it might have been nice to have them both accessible from the same side. Also it would be nice if the PSU filter was actually visible when the PSU was installed. Something that another company probably would have overlooked is the removal of the PSU filter. Cooler Master had the foresight to realize that the consumer would want to be able to clean the filter with the PSU still installed, you can see the handle on the filter above, the design actually causes the handle to stick out past even the largest PSUs.
Lets move on to some more pictures...


The first thing you see when you open the case is this really nifty installation template. This explains what all of the cable management holes in the motherboard tray are for, and which tapped holes to use for your motherboards size. The 5.25" drive retainers above are actually a really neat feature of this case. No tools necessary to install the 5.25" device, and these puppies keep it pretty secure. While you don't get the absolutely tight, budge-less mounting you would get with all screws, but these will keep the 5.25" device from moving around. Also the way that the tool-less locking device is installed, it allows for one of the two screw rows on the 5.25" device to be used, so you could still mount with screws if you chose. The devices work exactly like a clicking ball point pen, one press deploys the securing pins and the second click retracts them. Above I have attempted to show you exactly what these look like in both configurations, but with the case being so shiny I was having a hard time with flash reflection and I got a somewhat blurry picture without the flash. The top row has the pins deployed and the bottom row has them retracted..
Also you note the larger than average bundle of wires inside this case. The case pulls power off of the motherboard power connector for the backlighting of the I/O panel. Included are 2 dual USB cables for the 4 USB 2.0 ports, a SATA cable for the eSATA port, connectors for standard or HD audio, a connector for the HDD light, a connector for the IEEE 1394 fire wire port and the power on connector for the nifty touch sensing power switch. Finally, you can see two of the included 120mm cooling fans. Next let us move on to the included accessories


The picture on the left basically just shows how Cooler Master secures their accessory box before shipping the unit; nothing special, just a piece of tape to keep it from banging around. It is secured inside of the 4x3 module that converts 3 of the 5.25" device bays into 4 3.5" hard drive bays, more on this later.
The second picture, in the middle, shows what is inside the box. The 5.25" to 3.5" drive bay mounting bracket. There is a specially designed front panel cover for the person who wants to add a FDD or some sort of 3.5" fan speed controller or other device that requires front access.
The picture on the right shows everything that is in the bag. A power extension cable for those that may need it, a bunch of zip-ty fasteners, several cable management fasteners with adhesive backing, a chassis speaker and a copious amount of screws and standoffs for mounting various things. Both course and fine machine screws are included for all of your mounting needs. Below are the final pictures of the Cosmos S RC-1100 case:


The picture on the left is the front of the Cosmos S case without and of the mesh bay screens in. You can see the front of the 4x3 module with the massive 120mm cooling fan to keep your HDDs nice and icy. The fan that is included in this module has 4 red LEDs in it that give a really nice effect when on. You can see just how open the front of this case is to allow maximum airflow and cooling capabilities.
The picture in the middle show how much clearance you get underneath the case from the support bars. This is plenty to allow adequate airflow.
The last picture shows the case on its side and the amount of clearance you get if you chose to put it that way. Lets move on to the last page with the wrap up and conclusion...