

Chieftec Case & Thermaltake
Water
Cooling Kit
including additional Xoxide lighting kits
Reviewed by Shadrach 04.22.2003
Cooling Installation
*Warning - Ensure you have an adequate power supply to run additional components in your case. Before attempting any mods that will require additional power, you should have a bare minimum of a 300 Watt power supply. A larger power supply will be necessary with more power-intensive systems.
The Aquarius II kit is extremely simple to install. The installation consists of the following basic steps:
-
A couple pieces of mounting tape will hold the the metal mounting strips in place.
-
Magnets will be used between the reservoirs and the metal mounting strips.
-
Apply the water block on the CPU.
-
Cut hose to length for each individual part.
-
Connect the hoses and apply the hose clamps.
-
Hook up the power connectors--one for the pump that goes to the CPU fan header and one for the radiator fan.
-
Fill the system and your done.
The worst part about installation is turning the system on and praying that there are no leaks, but if you followed the guide then there is really no need to worry.

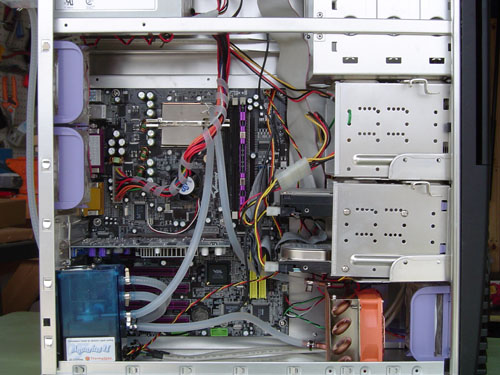
The case before any work is done
Installation consists of placing two chromed metal plates on the case with mounting tape. Magnets are used to hold the pump, filler reservoir, and radiator to the plates. Not too sure about the magnet idea? The magnets supplied with this kit are very strong, as shown in the picture below. The magnets were strong enough to be stuck to either side of my finger by their magnetic force alone.

Determine the location for the reservoir and radiator, place the metal plates in those locations. In this case, the drive rail holders at the bottom had to be removed. The secondary reservoir or "filler" should be placed high, and on the outside rear of the system for easy access and most effective air bubble removal.
Once the reservoir pieces are in place, and you have replaced your heatsink with the water block, you can begin to measure and cut your tubing. Connect all of your tubing with the provided clamps. Connect the motherboard connector to your CPU fan header. Fill the system, cross your fingers, and start your computer.

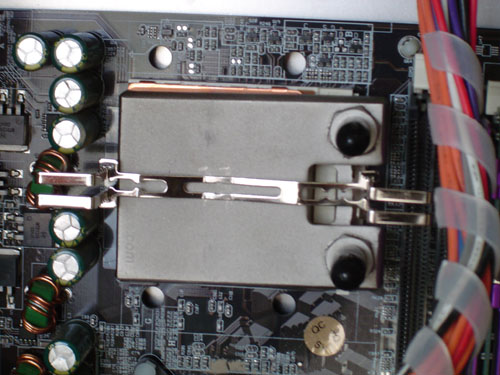
Application of the water block

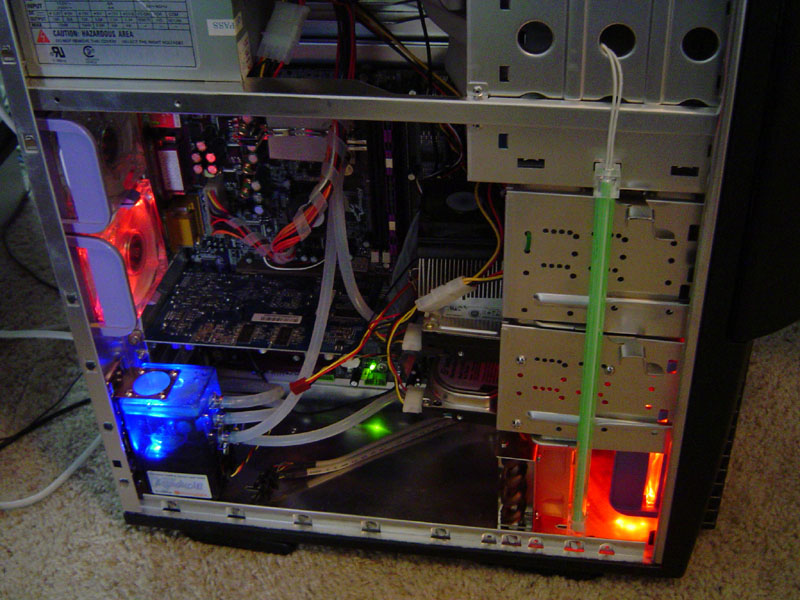
After the water lines are in place
*Warning - On some AMD based motherboards, you may need to turn off the feature that shuts the system down when CPU fan RPM is insufficient. When the pump is plugged in, the motherboard sees the pump as the CPU fan.
What happens next will amaze you, but may not if you understand the system. The height of the filler reservoir, on the rear of the case, allows air bubbles to be caught and removed from the water lines, while replacing fresh liquid into the system. Be sure you have water ready to pour in as the piping is filled and the air is removed. When the pump is running it lights up. Visual queues are the ultimate quick indicator, particularily considering you have a window in your case. Of course without a window, the light will not be helpful. Designing in an LED kit for the front bezel would have also been desirable.
Temperatures
Considering that no tweaking was done, no specialty thermal grease was used, and a 12 degree temperature drop was observed, in addition to a noticeable drop in fan noise, the products essentially speak for themselves.
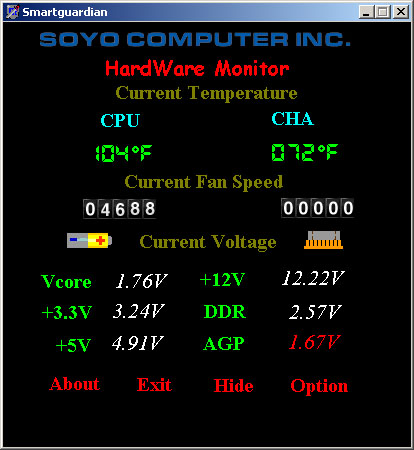
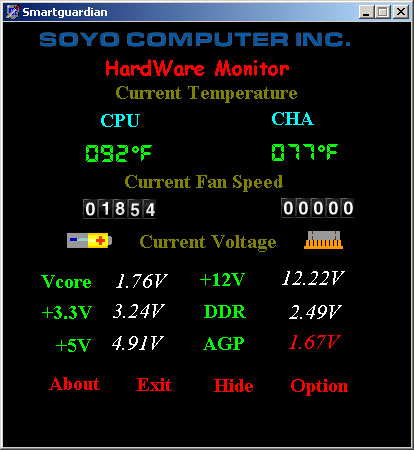
Notice the fan speed on the second image is the pump speed. This is the reason you must adjust your motherboard settings to compensate for the lack of fan speed.
Pros:
Compact and easy to
install
Motherboard connector, shuts down PC if pump stops
Good Design that fits all current processors
Effective
Cons:
Lacks pump LED power
indicator for bezel on windowless systems
May not fit some case
designs without modding
No brackets for hard mounting components
| « Back a page | Lighting it up » |