 |
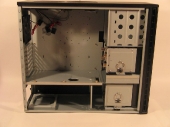
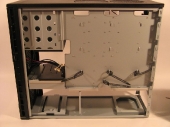
Opening up the left-side panel, we get our first look at the guts of the case. The first thing many notice about this case is the divided main chamber. The top portion houses the motherboard and expansion cards, while the bottom portion houses the PSU. The dividing panel between the two has several large holes cut into it, for easy system assembly. Once the cables are routed the way you want them, a pair of steel panels can be put into place and secured with thumbscrews. This leaves holes that are just big enough to accomodate power cables (for the large panel), or SATA data cables (for the small panel). The point of all this, as you might expect, is to isolate the power supply from the major heat-producing parts of the system, reducing the work that the PSU’s fan has to do to keep it cool. Less work means it can run at a lower speed, which means lower noise.The motherboard tray is not removable, but this is intentional. A removable tray is one more possible source of vibration, and thus noise. That said, this may cause issues if you use a large, motherboard-obstructing heatsink, so bear this in mind when selecting components. |
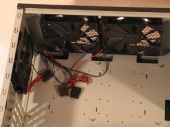 |
The upper two fans measure 140mm across, and like the 120mm fan in the back, they have three selectable speeds. They are powered by standard Molex pass-through plugs, which can be stacked in series to draw power from a single PSU connector, if so desired.Here also we can see the four cutouts in the motherboard tray: three above the top standoff holes and one to the right, next to the 5.25″ drive bays.. With the right power supply, you can use these cutouts to route the power cables behind the motherboard tray, where they won’t interfere with airflow.The motherboard tray itself is generously appointed, with standoff holes for everything from pico ITX all the way up to Extended ATX. Six of the nine standoffs for standard ATX are pre-mounted, and the toolbox has a package with half a dozen more. |
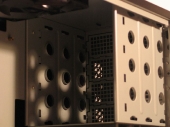 |
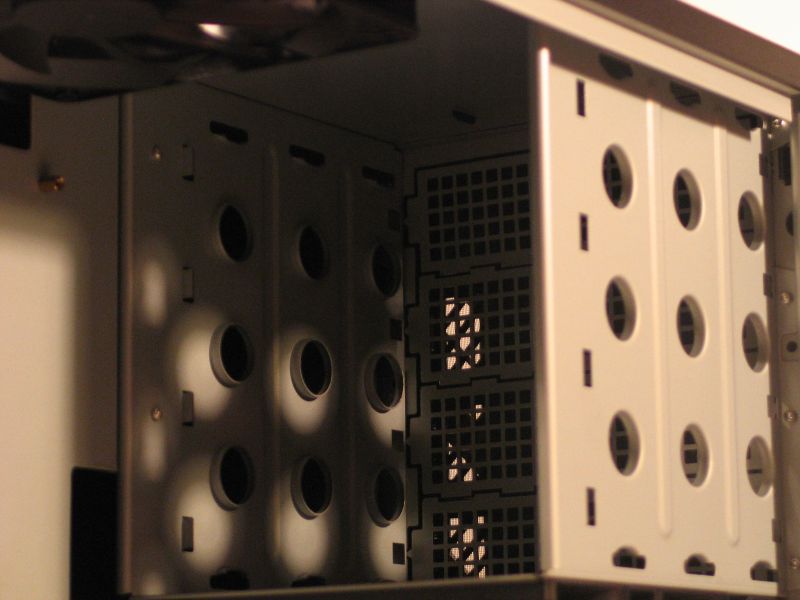
The four 5.25″ drive bays work on a rail system. A pair of rails, four of which are included, is screwed into each drive. The drive itself then slides in from the front, with no bezel-removal or other stupid fiddling required. As shipped, all four bays are covered in front with plates that have the same square-hole grille as we saw in front of the intake fans. These are only attached by small tabs to either side, however, and can be easily removed with metal shears. If you don’t have a pair handy, the plates can also be worked loose by wiggling the plate back and forth until the metal of the tabs breaks. The remaining stubs are generally sharp, but are so far recessed into the slots that you will likely never come into contact with them. |
 |
The two hard drive cages are also fairly unique. Each one is mounted on a set of rails that allows it to slide out of the case completely, and is held in place by a single thumbscrew. A large pull-ring on each one facilitates removal, and the pull-rings have a small latch on the side that holds them still when not in use, eliminating any possible rattle. The top cage has space for two 3.5″ hard drives, each on a slide-out tray that latches into place automatically. The drives themselves rest on a quartet of silicone grommets, and are secured to the trays by a set of special long-shafted screws, which are included with the case.The back of the top cage has a plastic toolbox for holding extra screws, grommets and motherboard standoffs. This handy feature finally puts to rest the old question: where to put all the fiddly bits that came with the case?In front of this cage is a mounting bracket for a 120mm front-intake fan. The fan screws into the bracket as it would into the case, and the bracket clicks into place in the chassis. Use of this bracket is required for mounting a fan there, as there are no screw holes for a standard fan mount. The cage itself can also be used as a mount for a 120mm fan, provided that no drives are installed. |
 |
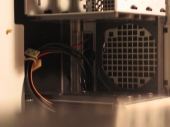
The lower cage has space for four 3.5″ drives, which are mounted sideways with the aforementioned long screws and silicone grommets. In front of this cage is yet another 120mm fan mounting bracket. Behind it, and just forward of the power supply, is a divider that can be used as an alternate location for the fan mounting bracket. |
 |
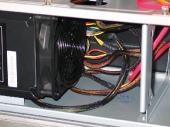
Taking off the right side panel, we can see that the rear of the motherboard tray has several slots for attaching zip ties. Also noteworthy is the cutout in the bottom lip of the motherboard tray. This allows for the routing of thick power cables behind the tray without too much trouble. Here, as with everywhere else in the case, the edges are rounded to avoid cutting of cables–or fingers!You may also have noticed the white clips hanging off of the front-panel connector cables. These have a flat panel with a permanent adhesive backing, and can be placed wherever you like to allow for quick bundling of cables, without the use-once-then-destroy method that zipties generally require. Opening and closing the clip requires a simple twist of thumb and forefinger, and once closed it stays where you put it. |
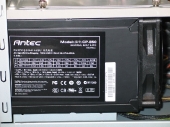 |
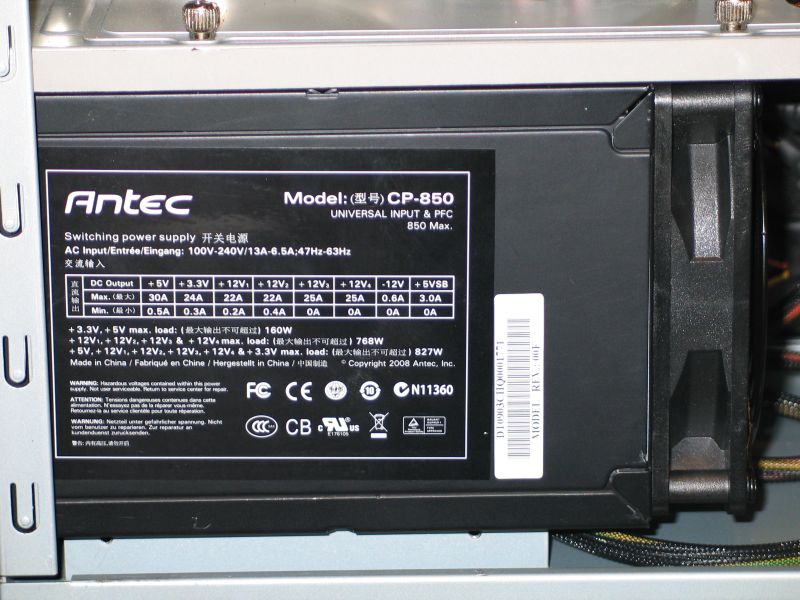
Here we see Antec’s CP-850 power supply mounted on the provided base. The edges of the base are covered in a set of silicone strips, which helps to minimize vibration transfer between the power supply and the main body of the case. |
 |
As you can see, there is plenty of space in front of the PSU for routing cables, even with the unusually large CP-850. For size reference, that is a 120mm fan mounted on the front of the PSU, where most make do with a bottom-mounted one that fills the width of the unit! The PSU base does have a large circular hole for accomodating such PSUs, and enough clearance above the floor of the chassis to allow for good airflow. The straight-through design of the CP-850 is better suited to this arrangement, however, as pushing air in a straight line takes less work than pushing it around a corner. |
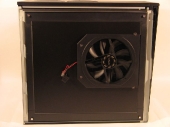 |
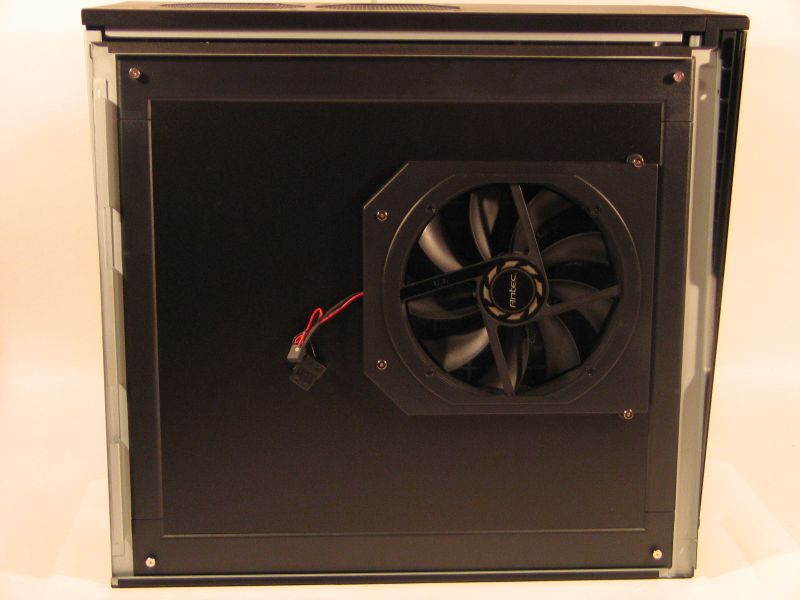
Here on the backside of the left side panel, we can see a couple of the features that make the P193 unique. Most obvious is the 200mm “Big Boy” fan mounted towards the rear-center. Like the other fans included with this case, it has a 3-position speed switch attached, and is powered by a Molex pass-through plug. Also present is the dampening panel, which takes up the entirety of the rest of the panel. Made of a sandwich of 1mm cold-rolled steel and polycarbonate, this panel and its mate on the other side help to deaden any noise that might be generated inside the case, so that less of it escapes. |
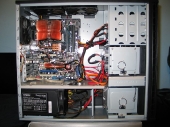 |
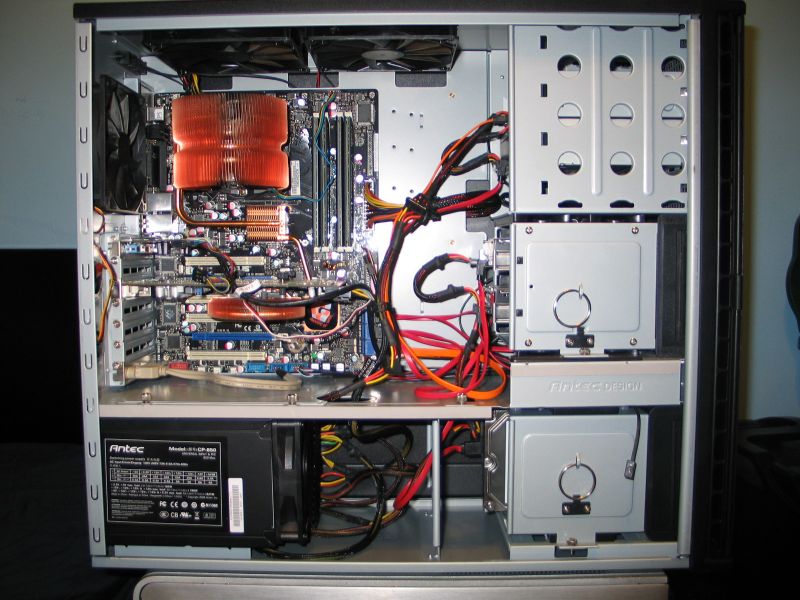
Here we have a fully-functioning system installed, with three hard drives, one optical drive, Antec’s Easy SATA hard drive caddy, a standard ATX board with audio riser, and a fairly massive CPU cooler. Some additional cable-hiding has since been done, but even in this rough state the hardware has plenty of room to breathe. |


[…] gets into the Antec P193 Computer Case/Chassis, the NZXT Zero 2 Computer Chassis/Case and the Azza Solano Computer […]
[…] TechwareLabs looks at the Antec P193 Computer Case […]