Speak Softly and Carry a Big…Case?
When you ask people to think of companies that make quality cases, Antec is one of the names that springs to mind almost immediately. The Antec Sonata case was one of the first commercially produced cases designed to virtually eliminate noise. While the Sonata and its successors do that job quite well, one area they’ve typically fallen short on is cooling. Antec’s answer to this was the P180, a case that managed to be quiet and provide high airflow.
Continuing in this line, Antec’s latest offering is the P193, the first of the Performance One cases to support the Extended ATX form factor. Soon, we’ll have a look at this case, and see whether it delivers on its promises. First though, let’s look at what it’s promising.
Antec’s Take
Larger and more versatile, the Antec P193 stands apart from the competition with room to handle the biggest hardware out there. Together with the cooling features and Quiet Computing™ technologies that the Performance One series is renowned for, the P193 is truly in a class all its own.
Features & Specifications
* Dual chamber design isolates heat and noise: the power supply resides in a separate chamber to isolate heat and reduce system noise
* Fits heatsink fans up to 140mm: the P193’s superior cooling eliminates the need for larger heatsinks
* No power supply included
* Power supply option: comes with a power supply mounting adapter to mount either a standard size power supply or Antec’s exclusive CP Series power supply
* Innovative two-layer, sound-deadening side panels (steel, polycarbonate) and three-layer front door (aluminum, plastic, aluminum) dampen noise and ensure Quiet Computing™
* 11 drive bays
– External 4 x 5.25″; 1 x 3.5″
– Internal 6 x 3.5″ for HDD
* Cooling system:
– 1 rear (standard) 120mm x 25mm exhaust TriCool™ fan
– 2 top (standard) 140mm x 25mm exhaust TriCool™ fan
– 1 lower front chamber (optional) 120mm fan for HDD
– 1 side (standard) 200mm fan for dual graphics cards
– 1 upper front (optional) 120mm fan for HDD
– 1 middle (optional) 120mm fan for graphic cards
* Cable organizers behind motherboard tray minimize cable clutter
* Front-mounted ports provide convenient connections:
– 2 x USB 2.0
– 1 x eSATA
– Audio In and Out (HDA and AC97 compatible)
* Double hinged door opens up to 270º
* 7 expansion slots
* 0.8mm cold rolled steel chassis for durability
* Compatible Motherboards: Mini-ITX, microATX, Standard ATX and Extended ATX
* Net weight: 35.8 lbs / 16.25 kg
* Gross weigh: 41.7 lbs / 18.9 kg
* Case dimensions:
– 20.25″ (H) x 8.1″ (W) x 23.25″ (D)
– Actual clearance needed for width is 9.5″ due to the side panel fan
– 51.4 cm (H) x 20.5 cm (W) x 59 cm (D)
* Package dimensions:
– 13.25″ (H) x 25.8″ (W) x 28.75″ (D)
– 33.7 cm (H) x 65.5 cm (W) x 73 cm (D)
* Whats new in the P193:
– Front door vents, as well as wider vents along the door frame, improve airflow into the chassis.
– Filters and filter doors are integrated as one unit. The doors themselves have been modified to provide greater airflow, resulting in cooler system temperatures.
– Drive bay covers are vented and include air filters to provide better airflow.
– Lower chamber fan is now located in front of the hard drive cage, allowing for installation of longer PSUs as well as easier cable routing between the lower HD cage and the power supply.
– The Big Boy 200™, a 200mm fan, is moved outward to give more clearance for taller heatsinks. Externally removable washable air filter allows for easier maintenance.
Packaging
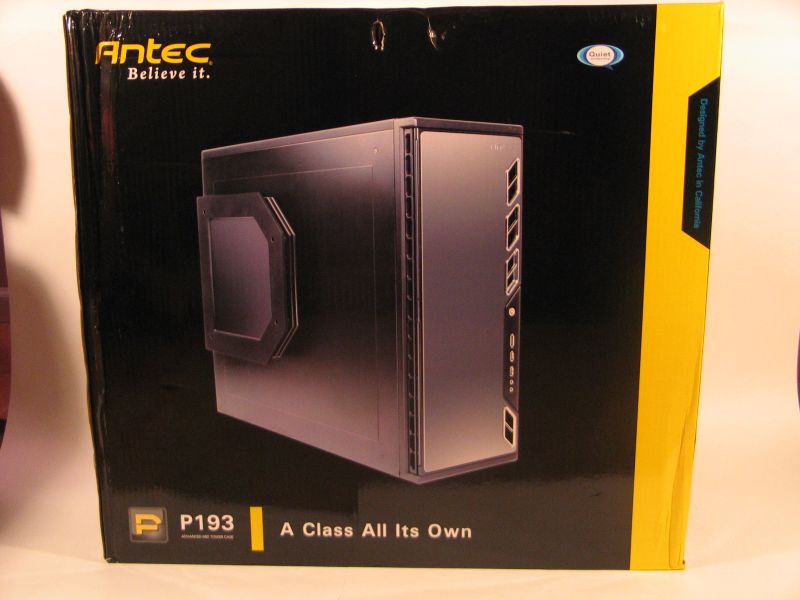 |
For the packaging, Antec has elected to go with a simple, no-nonsense look, showing off the case in their typical style. A black case on a black background would normally be a no-no, but Antec has managed to avoid the problem by using bright lights and contrast tweaking to make the case stand out. Both long sides of the box were identical, so calling one side “front” or “back” is pretty much arbitrary. |
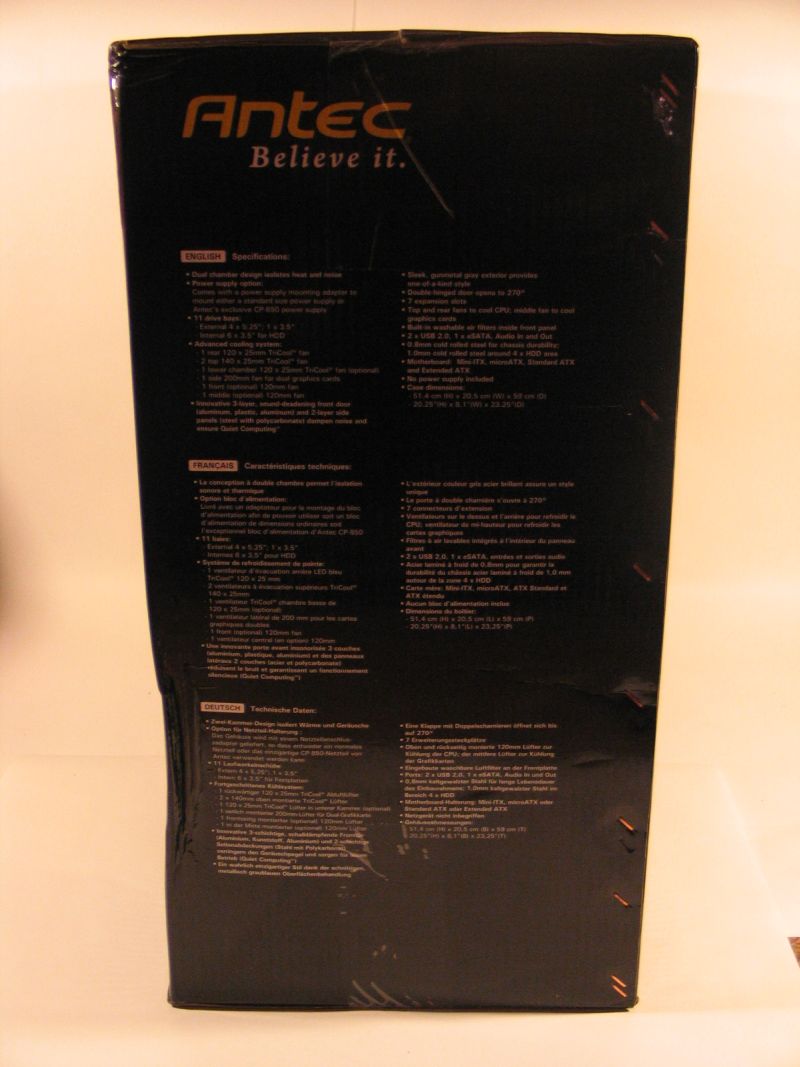 |
The sides of the box have the specifications printed out in three languages, and not much else. Visible here are a few dents in the box, which were noticeable but not severe. Given that these packages are designed to protect the contents, it would take a much bigger dent to worry me. |
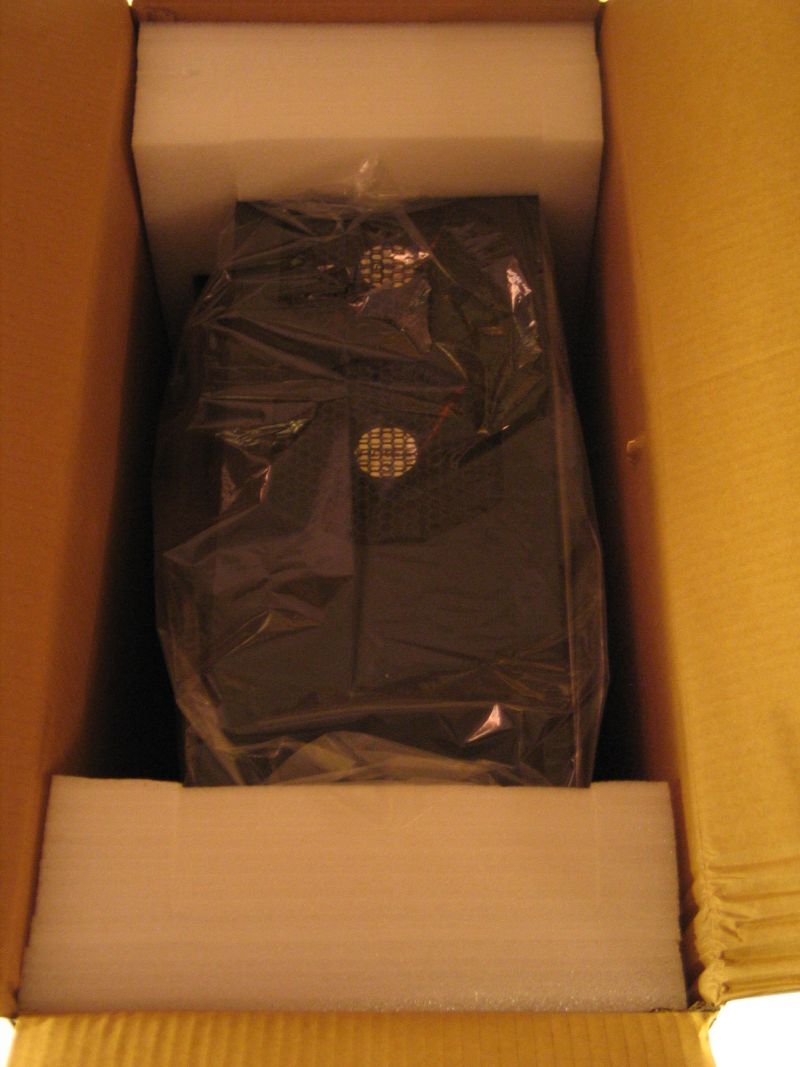 |
Opening things up, we see the case itself sandwiched between two thick styrofoam caps, and covered in a big plastic bag. There were no holes anywhere in the packaging, and the two or three dents corresponded with areas of foam padding, so this case is in as pristine a state as UPS could manage. |
A Closer Look – Exterior
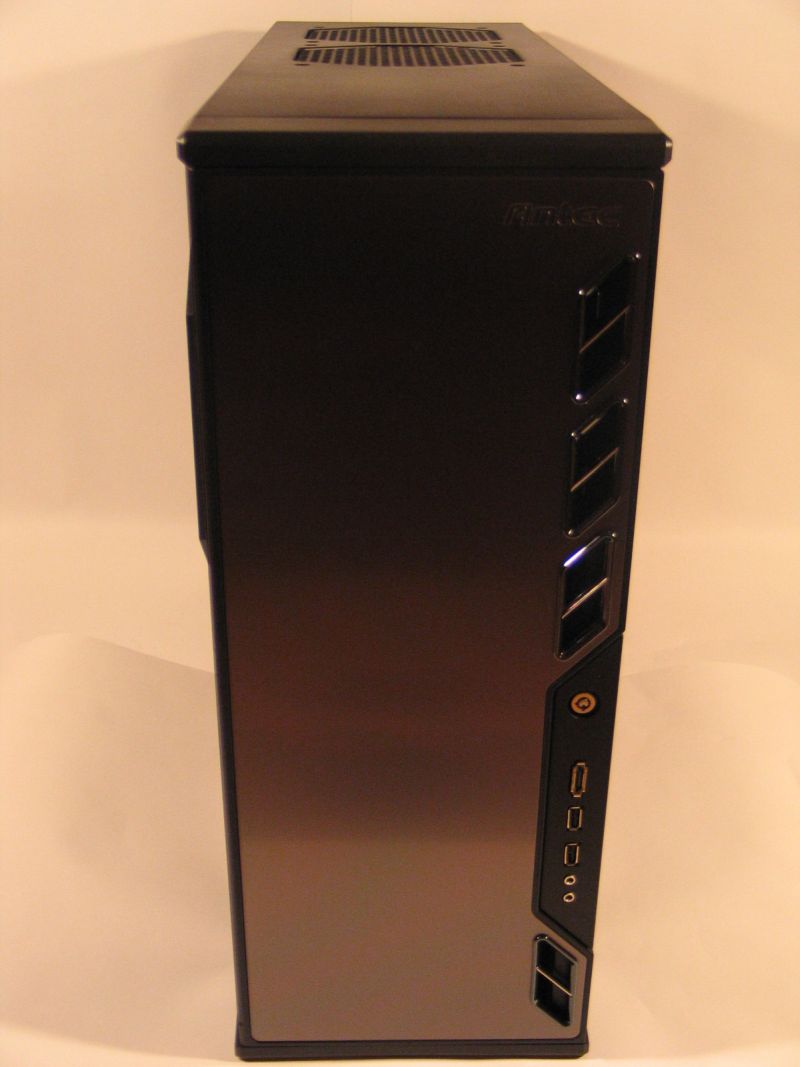 |
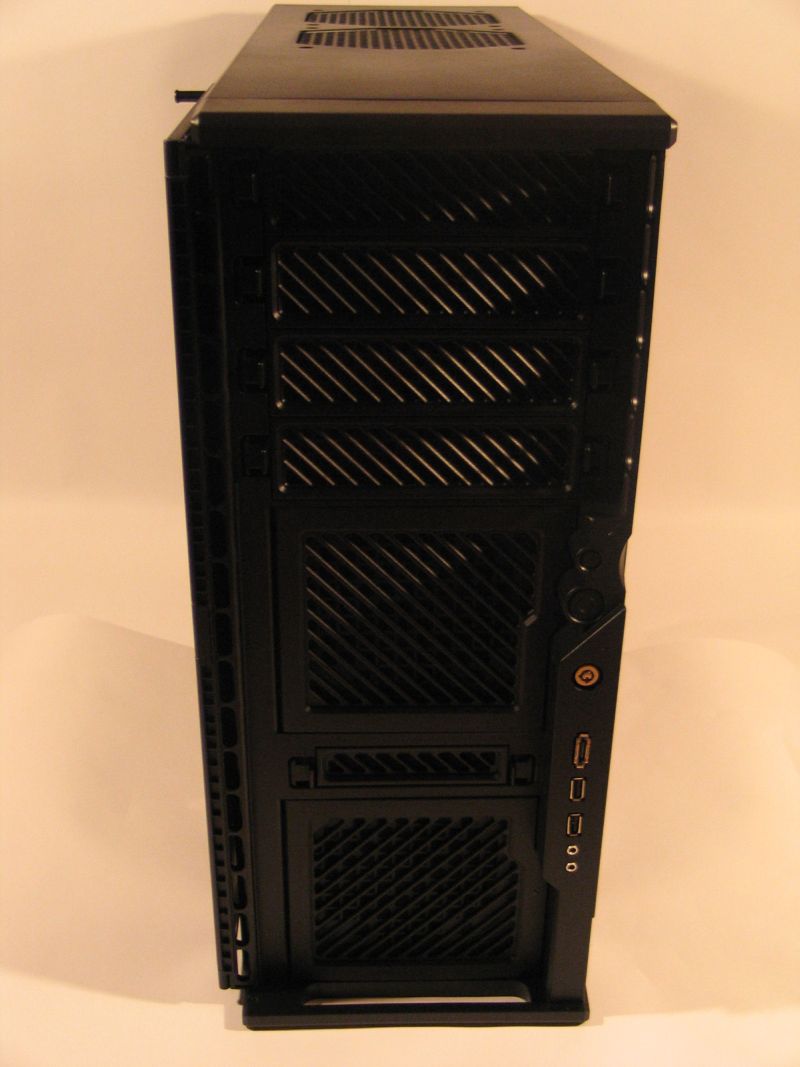
The front of the case features a surface that is both matte and reflective, which is a neat trick. The parallelogram-shaped holes along the right side are partially there for style, partially to improve airflow when the front door is closed. They also allow the HDD activity LED to be seen when the door is closed, which corrects one of the quirks of earlier P-series cases. The front door itself swings a full 270 degrees, and holds itself against the side panel with a hidden magnet, which is nice for those times when you need access to the drives. The cluster in the lower right contains the system power LED, a lock for the front door, one eSATA port, two USB 2.0 ports, and front microphone and headphone ports. |
 |
Opening the front door, we see one of the big improvements over older P-series cases, the front grilles. Older cases such as the P180 had fairly restrictive grilles on the front intake fans, which caused turbulence problems. This time, Antec has ditched those old grilles in favor of a more open design that also incorporates dust filtration. The drive bay covers for the four 5.25″ and one external 3.5″ drive bays also feature this dust-filter design, which aids greatly in keeping the inside of the case free of dust, pet fur, and other debris. |
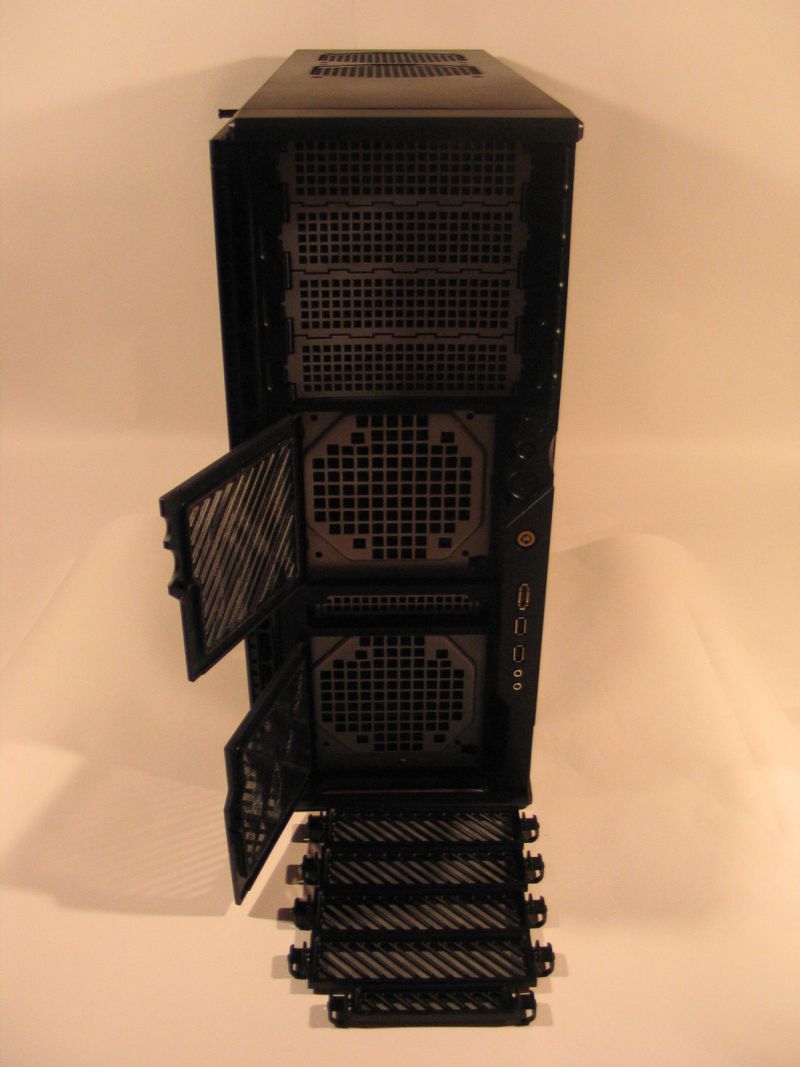 |
With the dust filters removed, we can see the intake grilles on the chassis itself, which are made up of large, square holes in the steel frame. A honeycomb pattern would arguably be more ideal, but this layout is anything but restrictive. The dust covers on the empty drive bays pop off by simply squeezing the latches to either side and pulling, while the doors over the two intake fan slots will pop onto and off of their hinges with just a thumbnail’s pressure near the post. Grab a can of compressed air or a powerful vacuum, and you can get rid of the accumulated dust in just a few minutes. |
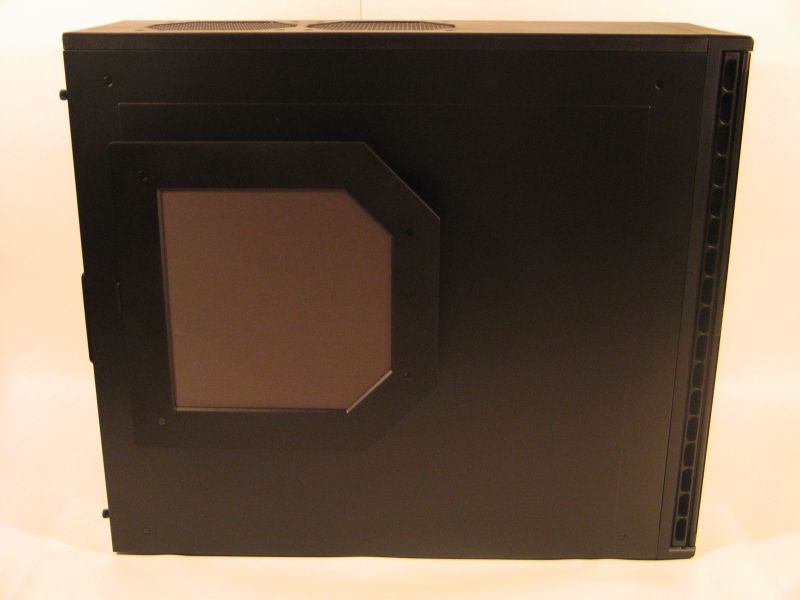 |
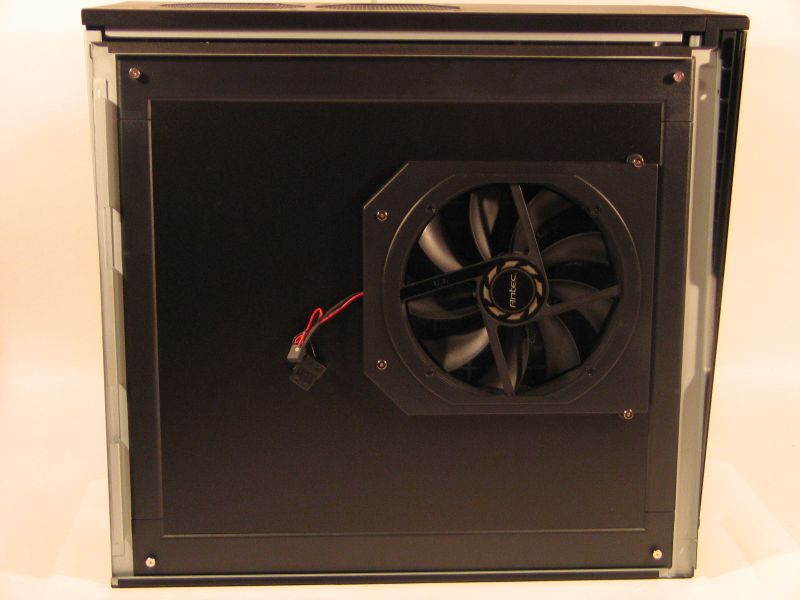
The left-hand side of the case is blank, except for the large module towards the rear that houses the 200mm fan. Antec chose to mount the fan on the exterior of the panel purposefully, in order to accommodate the larger tower-style heatsinks that are often used in quiet or silent systems. The rear of the fan module has a slot for a large dust filter that slides into place over the fan, again to help keep dust out of the system. |
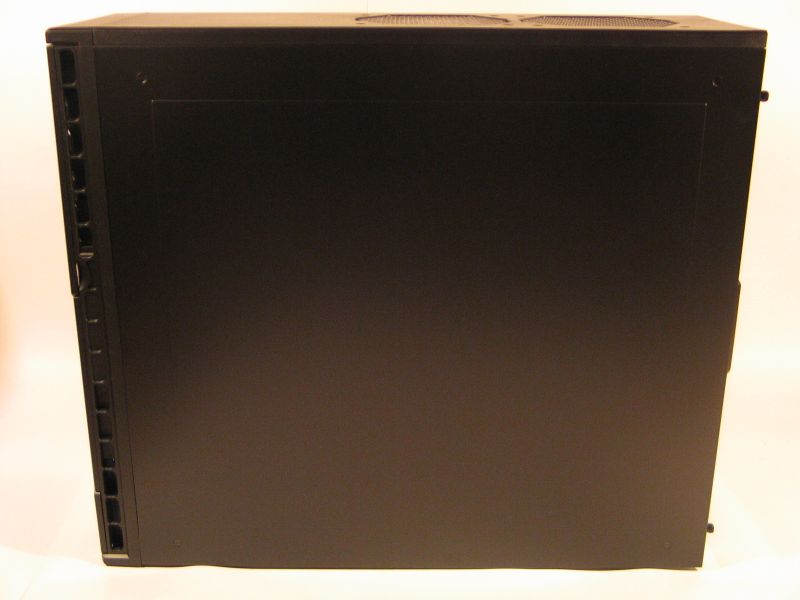 |
The right-hand side of the case is completely blank, which is not unusual. There is a slightly raised portion in the middle, but close inspection with eyes and possibly fingers is required to detect this. Not pictured here are a quartet of silicone feet on the bottom of the case, which help to dampen any vibration that might be transmitted from the floor. |
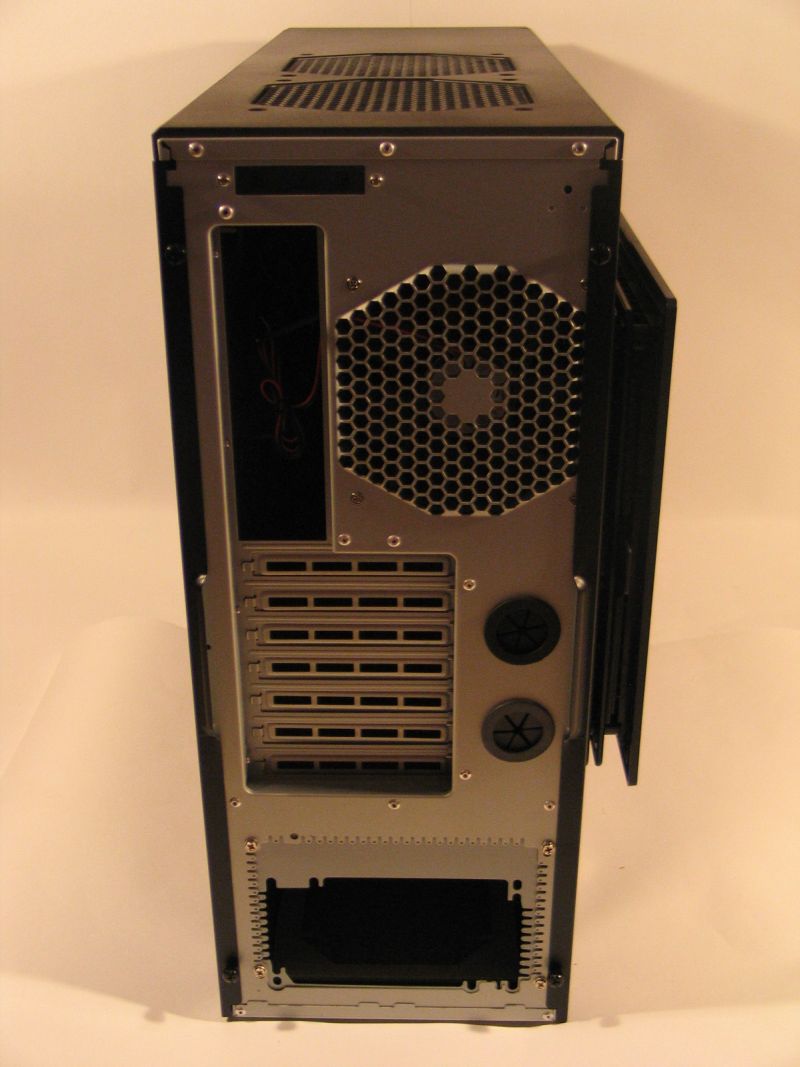 |
The rear of the case is a fairly standard affair in most respects. Each of the side panels is held in place with a pair of thumbscrews, and has a raised lip in the middle for pulling it open. The P193 does not come with its own I/O backplate for the motherboard, but given that the majority of motherboards come with their own, this is not a problem for most. Directly beside the I/O backplate is the grille for the case’s one rear 120mm exhaust fan, which is shaped in a repeating honeycomb-pattern for maximum airflow. At the very top, we see a small plastic panel with three 3-position switches. These switches control the speed of the two top and one rear exhaust fans.Below these, we see the motherboard expansion slots and a pair of circular holes, about 1″ in diameter, fitted with rubber grommets. These allow for easy use of an external pump and radiator, if watercooling is your thing.The PSU bracket deserves special mention, as it is somewhat unusual. The bracket in the case itself is much larger than is called for in the ATX specification, with a metal shim screwed into place with the more usual bracket. This is to accommodate the Antec CP-850, a power supply made especially for the Performance One series of cases. Hit the link for a more in-depth look at this power supply. |
A Closer Look – Interior
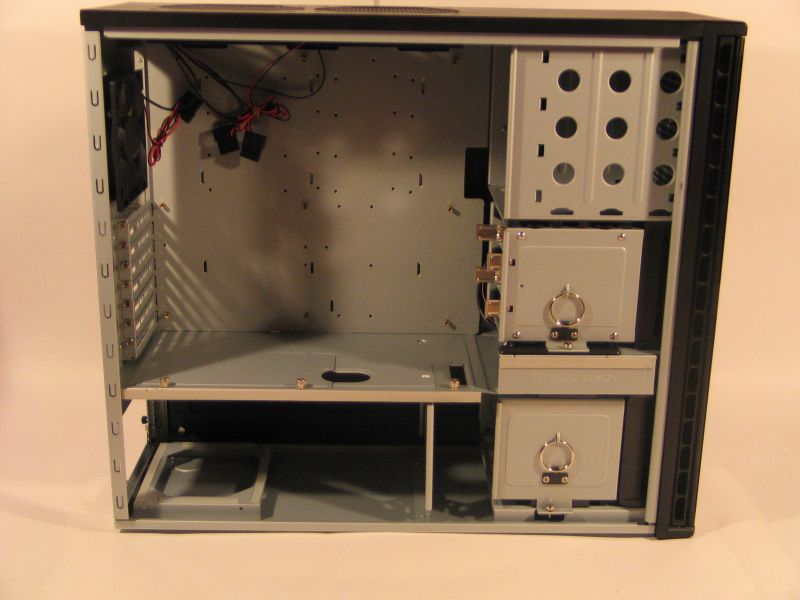 |
Opening up the left-side panel, we get our first look at the guts of the case. The first thing many notice about this case is the divided main chamber. The top portion houses the motherboard and expansion cards, while the bottom portion houses the PSU. The dividing panel between the two has several large holes cut into it, for easy system assembly. Once the cables are routed the way you want them, a pair of steel panels can be put into place and secured with thumbscrews. This leaves holes that are just big enough to accomodate power cables (for the large panel), or SATA data cables (for the small panel). The point of all this, as you might expect, is to isolate the power supply from the major heat-producing parts of the system, reducing the work that the PSU’s fan has to do to keep it cool. Less work means it can run at a lower speed, which means lower noise.The motherboard tray is not removable, but this is intentional. A removable tray is one more possible source of vibration, and thus noise. That said, this may cause issues if you use a large, motherboard-obstructing heatsink, so bear this in mind when selecting components. |
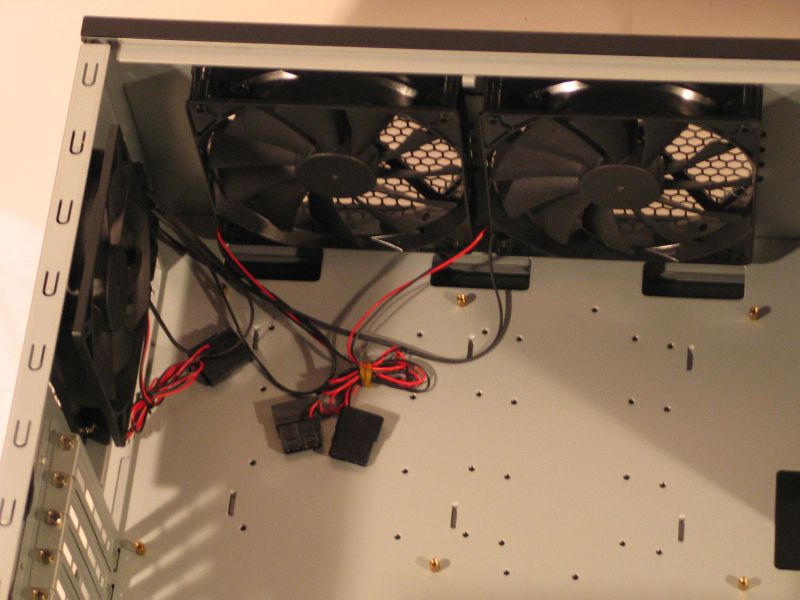 |
The upper two fans measure 140mm across, and like the 120mm fan in the back, they have three selectable speeds. They are powered by standard Molex pass-through plugs, which can be stacked in series to draw power from a single PSU connector, if so desired.Here also we can see the four cutouts in the motherboard tray: three above the top standoff holes and one to the right, next to the 5.25″ drive bays.. With the right power supply, you can use these cutouts to route the power cables behind the motherboard tray, where they won’t interfere with airflow.The motherboard tray itself is generously appointed, with standoff holes for everything from pico ITX all the way up to Extended ATX. Six of the nine standoffs for standard ATX are pre-mounted, and the toolbox has a package with half a dozen more. |
 |
The four 5.25″ drive bays work on a rail system. A pair of rails, four of which are included, is screwed into each drive. The drive itself then slides in from the front, with no bezel-removal or other stupid fiddling required. As shipped, all four bays are covered in front with plates that have the same square-hole grille as we saw in front of the intake fans. These are only attached by small tabs to either side, however, and can be easily removed with metal shears. If you don’t have a pair handy, the plates can also be worked loose by wiggling the plate back and forth until the metal of the tabs breaks. The remaining stubs are generally sharp, but are so far recessed into the slots that you will likely never come into contact with them. |
 |
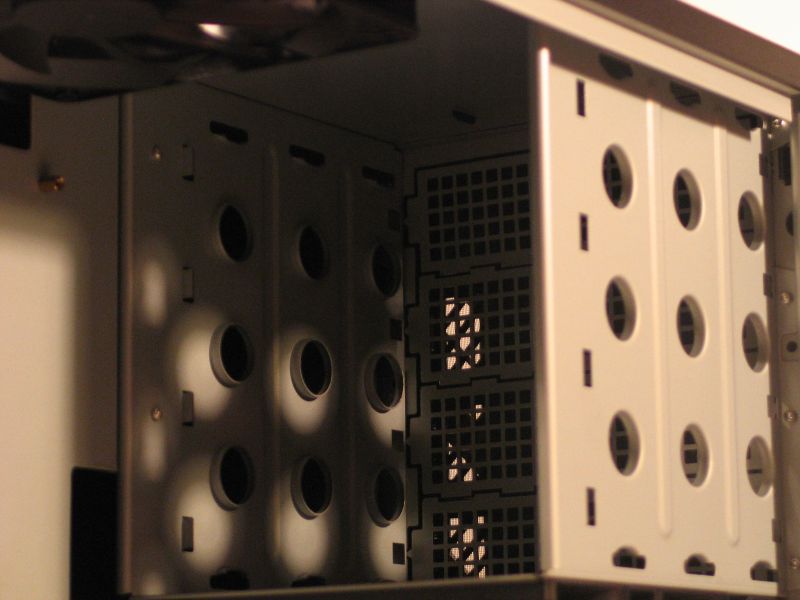
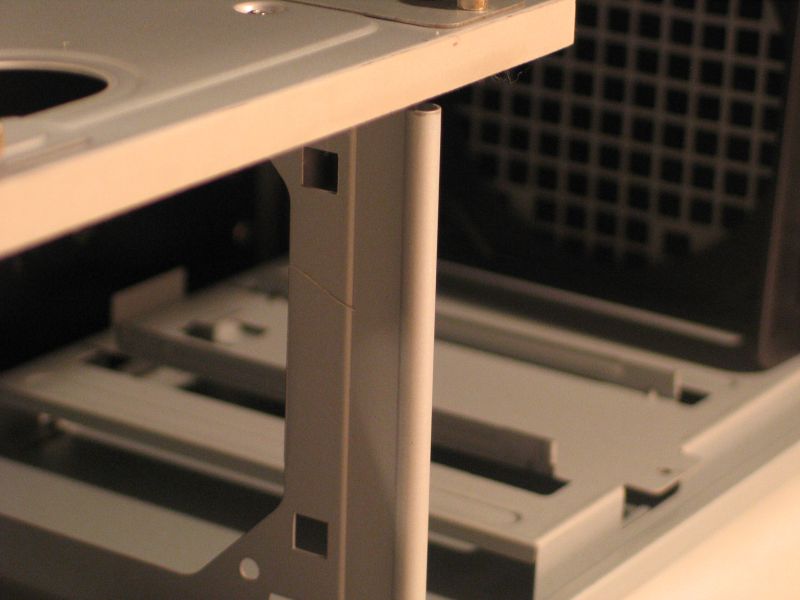
The two hard drive cages are also fairly unique. Each one is mounted on a set of rails that allows it to slide out of the case completely, and is held in place by a single thumbscrew. A large pull-ring on each one facilitates removal, and the pull-rings have a small latch on the side that holds them still when not in use, eliminating any possible rattle. The top cage has space for two 3.5″ hard drives, each on a slide-out tray that latches into place automatically. The drives themselves rest on a quartet of silicone grommets, and are secured to the trays by a set of special long-shafted screws, which are included with the case.The back of the top cage has a plastic toolbox for holding extra screws, grommets and motherboard standoffs. This handy feature finally puts to rest the old question: where to put all the fiddly bits that came with the case?In front of this cage is a mounting bracket for a 120mm front-intake fan. The fan screws into the bracket as it would into the case, and the bracket clicks into place in the chassis. Use of this bracket is required for mounting a fan there, as there are no screw holes for a standard fan mount. The cage itself can also be used as a mount for a 120mm fan, provided that no drives are installed. |
 |
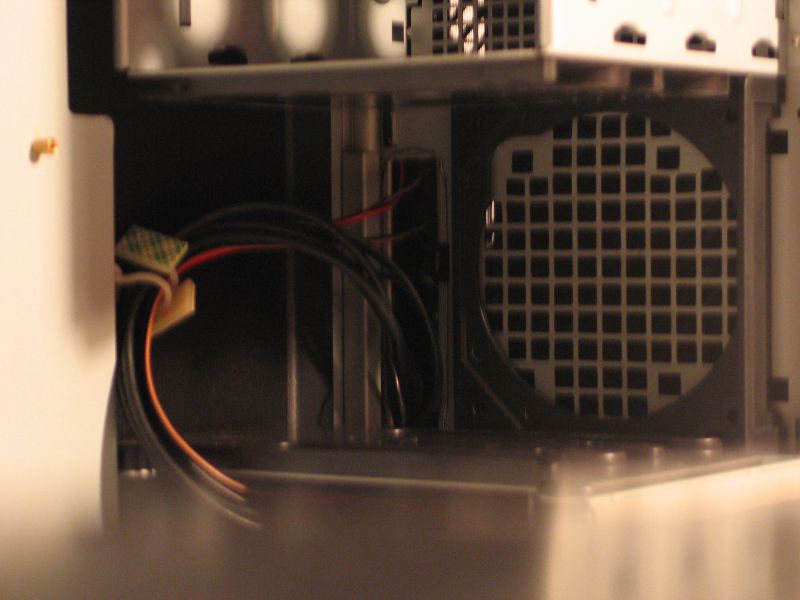
The lower cage has space for four 3.5″ drives, which are mounted sideways with the aforementioned long screws and silicone grommets. In front of this cage is yet another 120mm fan mounting bracket. Behind it, and just forward of the power supply, is a divider that can be used as an alternate location for the fan mounting bracket. |
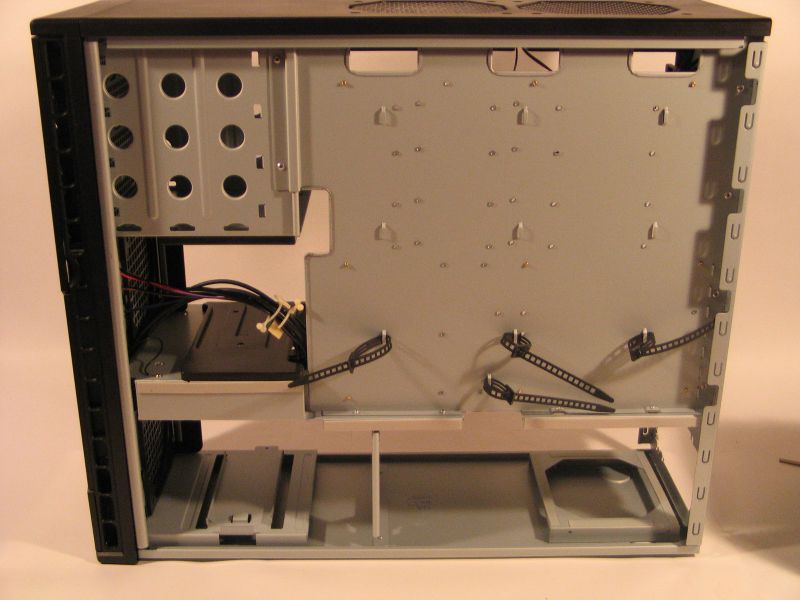 |
Taking off the right side panel, we can see that the rear of the motherboard tray has several slots for attaching zip ties. Also noteworthy is the cutout in the bottom lip of the motherboard tray. This allows for the routing of thick power cables behind the tray without too much trouble. Here, as with everywhere else in the case, the edges are rounded to avoid cutting of cables–or fingers!You may also have noticed the white clips hanging off of the front-panel connector cables. These have a flat panel with a permanent adhesive backing, and can be placed wherever you like to allow for quick bundling of cables, without the use-once-then-destroy method that zipties generally require. Opening and closing the clip requires a simple twist of thumb and forefinger, and once closed it stays where you put it. |
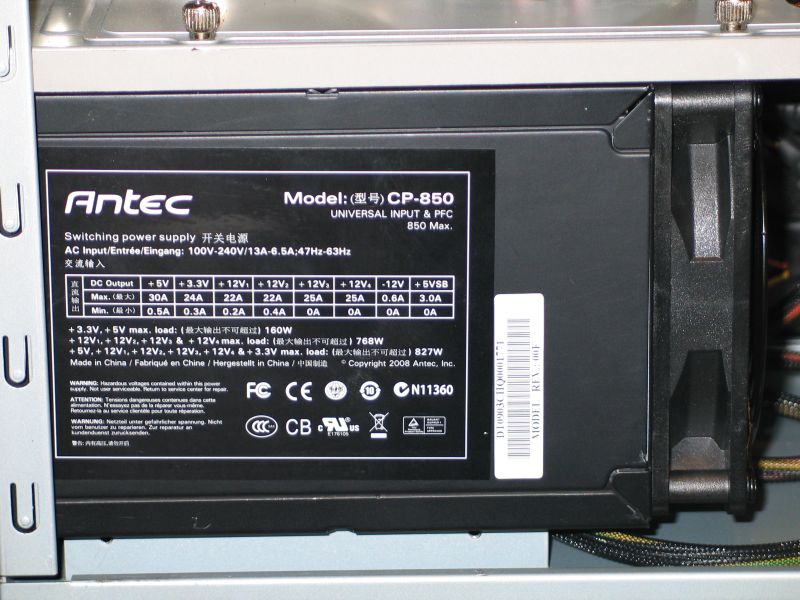 |
Here we see Antec’s CP-850 power supply mounted on the provided base. The edges of the base are covered in a set of silicone strips, which helps to minimize vibration transfer between the power supply and the main body of the case. |
 |
As you can see, there is plenty of space in front of the PSU for routing cables, even with the unusually large CP-850. For size reference, that is a 120mm fan mounted on the front of the PSU, where most make do with a bottom-mounted one that fills the width of the unit! The PSU base does have a large circular hole for accomodating such PSUs, and enough clearance above the floor of the chassis to allow for good airflow. The straight-through design of the CP-850 is better suited to this arrangement, however, as pushing air in a straight line takes less work than pushing it around a corner. |
 |
Here on the backside of the left side panel, we can see a couple of the features that make the P193 unique. Most obvious is the 200mm “Big Boy” fan mounted towards the rear-center. Like the other fans included with this case, it has a 3-position speed switch attached, and is powered by a Molex pass-through plug. Also present is the dampening panel, which takes up the entirety of the rest of the panel. Made of a sandwich of 1mm cold-rolled steel and polycarbonate, this panel and its mate on the other side help to deaden any noise that might be generated inside the case, so that less of it escapes. |
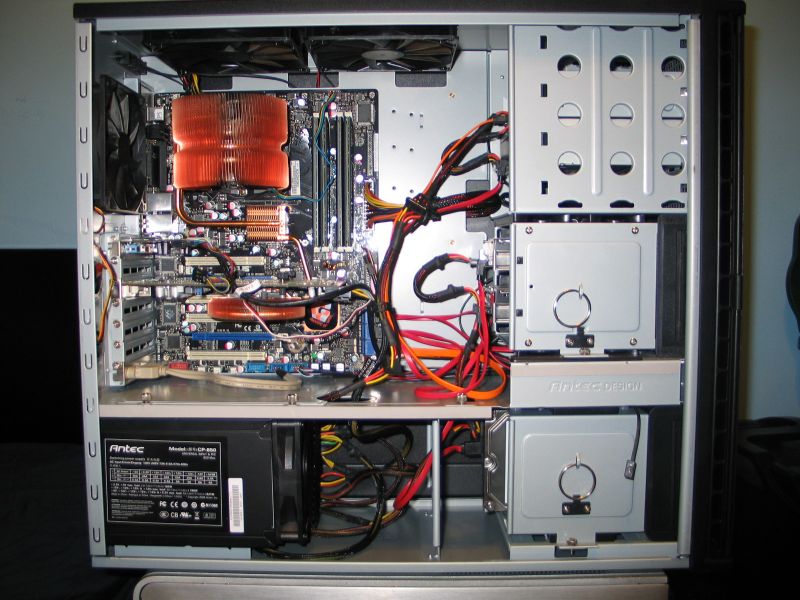 |
Here we have a fully-functioning system installed, with three hard drives, one optical drive, Antec’s Easy SATA hard drive caddy, a standard ATX board with audio riser, and a fairly massive CPU cooler. Some additional cable-hiding has since been done, but even in this rough state the hardware has plenty of room to breathe. |
Additional Thoughts
As you’ve doubtless noticed by now, the P193 has quite a variety of fan mounts. Were one so inclined, one could have up to seven fans installed in this system at once, not counting any mounted on CPU or GPU heatsinks. Obviously this is overkill, and in the manual Antec even recommends not to install any more fans than necessary, to avoid excessive noise. As this system has only one video card and fairly efficient heatsink-fan units on CPU and GPU, I’ve elected to install two intake fans in the front brackets and leave the others unplugged. With these four fans running at ~900rpm at idle, the system is dead silent. I literally cannot hear it running with every other noise-making device turned off, listening in the hours past midnight when nobody else is up. At full load, the CPU and GPU fans spin up to ~1600RPM, at which point I can detect a barely audible hum.
As mentioned earlier, the included Tricool fans have three settings, and while the top two settings are audibly noisier than the low setting, at no point is the noise deafening. That said, the fans don’t really move that much more air on medium than they do on low, and even the high setting is not a huge bump, despite the marked noise increase. These fans are best used on the low setting, where they are dead quiet while still moving a fair amount of air. This applies to all of the fans, from the standard 120mm all the way up to the 200mm “Big Boy”
Another important point to note is the weight. Companies like Silverstone and Lian Li have been producing mostly aluminum enclosures, which help to save on weight. The problem with these light cases is that they are noticeably noisier than their steel cousins, both from increased rattle and from the thinness of the exterior walls. The P193 goes in exactly the opposite direction, opting to use 1mm cold-rolled steel throughout the chassis and in the side panels. Combined with the tight fit and conspicuous use of silicone in key spots, this serves to eliminate vibration transfer–a big component of computer noise. The all-steel construction makes the P193 sturdy and solid—and I do mean solid. Empty, it weighs almost 42 lbs, which combines with the size to make this case awkward to move.
Conclusion
I’ve had an abiding affection for Antec’s Performance One series of cases ever since the first P180 came out, and the P193 only reaffirms it. “Enthusiast” cases are usually flashy, loud and attention-grabbing; the P193 and its cousins are anything but. If you’re looking for a case that will take your noisy beast of a PC and swallow it into a cold, black pit of silence, this is the case for you. From fit and finish to raw performance, this case excels in all areas. At a MSRP of $199, it is definitely on the high-end of the price scale, but is easily worth every penny.


[…] gets into the Antec P193 Computer Case/Chassis, the NZXT Zero 2 Computer Chassis/Case and the Azza Solano Computer […]
[…] TechwareLabs looks at the Antec P193 Computer Case […]