![]()
Introduction
Corsair started out with a solid reputation for high performance RAM. Since then, they’ve branched out into other areas, including cases, power supplies, and even speakers. Throughout, they’ve maintained a consistent reputation for quality that few can match. Today, we’ll be looking at one of their latest offerings in the Obsidian line of computer cases, the Obsidian 550D. A mid-tower case focused on quiet performance, the 550D has several interesting features that we’ll be exploring in-depth.
Unboxing Video
First, let’s have a look inside the case:
–~~~~~~~~~~~~–
A Closer Look
 |
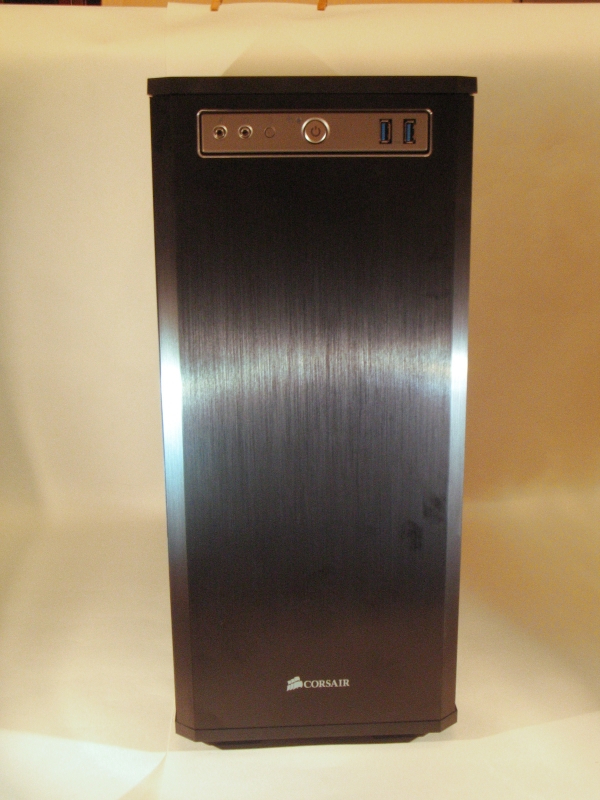 |
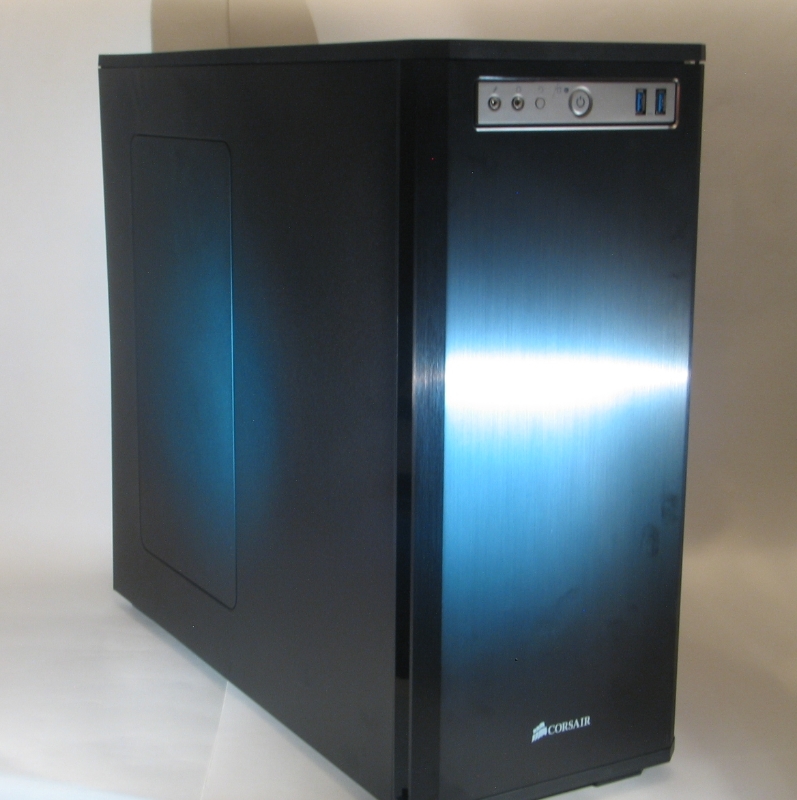
As has been the trend with the Obsidian series, this case presents an impassive front with little ornamentation. Aside from the Corsair badge at center bottom, the brushed aluminum front panel is broken only by a single panel near the top. The central power button and HDD activity light are flanked by headset and microphone jacks on the left, as well as a flush-fit reset button. To the right are the only front I/O ports, two USB 3.0. These are spread out a bit, which helps for accommodating bulky flash drives.
 |
 |
 |
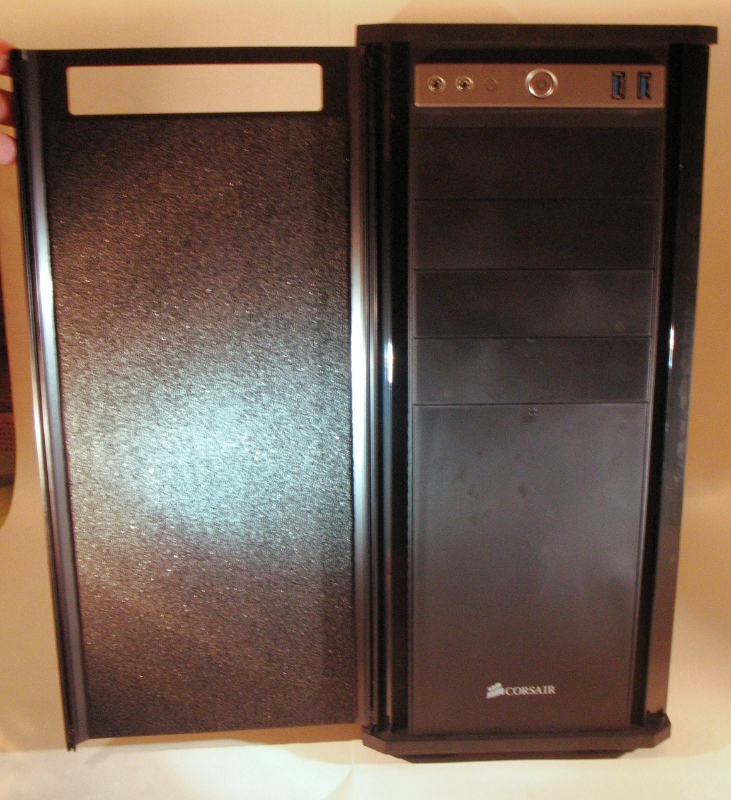
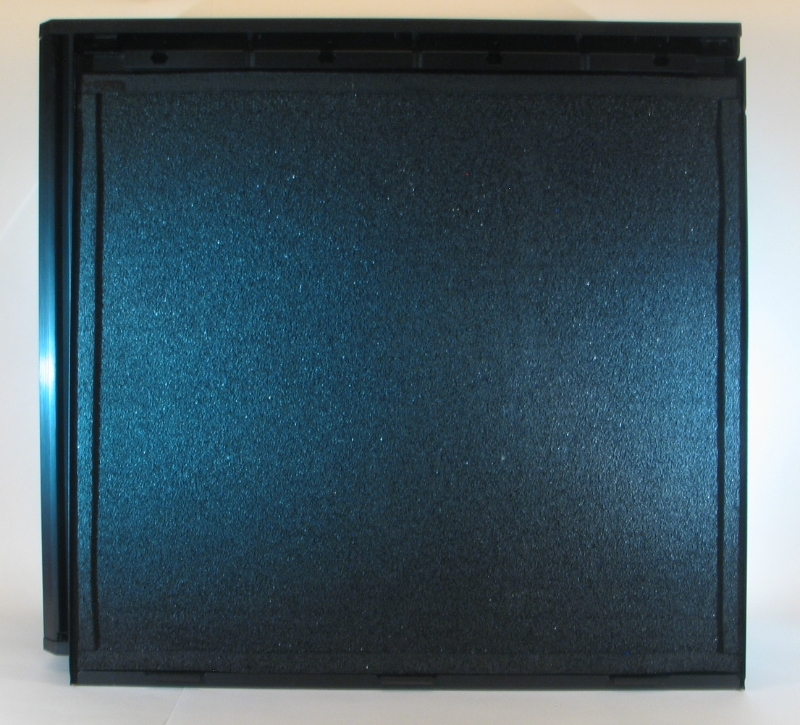
The door, which holds itself shut with spring clips at top and bottom, opens up to an angle of 180°. Interestingly, these clips are present on both sides of the door, allowing it to swing open to either side, or to come off completely. The inside of the door is covered in a thin sheet of acoustic foam, which helps to eliminate any rattling that might otherwise occur. Below the I/O ports, there are four 5.25″ bays, with covers in place. No external 3.5″ bays are present, which is a bit unfortunate.
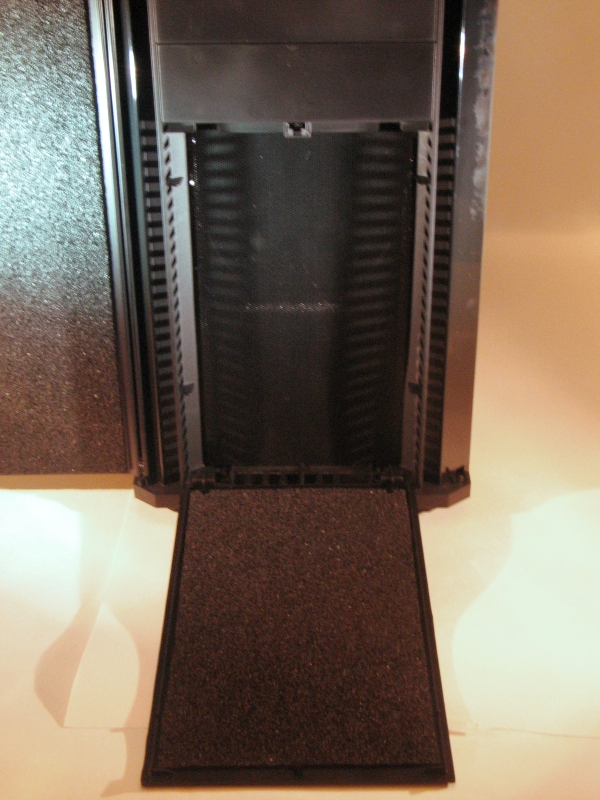
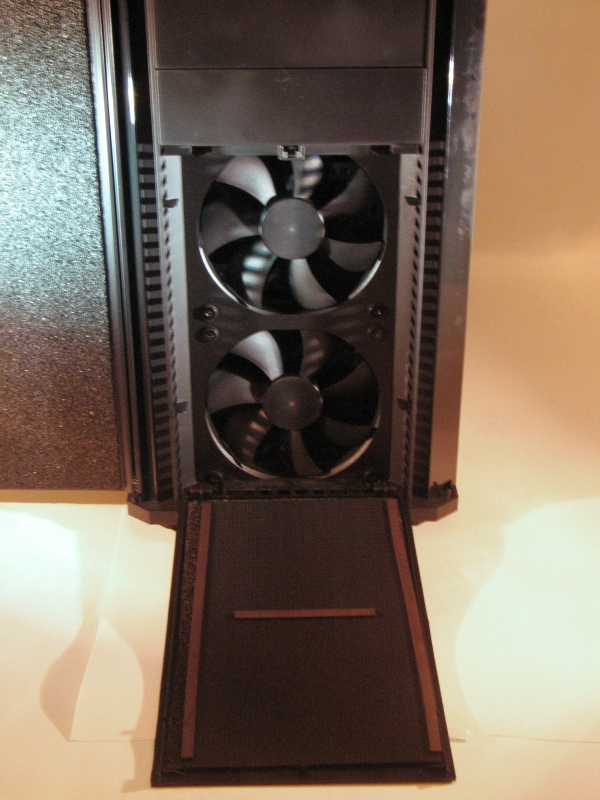
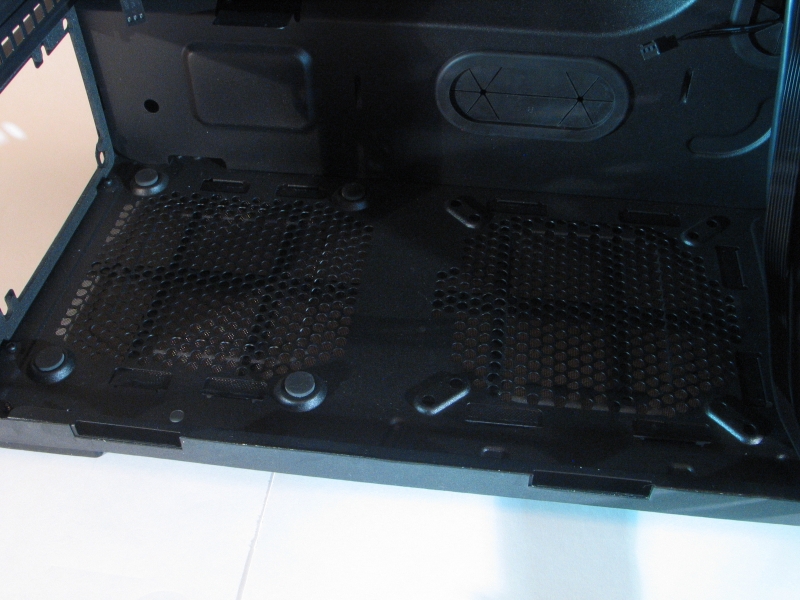
Below the drive bays is a plastic panel that comes off with a press on the latch point at its top. Beneath this we see a mesh filter guarding a pair of 120mm intake fans. In a particularly clever move, Corsair has designed this filter to attach to the frame with thin strip magnets glued on at the edges. This allows the filter to be as thin as possible without compromising coverage, and also facilitates easy cleaning. The fans themselves are plain black, no lights or ornamentation.
 |
 |
 |
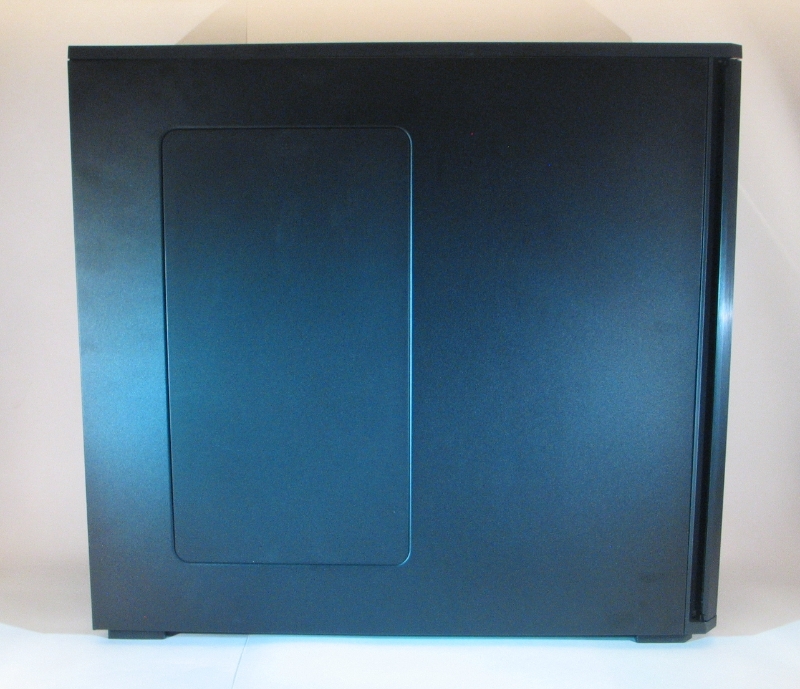
The left side cover panel is similarly stark, with only a single pop-off panel to mar the surface. Beneath this panel is yet more acoustic foam, and rubber grommeted mount points for two 120mm or 140mm fans. On the panel’s backside is yet more acoustic foam.
 |
 |
As you might expect, the right side cover panel is completely blank. Once again, the inside is covered top to bottom with acoustic foam.
 |
 |
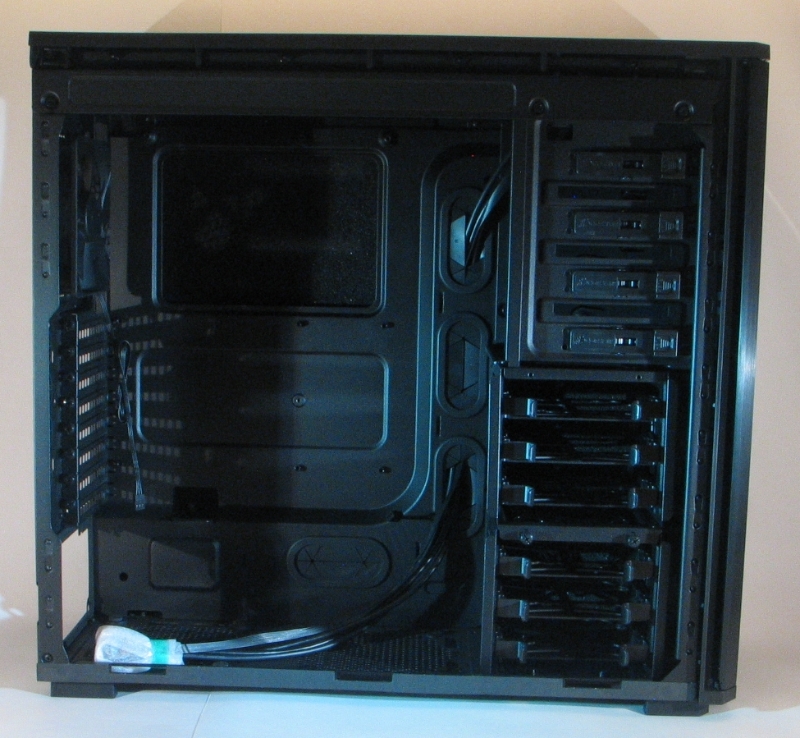
The all-black theme continues on the inside, with all surfaces being either black plastic or black-painted steel. In a nice bit of attention to detail, the front panel header cables and fan power cables are also solid black, keeping them from standing out.
 |
 |
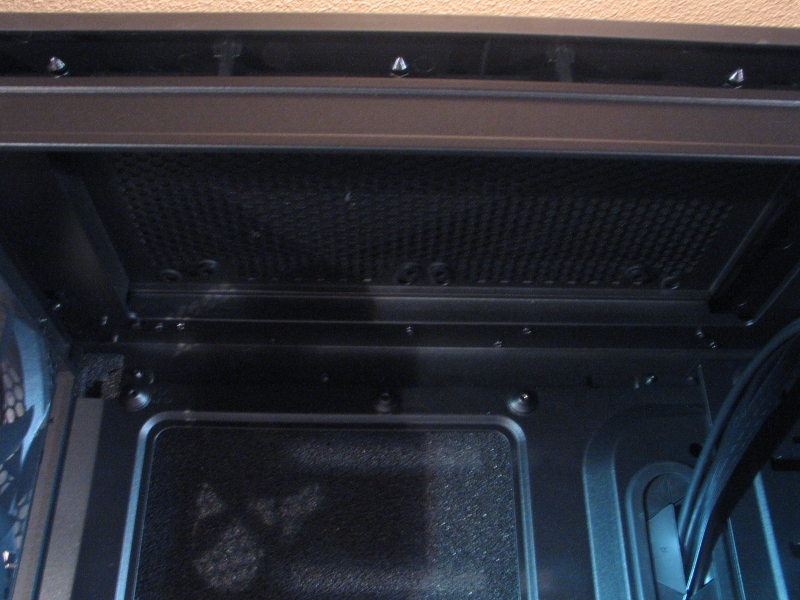
As is fairly common these days, the power supply mount is at the bottom rear of the case, with an intake port situated to allow the PSU to draw in air from outside the case. In front of that is another of the case’s fan mount-points, with mounting holes for 120mm and 140mm fans. Both intake ports are covered by a mesh dust filter, which pulls out from the bottom rear of the case for cleaning.
 |
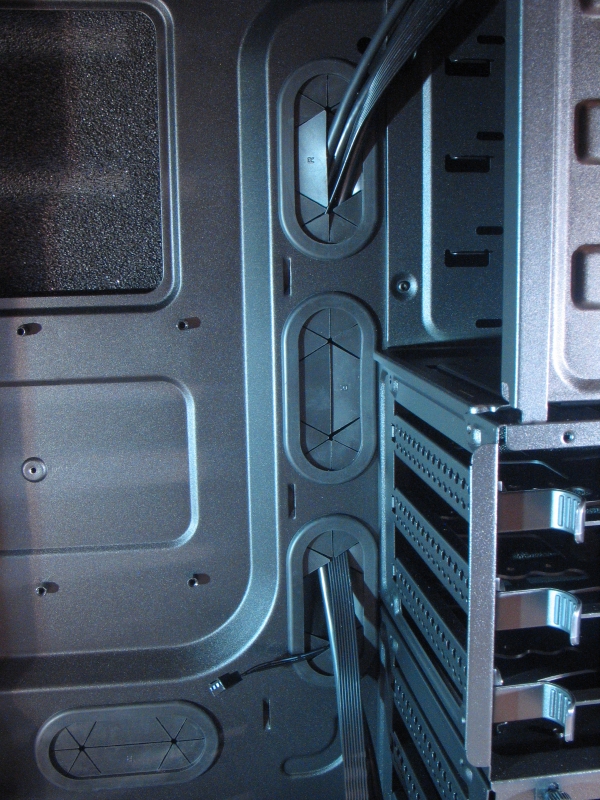
The area near the rear of the motherboard has several interesting features. The expansion slot covers are perforated, to allow for better airflow, and held in place with thumbscrews in the ubiquitous black. Right next to this are four grommeted ports for water cooling tubes. Immediately above is an exhaust fan port, with an included 120mm fan. Like the others, this port can accommodate a 140mm fan instead if you wish.
 |
 |
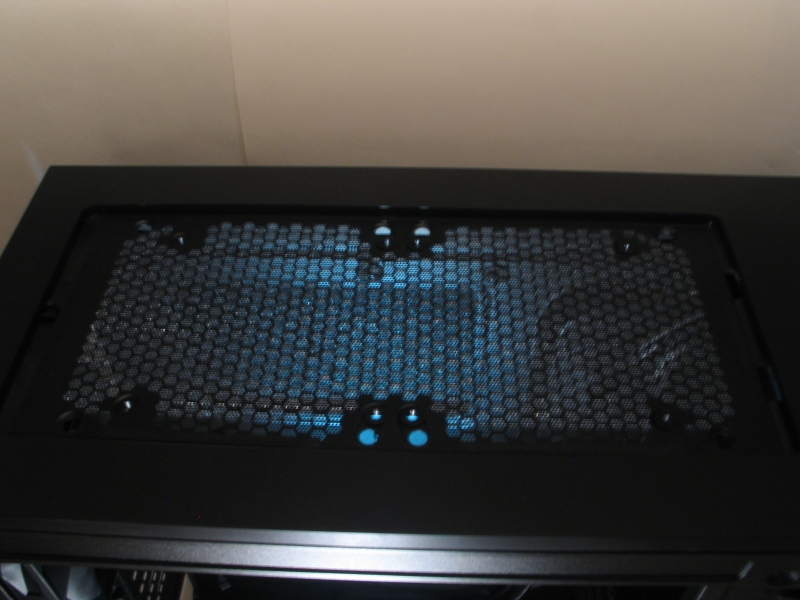
The top of the case has a couple of the dual-size fan ports hidden behind a pop-off panel. Their position in a recess above the motherboard tray makes them ideal for a dual 120mm or dual 140mm radiator, if you’re going the liquid-cooling route.
 |
 |
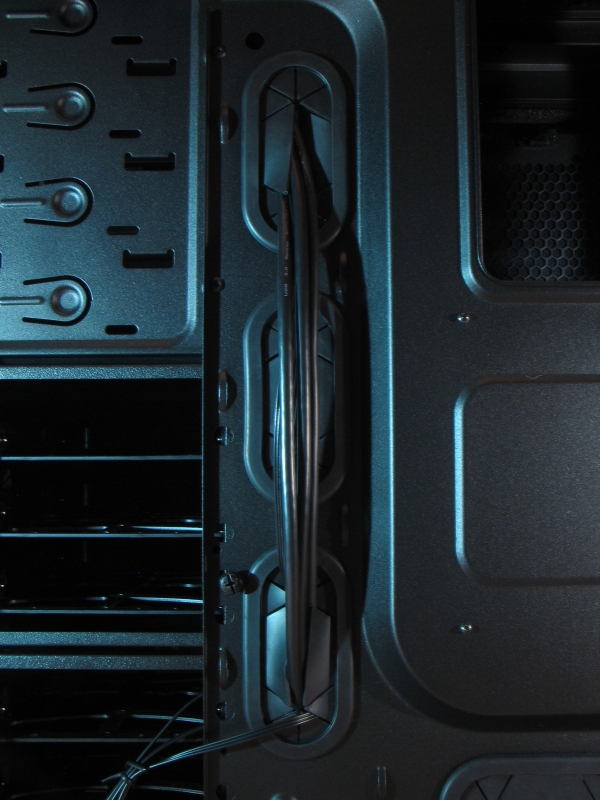 |
One area where this case stands out is in its attention to cable management. The areas below and to the front of the motherboard mounting area are not only accessed through oversized, rubber grommeted holes, but are raised up a half inch or so to allow extra room for cables to be run back there, where they’ll be out of the way.
 |
 |
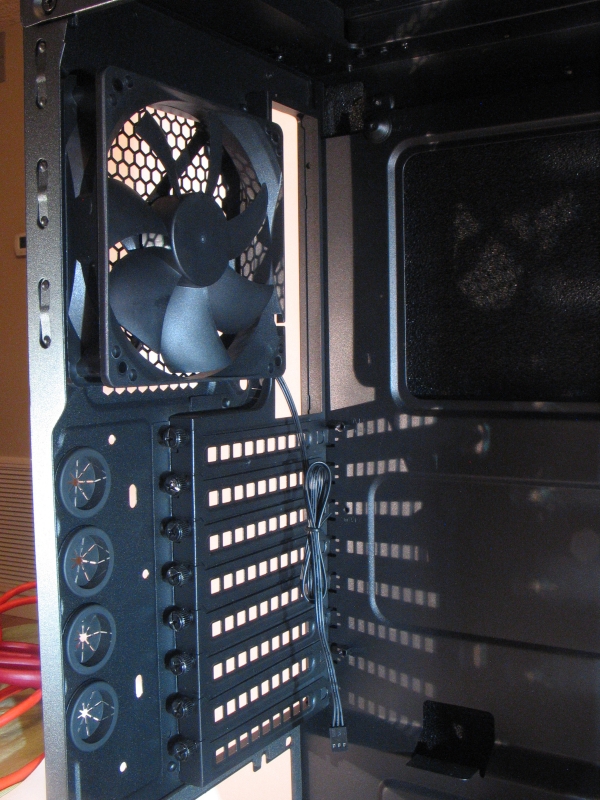
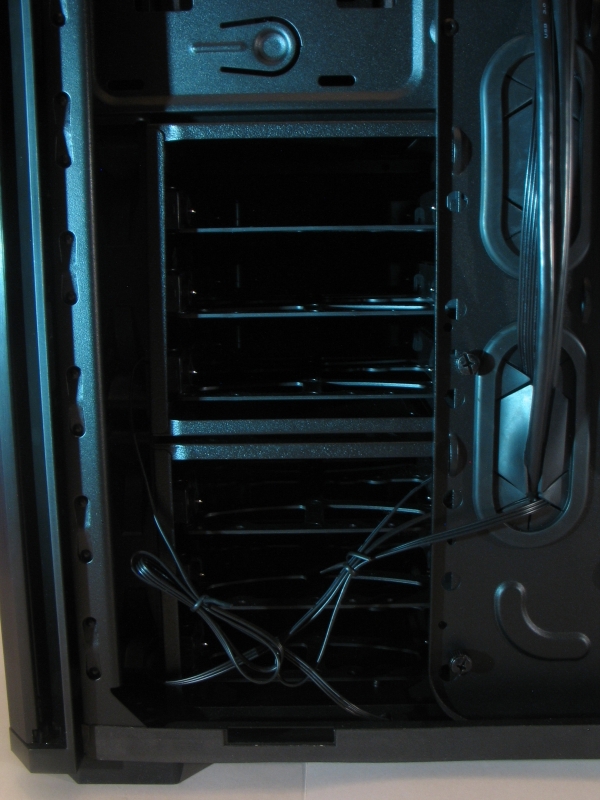
Moving forward, the 3.5″ drive cage is another area worth mentioning. Each of the two drive cages holds three drives each, and can be removed independently after unscrewing a few thumbscrews. These screws were torqued a bit tight in our review model, but a few turns with a Phillips-head screwdriver loosened them to the point where thumb and forefinger could do the rest.
Refreshingly, Corsair has opted to resist the urge to cram the cages full with as many drives as possible. Instead, each drive has airflow space above and below it, with intake fans positioned just in front of the cages. So if you must have six hard drives in your rig, you can rest assured they won’t die prematurely to overheating.
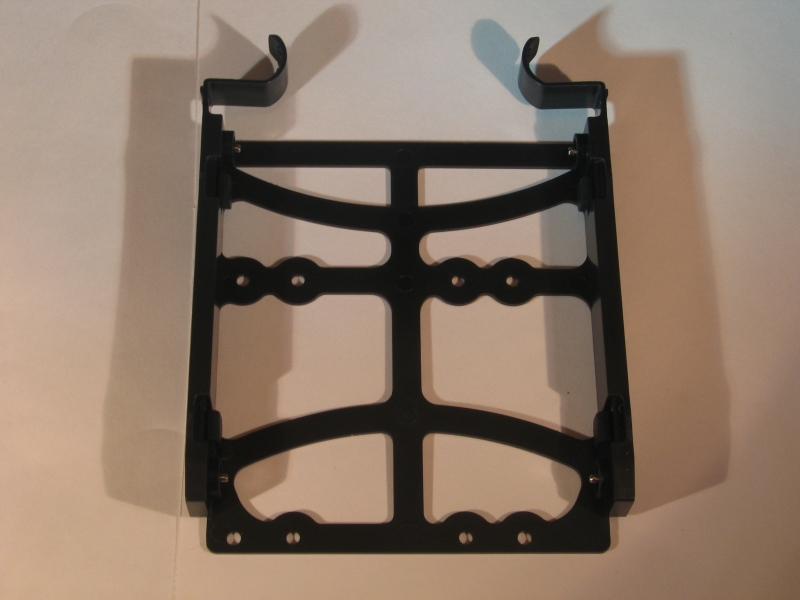
The drive brackets are also worth something of a mention; they can quickly accommodate any 3.5″ drive with no tools, and can also mount 2.5″ drives with a few screws in the bottom.
–~~~~~~~~~~~~–
![]()
Installation
Installing a system in this case was simple and fast. The standoffs for an ATX motherboard were already in place, the intake and exhaust fans were already installed where I wanted them, installing the drives was a snap, even cable routing was easy.
|
 |
The one real snag I ran into was with the drive installation. I wanted to install my SSD in the bottom-most slot, where it would be out of the way, but the right-angle SATA data cables I had to hand made that infeasible. That bottom slot bumps up against the bottom lip of the case, so if you want to put a drive there you’ll need to use a short, straight SATA plug.
Literally everything else about this case was trouble-free, including the parts I thought would be difficult. My 3.5″ SATA drive dock, which normally causes tool-less retention systems in most cases to fail or even break, slotted in without complaint in this case. The front-panel header cables for power switch, reset, &c., which are normally a twisted mass of fiddly mess, were in this case a neat bonded ribbon that I could pull apart as needed to fit my motherboard’s particular layout.
|
Worth a special mention are the front panel audio ports. In literally every other case I’ve tried, these have ended up being unusable due to electrical noise, most often due to sharing a circuit board with the front USB ports et al. In this case, they work flawlessly, eliminating the need for extension cables or awkward reaching around to the back of the case. Kudos to Corsair for getting this right where so many fail.
Conclusion
In operation, this case was incredibly quiet—so much so, I had to double-check that the computer was even on. The only notable noises from this case are the optical drive spinning up and the video card fan when the system is under load, and even those are dampened by the case’s excellent acoustic properties.
The Corsair Obsidian 550D is an absolutely superb case, built with a level of care and attention to detail not often seen even in much pricier offerings. Where others in its price range ($159 MSRP) focus on flash and ostentation, the Obsidian 550D is all about solid, quiet performance. If you’re looking for a quiet compact mid-tower case that doesn’t compromise on performance, this is the one to beat.

[…] Corsair Obsidian 550D Mid-tower Case Review @ TechwareLabs […]
[…] Armor Revo Case @ eTeknix AZZA Genesis 9000 Case @ Legit Reviews Corsair Obsidian 550D Case @TechwareLabs Cooler Master Elite 120 Case @ Cowcotland Cooler Master Silencio 650 Case @Cowcotland Lian Li […]
[…] Genesis 9000 Case @ Legit ReviewsCorsair Obsidian 550D Case @ TechwareLabsCooler Master Elite 120 Case @ CowcotlandCooler Master Silencio 650 Case @ CowcotlandLian Li […]
[…] Corsair Obsidian 550D Mid-tower Case Review @ TechwareLabs […]
[…] Corsair Obsidian 550D Mid-tower Case Review @ TechwareLabs […]
[…] Corsair Obsidian 550D Mid-tower Case Review @ TechwareLabs […]