Test Setup
- Intel Core i7-4960X
- MSI R9 280 and Sapphire 7950 Crossfire
- Asus P9 X79-E WS Motherboard
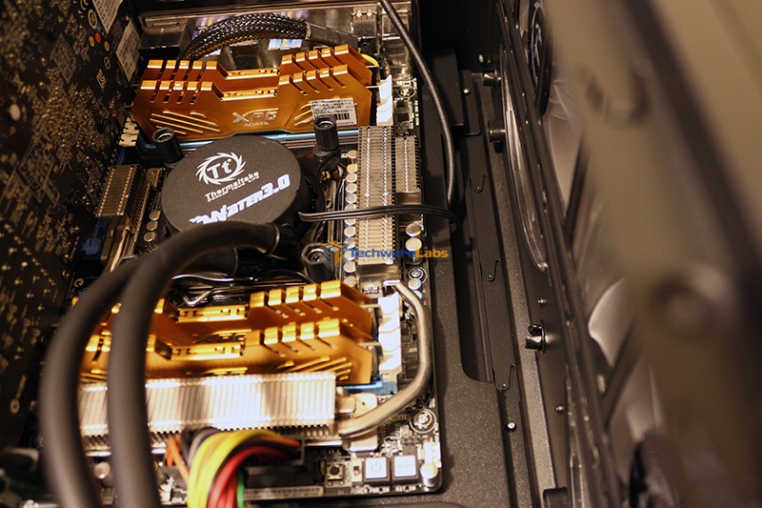
- ADATA XPG V2 DDR3 2600 MHz 16 GB RAM kit
- Crucial MX100 512GB SSD
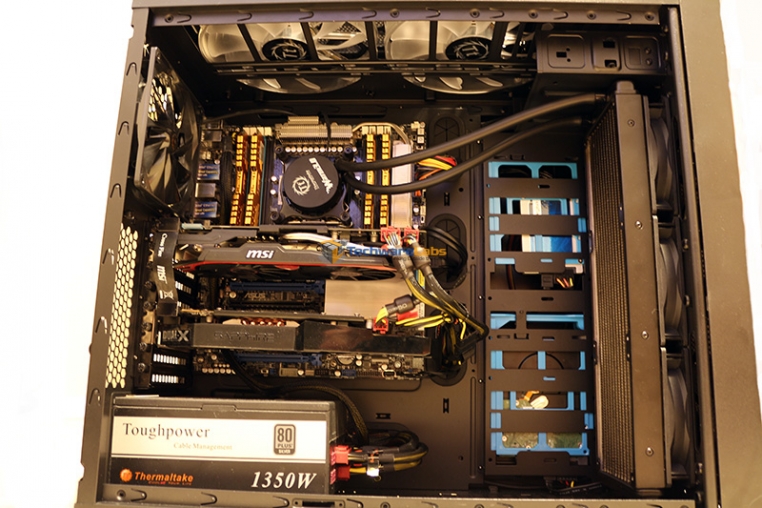
- Thermaltake Core V71 Case
- Thermaltake Toughpower 1350W Power Supply
Installation
 |
 |
The install was a little bit tricky simply due to the large size of the radiator. There were some clearance issues while trying to mount the radiator in the top of the case so I decided to do a front mount instead. The problem here is that the hoses aren’t quite long enough to reach to the front of the case when the rad is against the front and the fans are on the other side. What this meant is that I had to put the fans inside in order to move the radiator closer.
Before you decide to go with a cooler this large you will definitely want to measure everything out and make sure it will fit.
Aside from that though the pump/block mounting is very simple and works great and the hoses bend pretty easily.
Testing
Temperature
 |
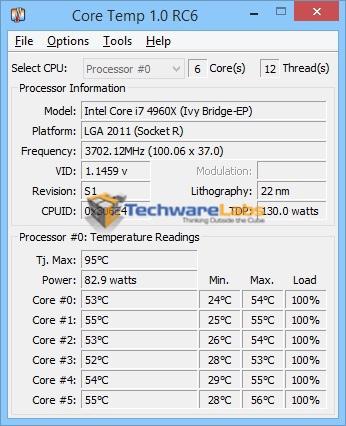 |
| H100 Stock | Water 3.0 Stock |
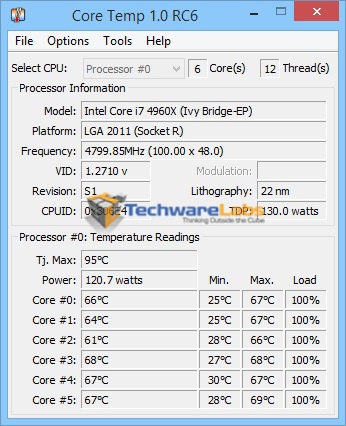
This is what it’s all about here. This is why we went with the biggest, baddest cooler available and why we were willing to struggle and compromise on the mounting. Going up against the Corsair H100 with its 240mm radiator we saw a massive 8-10 degree drop in the max load temps with the 4960X at stock settings. This is a very significant drop and gives a ton more headroom for pushing overclocks even further.
 |
 |
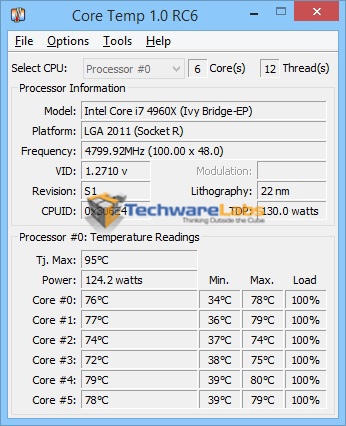
| H100 Overclocked | Water 3.0 Overclocked |
Although it’s nice to see how much our temps at stock settings improved, it’s unlikely that anyone installing a cooler this extreme is going to be running non-overclocked. In fact, I’d wager that most people who are looking for a 360mm radiator cooler are going to try and squeeze every last bit of performance from their CPU.
The 4960X is already a beast to cool at 3.6 GHz. Once you start throwing voltage at it though things can get out of hand quickly. At 4.8 GHz and 1.4V our H100 was struggling to keep the chip below 80. After installing the Water 3.0 Ultimate we saw an immediate 10-12 degree drop across the board. This is an incredible improvement and will most likely allow us to squeeze even more performance out of this chip.
Noise
As I mentioned on the previous page, the included fans push a claimed 99 CFM and spin up to 2000 rpm. When plugged in to a fan controller and turned down all the way, they are virtually silent. As you increase the speed the noise increases quickly until at 100% they are very noticeable. The tone is low pitch so it isn’t really annoying, you’ll just want to make sure you have your game volume cranked up to drone it out. Considering how well it cools, I am more than happy to sacrifice some silence.
The pump is inaudible unless you put your ear to the case. Even though I put it on the fan controller as well, the noise difference between 20% and 100% is nearly indistinguishable.

[…] Thermaltake Water 3.0 Ultimate CPU Cooler Review @ TechwareLabs.com […]
[…] TechwareLabs chills out with the Thermaltake Water 3.0 Ultimate CPU Cooler […]
[…] Thermaltake Water 3.0 Ultimate CPU Cooler Review @ TechwareLabs.com […]
[…] Thermaltake Water 3.0 Ultimate CPU Cooler Review @ TechwareLabs.com […]
[…] Thermaltake Water 3.0 Ultimate CPU Cooler Review @ TechwareLabs.com […]