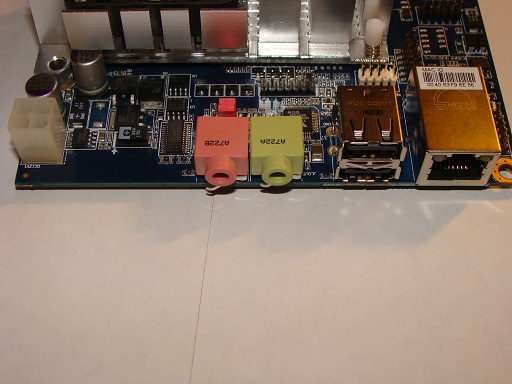
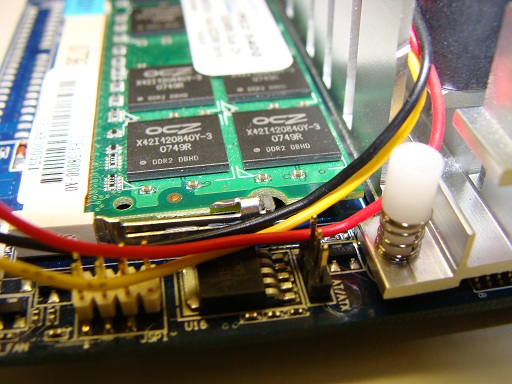
After taking the motherboard off of out enclosure, the the first thing we notice is the fan and the heatsink of the system. The heatsink occupies approximately 40 percent of the space of the board. Around the heatsink, I noticed the headers for VGA and USB. Unlike in the traditional motherboards that have integrated graphics, this motherboard does not have a VGA header mounted directly on the motherboard. Instead to save space the VGA header comes in form of a dongle that is screwed into the chassis while the other end is plugged into the motherboard much like a USB header. Taking a closer look on the back side of the motherboard, you can note the jacks. There are 2 USB jacks, 2 3.5 mm jacks (speakers, microphone), and an Ethernet1000/100/10 port. The white square header on the right represents the main power input into the module. The first two pins are +12 VDC and GND while the other two pins bridge off into the SATA II module we discussed earlier.
 |
 |
 |
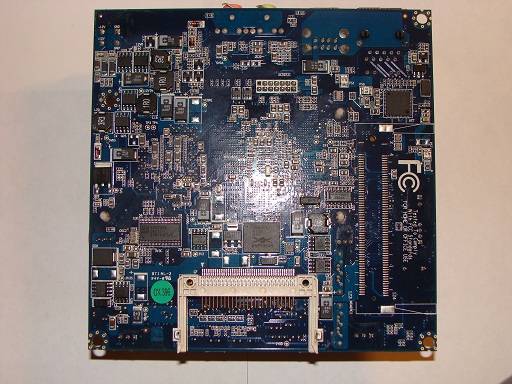 |
I would like to direct your direction towards the lower side of the bottom right picture. This is yet another example of the techniques VIA uses to minimize the space consumption of the system design. Instead of mounting the socket on top of the motherboard VIA decided to mount the component on the bottom and elevate the board from the chassis for accessibility. The Compact Flash Solid State Socket or CF SSD socket provides further expandability of the system by providing the user with the option of installing an operating system on a separate hard drive while using the main 2 drives in RAID.
Installation
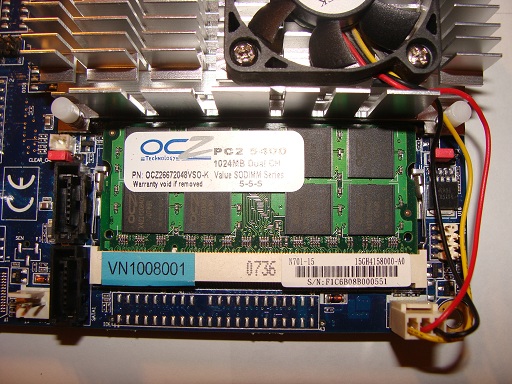
Installation went incredibly smoothly. For my configuration, there were a total of 2 items that were needed to be installed the memory and the hard drive. The VIA ARTiGO A2000 uses SODIMM RAM, same as RAM used in laptops. To satisfy the requirement, I chose to install the OCZ SODIMM PC5400 512 MB memory with 5-5-5 timing. The installation mechanism is also similar to that of the laptop’s. The pins that hold the spring loaded module in place can be lifted and the module pops out, see picture below. Because of the module’s location, (right under the NSD7200-A) the installation can be slightly complicated as the space is rather cramped.
 |
 |
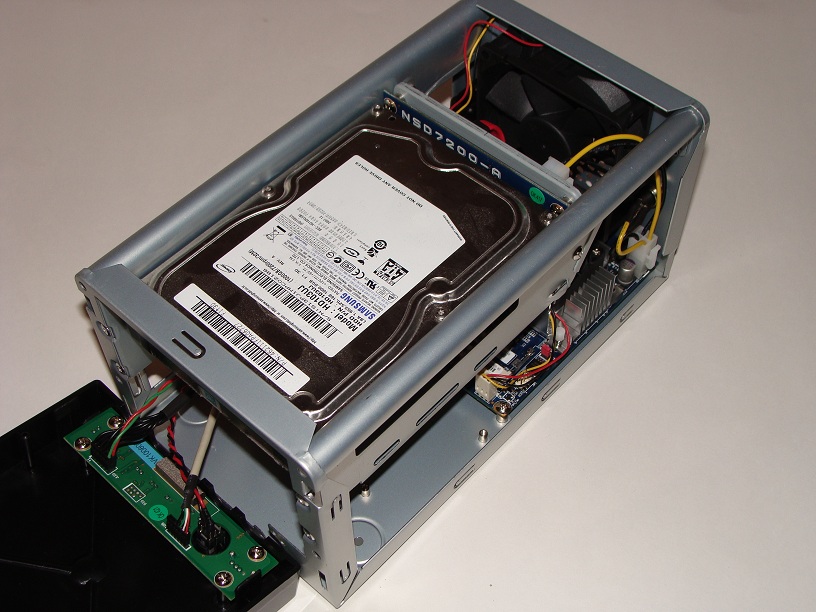
With the RAM installed the difficult part is over. The hard drive simply slides into the chassis thorough the front of the computer and then gets affixed to the chassis as demonstrated in the pictures below.
 |
 |

[…] TechwareLabs spend some time with the VIA ARTiGO A2000 […]
[…] http://www.techwarelabs.com/via-artigo-a2000/ […]
[…] TechwareLabs checks out the VIA ARTiGO A2000 […]
[…] http://www.techwarelabs.com/via-artigo-a2000/ Title: VIA ARTiGO A2000 @ […]
[…] Via [TechwareLabs] […]
[…] http://www.techwarelabs.com/via-artigo-a2000/ Title: VIA ARTiGO A2000 @ […]
Social comments and analytics for this post…
This post was mentioned on Twitter by TWLDotCom: Review: VIA ARTiGO A2000 – http://bit.ly/39a67e…
[…] This post was mentioned on Twitter by ChrisTWL and MikeS_TWL, Tom Gowing. Tom Gowing said: Review: VIA ARTiGO A2000 – http://bit.ly/39a67e […]