Cooler Master Storm Trooper Unboxing and Install
Today I’m going to be doing an install in the Cooler Master Storm Trooper.
This full Tower from Cooler Masters Gaming/ Enthusiast lineup should be pretty interesting:
Here are the Specs:
FEATURES
- The first full tower chassis with two 90 degree rotatable 4-in-3 HDD modules
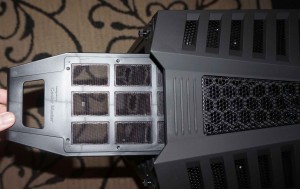
• The first with an easy-to-carry handle, and hidden tool box for storing private goods
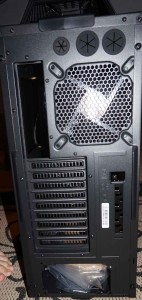
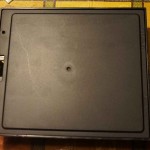
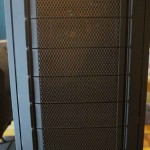
• Removable dust filters on bottom and top intakes
• A built in fan controller for cool and quiet operation
• Supports up to 12 hard-drives for future upgrades
• Convenient external 2.5” HDD/SSD X-dock
• Supports high-end hardware, XL-ATX Mainboards and Quad SLI/CF with dual slot VGAs
SPECIFICATIONS
- Model Number SGC-5000-KKN1
- SGC-5000-KWN1 (Windowed)
- Type Full Tower
- Dimensions L x W x H 5 x 250.0 x 605.6 mm
- 8 x 9.8 x 23.8 in
- Motherboard Form Factor Micro-ATX, ATX, XL-ATX
- Material Steel, plastic, mesh
- Colors Black internal
- Black external
- 25” Device Bays 9 external
- 5” Device Bays 8 convertible from 3x 5.25″ to 4x 3.5″ cages
- 5” Device Bays 5 internal
- 8 convertible from 3.5″” bays
- Front I/O Panel USB 3.0 x2
- USB 2.0 x2
- eSATA x1
- Audio In & Out x1
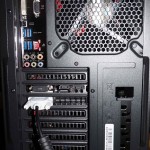
- Rear Expansion Slots 9+1
- Fan Cooling Mounts Front: 120mm x2
- Top: 200mm x1, or 140mm x2, or 120mm x2
- Rear: 140mm x1, or 120mm x1
- Bottom: 120mm x2
- Included Cooling Devices Front: 120mm Red LED fan x2, 1200 RPM, 17 dBA
- Top: 200mm Black fan x1, 1000 RPM, 23 dBA
- Rear: 140mm Black fan x1, 1200 RPM, 19 dBA
- Power Supply Bottom Mount
- Standard ATX PS2 / EPS 12V
- Max CPU Cooler Height 186 mm / 7.3 in
- Max GPU/PCI Card Length 322 mm / 12.7 in
- Special Features Carrying Handle
- Weight
- 7 kg / 30.2 lb
- Packaged Dimensions 635 * 280 * 650 mm
- 0 * 11.0 * 25.6 inch
- Packaged Weight 5kg / 34.2 lbs (SGC-5000-KKN1)
- 3kg / 33.7 lbs (SGC-5000-KWN1)
- Warranty 2 years
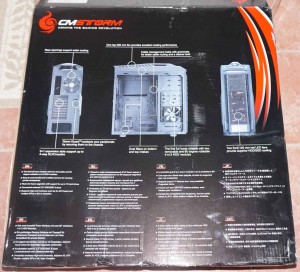
The external packaging is standard design box, nothing particularly extraordinary here, specs and a picture of the case. You cannot really ask for more than that.
Once the box is open you’ll find the case is wrapped in a bag as well as the standard Styrofoam blocks.
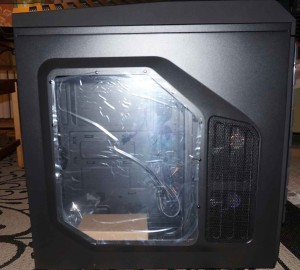
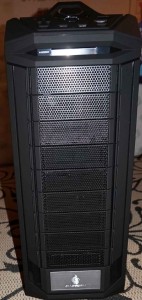
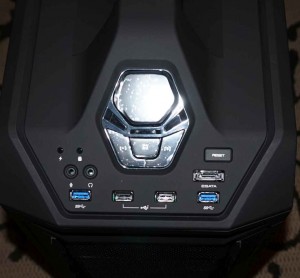
Out of the packaging the case looks pretty nice. The placement of the ports and dock at the top of the case are convenient for the under desk placement you’ll likely have with a full tower.
 |
 |
 |
 |
 |
 |
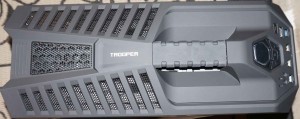
I noticed pretty quickly that the handle has a nice rubber underside so if you do decide to port the beast around its nut cutting into you like some other handled cases I have used. I also see that the Top and Bottom dust filters can be removed very easily cleaning.
 |
 |
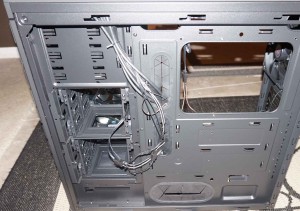
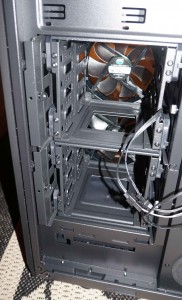
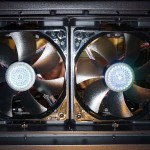
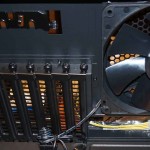
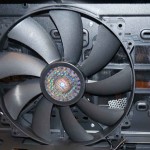
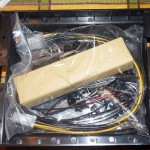
Opening the case up is straightforward with the thumb screws on both the left and right panels. Inside I remove the brown box that I assume contains the case hardware. I also notice the wire bundle through the cable management grommets. Four Internal fans will give this case plenty of airflow. Certainly more than enough for standard builds. I am also happy to see the liberal usage of thumb screws inside the case. The hard drive caddies as well as the card slots are both outfitted.
(Pictures 9-13 19,20,21)
 |
 |
 |
 |
 |
 |
 |
 |
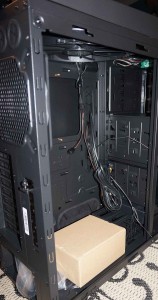
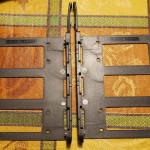
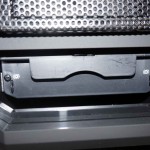
Once the initial looks are done I begin prepping the case for the install. Opening the brown box I was surprised to see only hard drive trays. It took me a second to realize the screws and other hardware were in a special compartment at the base of the case. I like this compartment; it will give me a place to store all the cd’s and warranty cards for the system, as well as permanent storage for spare parts.
 |
 |
 |
Here is the system I will be installing in this case:
ASUS Maximus Hero VII
Intel Core i7-4790K
Thermaltake NiC C4
G Skill Trident DDR 2400 16GB
EVGA GeForce GTX 970
Samsung 840 EVO 250GB SSD
Antec HCG-850 PSU
2 additional hard drives
I start by installing the motherboard posts. I only mention this because I used the ones from the hardware in the box and I still had to crank them in. While this isn’t uncommon I have personally come to expect more from cases in this price range. Motherboard and IO plate go in without an issue.
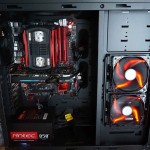
This was a build for a client so I wanted to make sure the cabling was clean up front. I was pleased to find that I had the option to install the power supply in either direction allowing me to maximize cable length. This came in handy because the 8 pin had to reach to the very top of the case. The grommet placement in the case as well as the soft rubber was all very helpful I didn’t have any issues routing my cables where I wanted.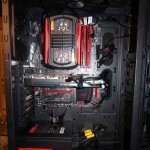
 |
 |
 |
 |
 |
 |
Once I installed everything and got my cables routed, I went to attach the panels. I had to work to get the right (motherboard side) panel attached because of the shallow depth and the cabling that was back there. Again this is not uncommon; I would just like to see more case manufacturers give this area more depth. I was only using 4 SATA cables and three power lines this case supports well over 10 2.5/3.5 devices cabling could very easily become unmanageable in a complicated build.
Once together the unit looks very good. The control panel for the fans and lighting is easy to use and will be great for my customer. This was an expensive case for the issues I had. I feel the 2.5 External dock could be removed and that cost could be put into more cable room behind the motherboard. The Storage drawer with the door is a nice touch. Overall I am Happy with the build and so is the client.
I would recommend this case to people with a simple build and a decent amount of cash. It’s good looking but at $149 I like some other cases better.

You must be logged in to post a comment.