![]()
| Type | ATX Mid Tower | |
| Color | Black | Any color, so long as… |
| Dimension | 16.85″ X 7.09″ X 16.06″ | Fairly small, but smaller on the inside. |
| Weight | 10.6lbs | Quite light. |
| Power Supply Mounted | Bottom | It’s trendy, and airflow can be better. |
| Motherboard Compatibility | Micro ATX, ATX | Barely fits an ATX motherboard. |
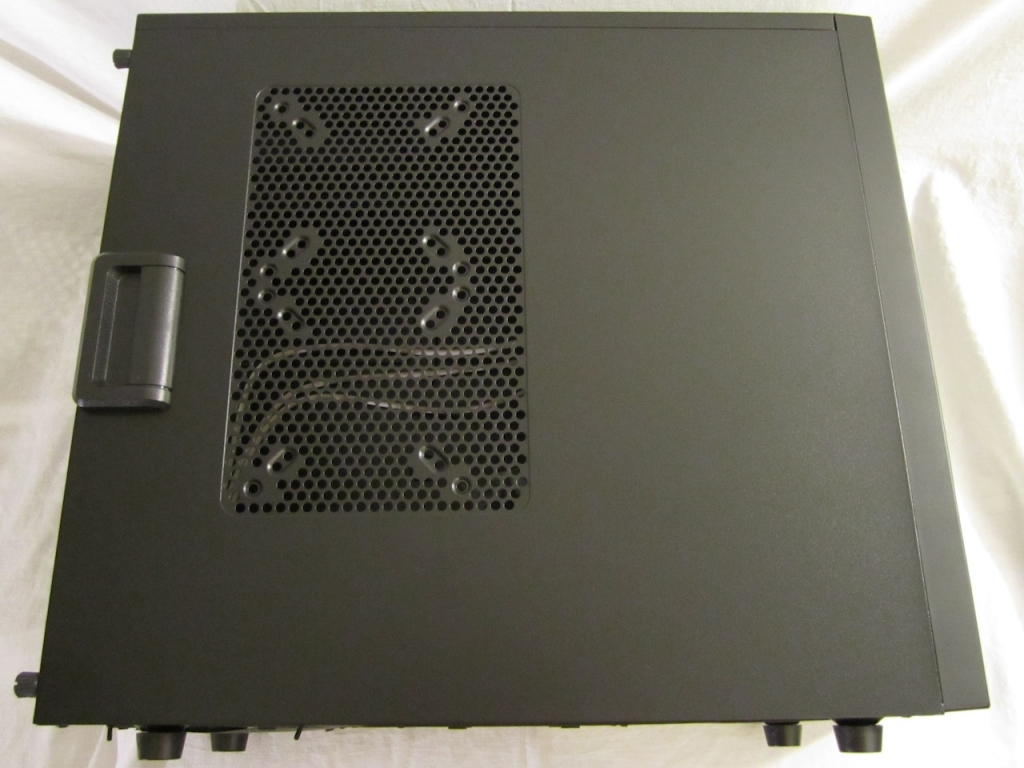
| Side Panel Window? | No | This case isn’t ostentatious. It’s a little understated, even. |
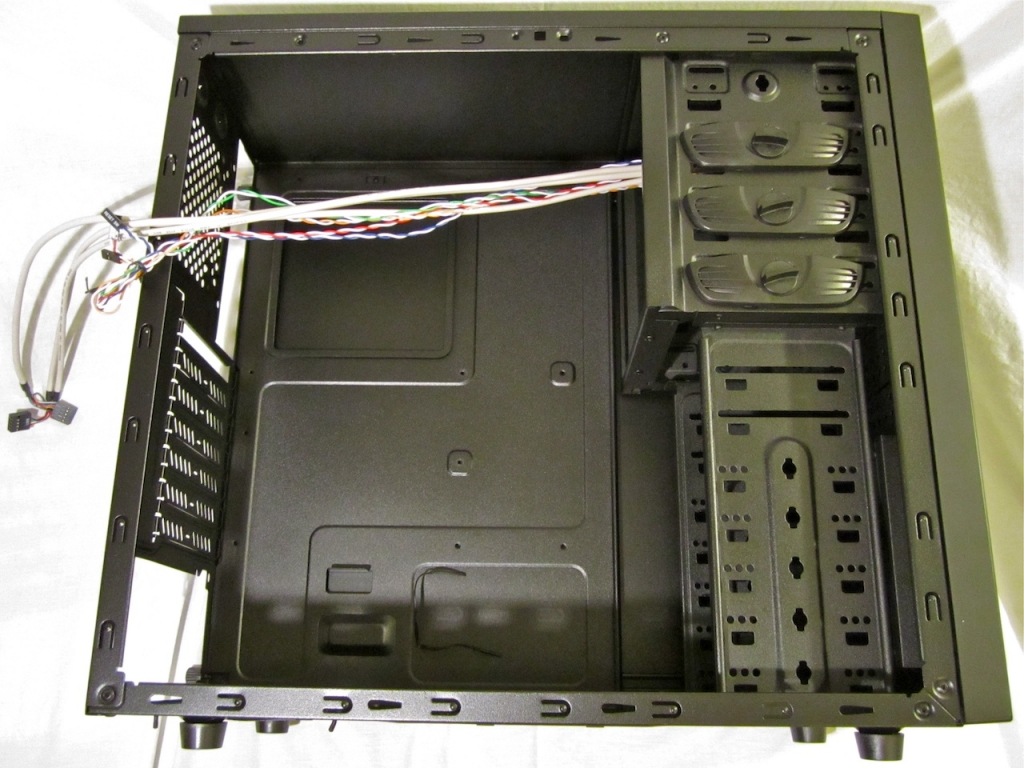
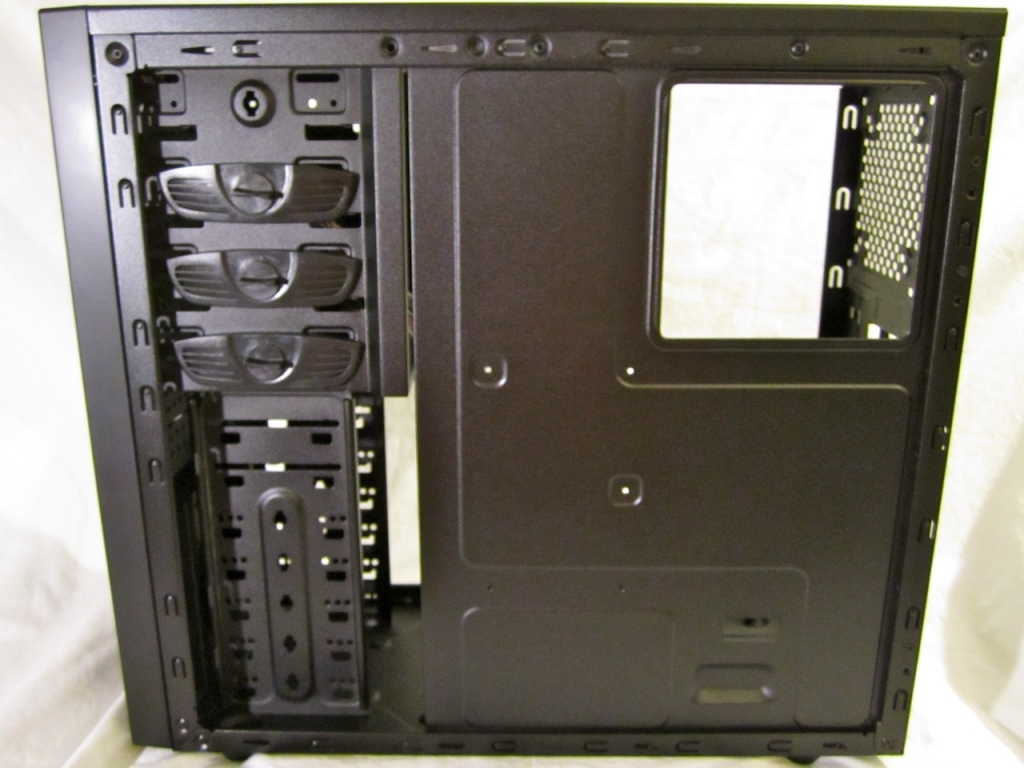
| External 5.25″ Drive Bay | 3 | Quite adequate; ours also included one internal bay. |
| External 3.5″ Drive Bay | 1 | Most don’t need floppies, but some USB3 headers mount here. |
| Internal 3.5″ Drive Bay | 2 | Plenty of room for hard drives, most of the time… except I count six. They didn’t include enough toolless mounting hardware for all of them, however, and the second-from-top seems to be built like an external bay, but they left no facade space for it to project. |
| Expansion Slot | 7 | About as many as you will ever need. |
| SDD Plank | 1 | I can only assume they meant an SSD mounting point; a 2.5″ drive can be bolted directly to the floor of the case. |
| Front Panel Ports | 2 X USB2.0 Ports AUDIO IN/OUT (HD AUDIO) |
Sparse, but adequate; if you want USB3, bring your own headers. |
| Optional Fan Expansion | 1 X FRONT 120MM FAN 2 X SIDE 80/90/120 MM FAN 1 X REAR 120MM FAN 2 X BOTTOM 120MM FAN |
Six fan slots, none of them filled. I found airflow tended to suffer when I populated all the fan spots; bulky internal components tend to be incompatible with case fans here. |
| Side Air Duct | No | No ducting, just room for two fans. |
 |
 |
Pros:
- All case edges are rolled, and there’s no obvious place to slice yourself open.
- Toolless mounting hardware for most drive bays.
- Side panels come off with a firm tug and no tools; a pair of thumbscrews is all that keeps them in place.
- Reduced need for screwdrivers to access expansion cards.
- Cutout behind CPU heat sink to make cooler changes easy
- Rubber-gasketed holes pre-cut for water cooling
- Light & compact
Cons:
- Side panels come off with a firm tug and no tools, so keep an eye on systems brought to a LAN party.
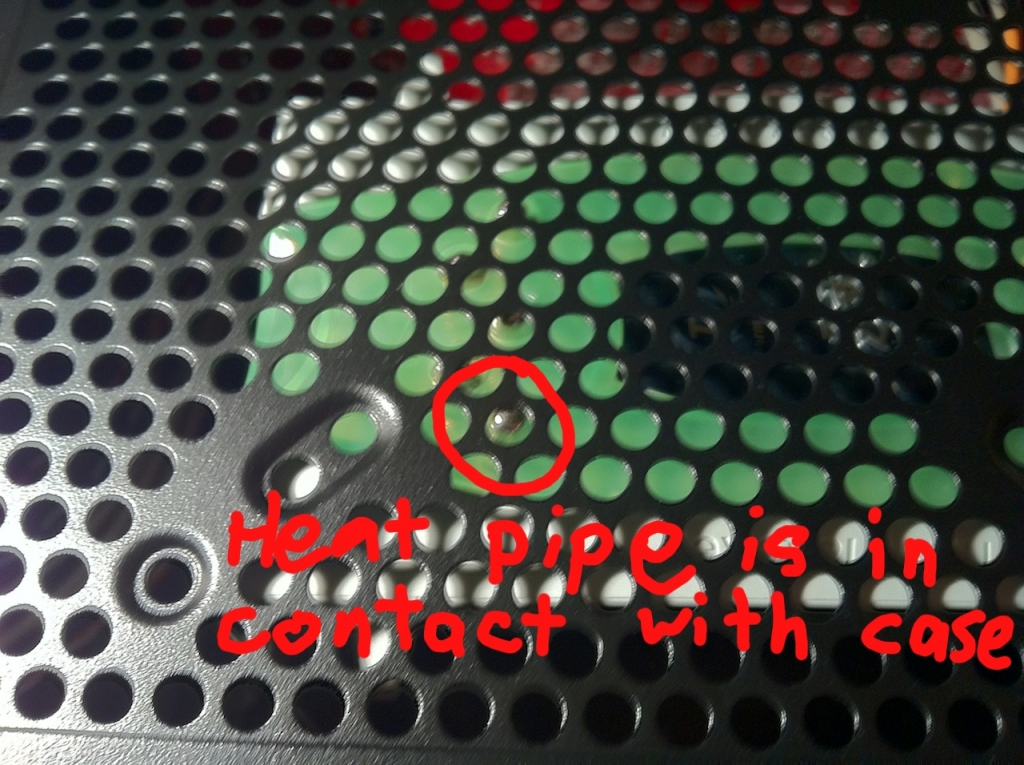
- CPU heat-sink cutout doesn’t line up with all motherboards
- less than 1mm clearance between ATX sized motherboard (Jetway HA-09) and PSU (FSP Aurum)
- More HDD bays than mounting clamps
- Does not come with any fans. Bring your own, or risk meltdown.
- Small case means tight airflow; large heat sinks will not fit – the side panel will not close over the Thermaltake Jing of the test system. With a specified height of 161.2 mm, I would recommend an absolute maximum height of 155 mm, or 130 if you plan on mounting fans on the side panel.
- No top-mounted exhaust port, nor internal room for a fan.
- Not actually tool-less as advertized. You will need a P2 Phillips screwdriver to get to your cards, though you can use between one and seven screws to hold down as many as you have inserted. “Stubbie” pocket screwdrivers and most multitools will not fit; two to two-and-a-half inches of shaft will do, however, as will the Leatherman Squirt EL. Thumbscrews would have been a much better idea.
- Not much room for airflow; cooling will be restricted.
As it stands, this is an excellent entry-level case for entry-level systems, and while it has some nice, advanced features, it also has some glaring flaws. Most gamers’ PCs (for that seems to be the target market) will not have a stock cooler, and there is little extra room for a more powerful unit; given the tight spaces, even with a more powerful cooler, there is precious little room for airflow. Mounting a CPU cooler that pulls from the front and exhausts to the rear, as well as an exhaust fan in the case will help, however. Removing the foam in front of the mesh at the front of the case and mounting an intake fan there will also help, though you must be careful when removing the front panel that you do not damage the USB and audio headers. The front panel is, in fact, toolless – make sure you do not use the bottom lip of the front panel as a handle, as convenient as it may seem. Under this front panel, you will find bays for drives; the front panel mesh can be removed by popping it out, but there are front panel covers spot-welded to the steel chassis that you will be expected to tear free using a Phillips screwdriver before you can use the bay. On the opposite end, you will find similar covers for unused PCI sockets. I find this sort of disposable construction distasteful and slightly worrying; if your configuration changes and you need to block a PCI socket after opening it up, you will find the modification is irreversible and you will have to provide your own slot cover (perhaps if you are discarding or recycling an old system, harvest the slot covers before doing so!) to keep bugs out, airflow moving in the right direction, and prevent other such hassles. While on the subject of the backplane, the clamp that holds down all seven PCI cards is not toolless, and provides very little clearance for screwdrivers. I am disappointed that Diablotek chose not to provide thumbscrews here. Still, their construction method managed to shave off over half an inch of depth compared to many other designs, except for the raised clamping bracket. This will not help with clearance considering that plugs and cords are the usual culprit, but it does allow them to save a bit more metal – and therefore weight.
 |
 |
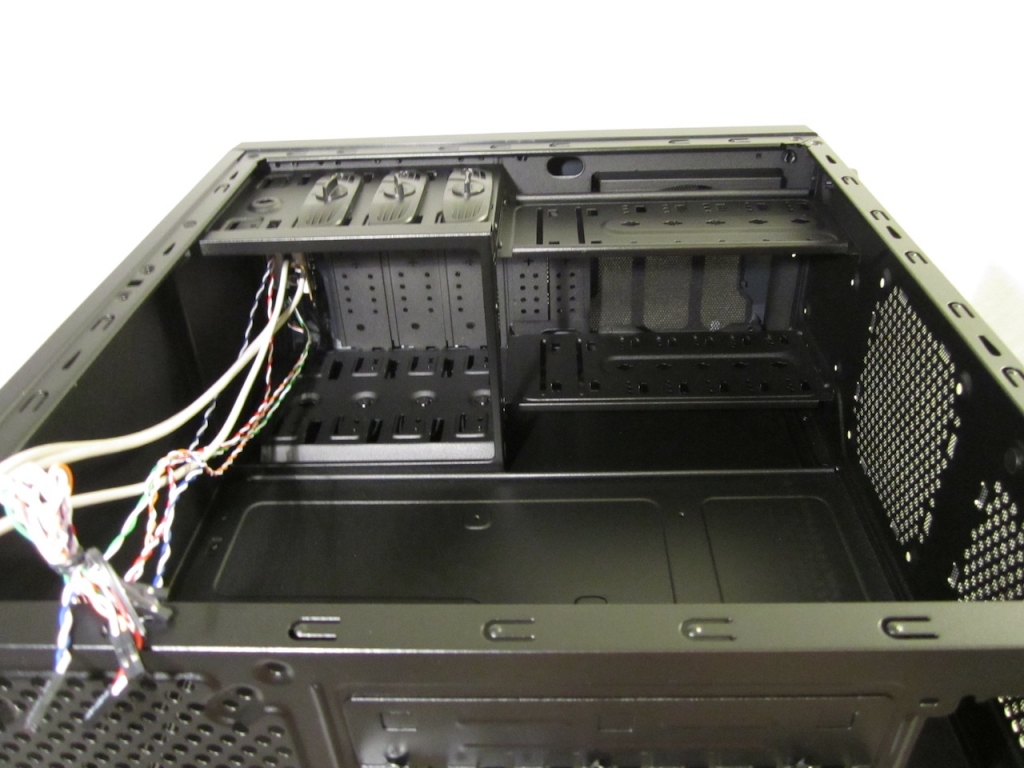 |
On the inside, the situation is also mixed. The chassis seems to be a common design among multiple Diablotek cases, for it has more than the advertized three 3.5″ bays, but only three toolless mount kits. It seems slightly disingenuous to provide product discrimination this way – and artificial scarcity is a distressing concept in general. Bolting an SSD to the floor of the chassis seems a questionable design choice, but it is hard to question – at least in in design expediency; this likely added no manufacturing steps, and was added to the stamping used to form the bottom with no increase in complexity. I have mentioned the compactness giving rise to fitment issues with some heat sinks; it also gives rise to a great many hassles when attempting to run power to the system, especially the odd extra Molex power connection required by the Jetway HA09 motherboard in the test system. “Cable-gami” is likely to prove somewhere between difficult and impossible, further contributing to airflow issues. The cramped case can also be well demonstrated by the sub-1mm clearance between an ATX motherboard and the power supply; while there are no good sharp edges to cut open a hand on, there’s not much room for hands in here at all.
