![]()
The Motherboard
 |
 |
 |
 |
The A75 Extreme6 seems to follow both a similar color scheme and layout to ASRock’s other motherboards, which makes sense from both a brand recognition viewpoint and for improved familiarity with recurring customers. Let us see what is included on this board per the box:
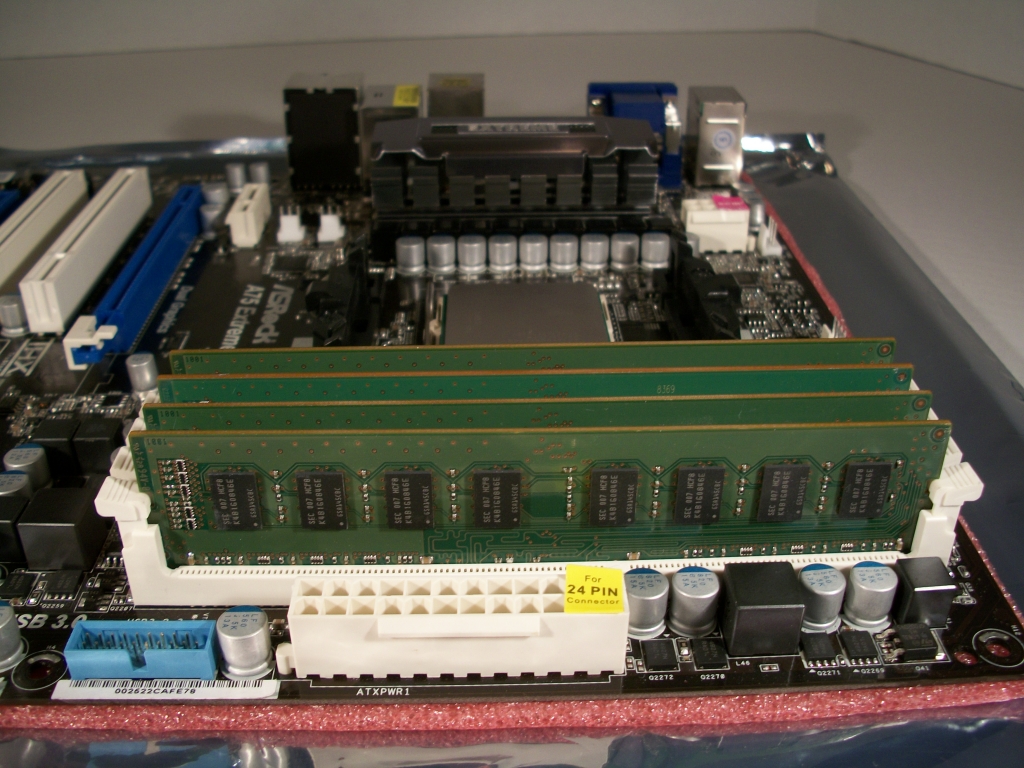
- 4 x Dual Channel DDR3 1866
- FM1 Socket 100W Processor Support
- Combo Cooler Retention Module
- PCIE GLAN
- 1 x IEEE 1394 Port
- 4 x USB 3.0 Ports
- Multi-VGA Output Options
- D-Sub
- DVI-D
- HDMI
- Clear CMOS Switch with LED
- 1 x eSATA III Port
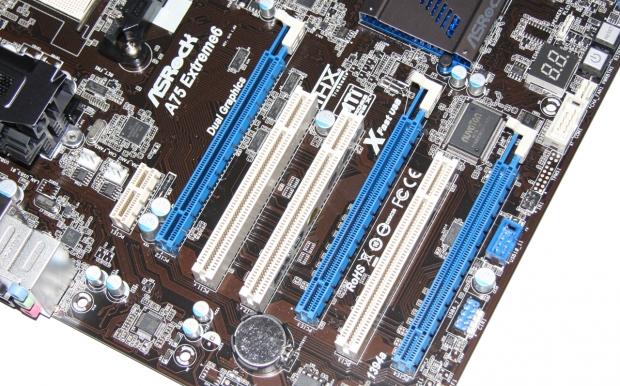
- 3 x PCI-Express x16 Slots
- Supports AMD Quad CrossFireX
- 3-Way CrossFireX
- CrossFireX
- Dual Graphics
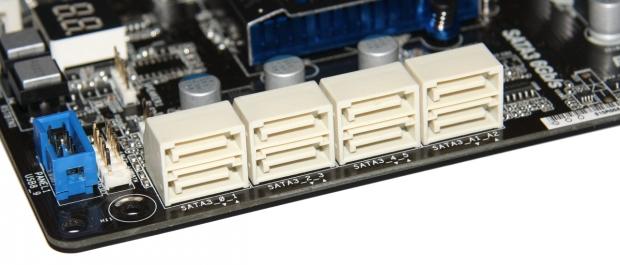
- 8 x SATA III Connectors
- Power & Reset Switches with LED
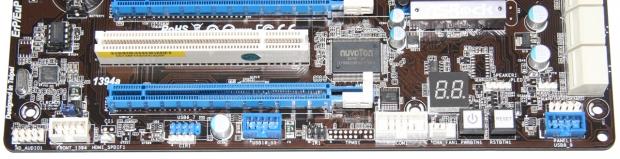
Something that immediately caught my eye was that this board had not one (1), but three (3) PCI-Express x16 slots. That is three PCI-E x16 slots, which is two more than most boards. This makes a lot of sense when you look at the CrossFire capability built-in. While all three slots are x16 physically, when you CrossFire those graphics cards they go from x16 to x8 to x4. You might be intimidated by that many PCI-E x16 slots, but you should not be as they are backwards compatible and therefore you suffer no loss of usable slots.
 |
 |
| PCI-E Slots | SATA III Ports |
 |
 |
| 4 DIMMS (shown with 8 GB RAM) | CPU FM1 Socket |
The second thing that drew my eye was off to the right of the PCI-E slots, and it was the number of SATA III ports. There are eight (8) SATA III ports in total. There are six (6) running off of the A75 chipset (marked SATA3 0-5) and two (2) off of the ASMedia ASM1061 controller (marked SATA3 A1-2). Continuing our board tour we head north, we see the four DIMM slots for RAM (ASRock says the board supports up to 32 Gigabytes DDR3 at 2400MHz or more). Next to the four DIMMs we see the board’s main 24-pin ATX power connector and a USB 3.0 header. Moving right along we see the CPU socket is nothing special and has an eight (8) pin CPU power connector with several fan headers. It is nice the amount of room that is given for a CPU Cooler, but I want to note here that you should not forget to remove the back plate from the board if you are using a cooler that does not use the two brackets already on the board.
 |
 |
| Board Headers | I/O Ports |
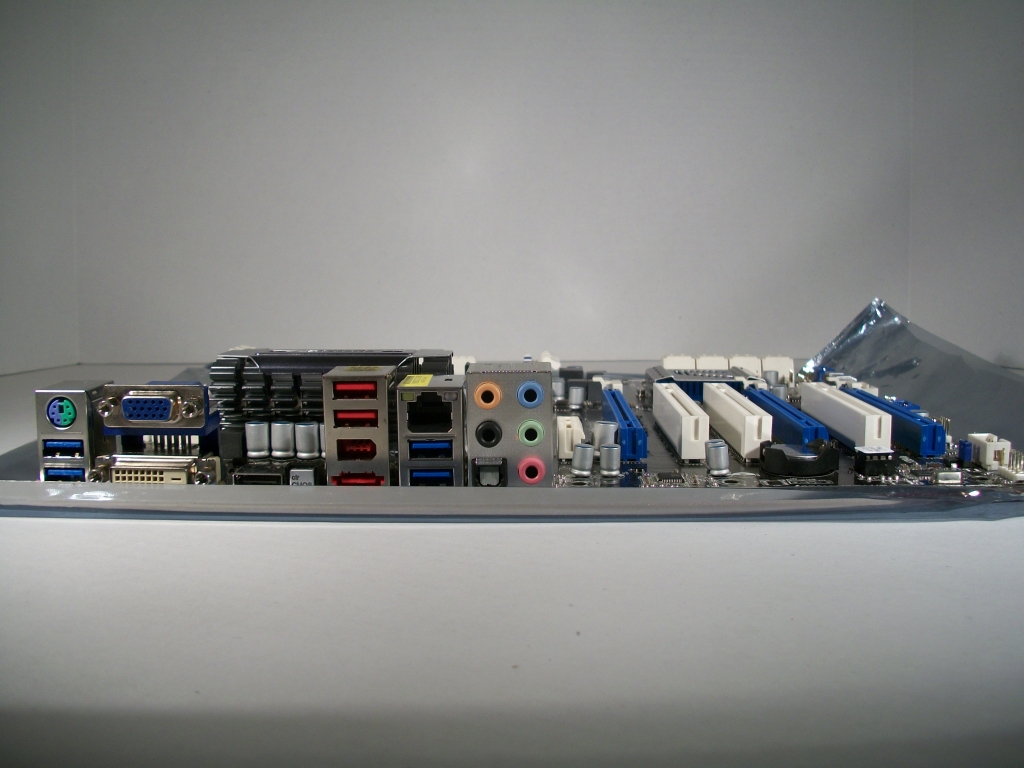
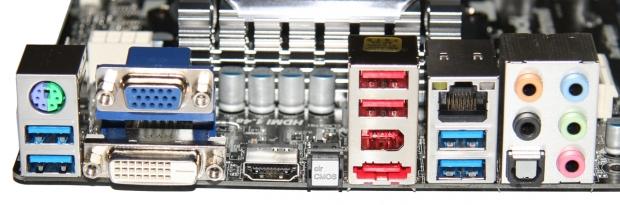
All that remains is the plethora of headers and I/O ports. The Quick Setup Guide does an excellent job of helping you setup the headers and the board itself is labeled well. Going from left to right you have the HD Audio header, FireWire, HDMI S/PDIF, two (2) blue USB 3.0 headers, a COM1 header, and the front panel header. Additionally you will see a power button, reset button, and a LED reader just above the headers which are handy for troubleshooting. The I/O ports on the back of the board are clearly marked on the back plate provided by ASRock, but if you are just looking at the board you may not know what is what so I will label them from left to right. First is a combo PS/2 port with the two (2) USB 3.0 ports running off of the ASMedia ASM1042 controller below it, then a VGA port above a DVI-D port, then a HDMI port with a Clear CMOS button next to it. In red we have two (2) USB 2.0 ports above a FireWire port, above an eSATA port. Now we have the Gigabit networking port above the two (2) blue USB 3.0 ports. Last, but not least, is the five (5) audio ports with an optical out.

I recently upgraded to an ASRock motherboard and absolutely love it.