UEFI
What ASUS as currently provided us in case of UEFI BIOS is their most recent version which presents itself with an attractive design, keeping the black and red theme, and the new interface which is called EzMode. Where you can monitor your system information, CPU and motherboard temperature, CPU Voltage, and DRAM status, but you can also set CPU Fans and any other fans connected directly onto the board, as well as directly change the boot priority and tune the system to different profiles and save and change them easily and quickly. If you enjoy the old style where you do not have the mouse, simply press F7. This BIOS features all of the standard ASUS options, which allows you to alter just about anything when it comes to overclocking.

Click on the thumbnails for a larger image.
The Maximus VII Gene uses a 64Mbit American Megatrends Inc. flash ROMs. To ensure redundancy if a flash fails, ASUS also developed the BIOS Flashback feature. This enables the user to recover and reflash the BIOS even if the ROM is corrupt. As an added bonus you can perform this function without a CPU installed.(Neat ‘ay?) This is particularly useful for future CPUs that may not work with the motherboard at all until the BIOS is properly updated.
This is the first generation since the inception of UEFI on ASUS motherboards that’s changed significantly. Prior to now each step had been a minor one with a few features being added here and there. While it operates very similarly to the way the original ASUS UEFI did, this version maintains different aesthetics and incorporates new features. Drop downs are more easily identified and the BIOS is much more uniform in how it operates. There are even animations for changing and cycling through various sections of the BIOS. If you don’t like animations ASUS didn’t forget to add in a “turn off Animation” button for you guys. The My Favorites feature shows improvement. One can now select a list of options and assign these within the My Favorites menu instead of actually browsing to the options you want and selecting these. This effectively combines the approach used by other motherboard makers and ASUS’ own approach for maximum flexibility. The interface for doing this is also quite slick and easy to use.
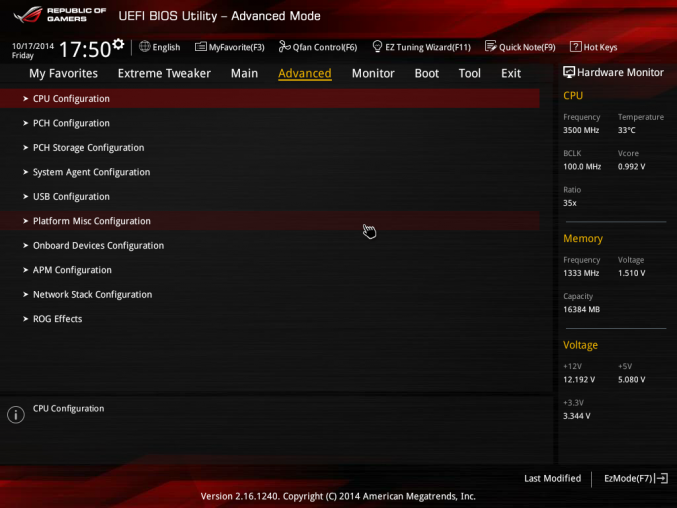
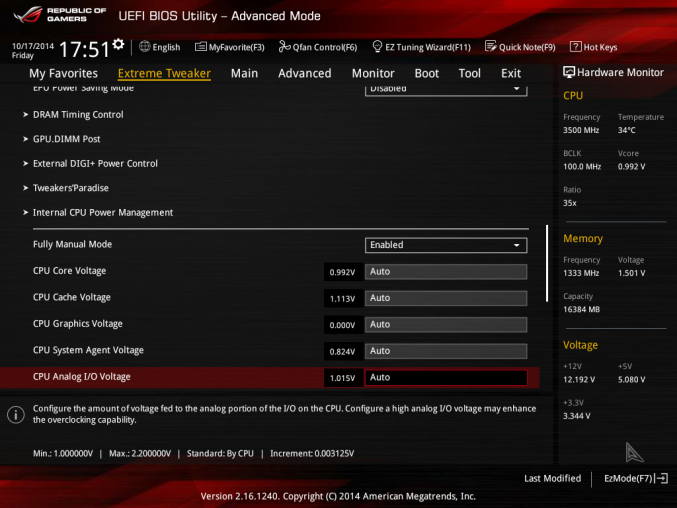
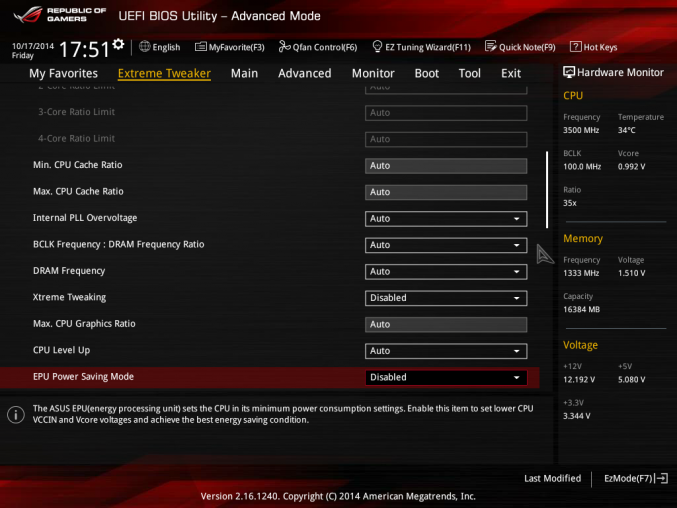
For convenience the BIOS constantly shows the hardware monitor stats on the far right hand side. When you highlight options the interface also shows information concerning the minimum, maximum and increment information where applicable. Naturally there is the monitor section of the BIOS which provides more detailed information, but effectively you get what you need on every screen.
Click on the thumbnails for a larger image.
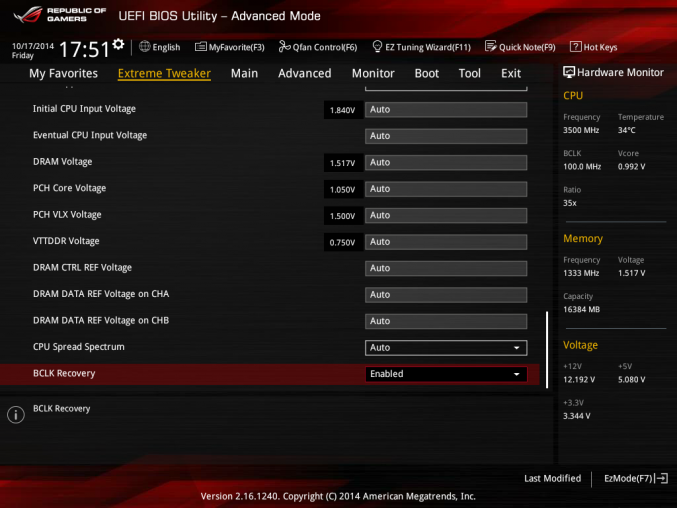
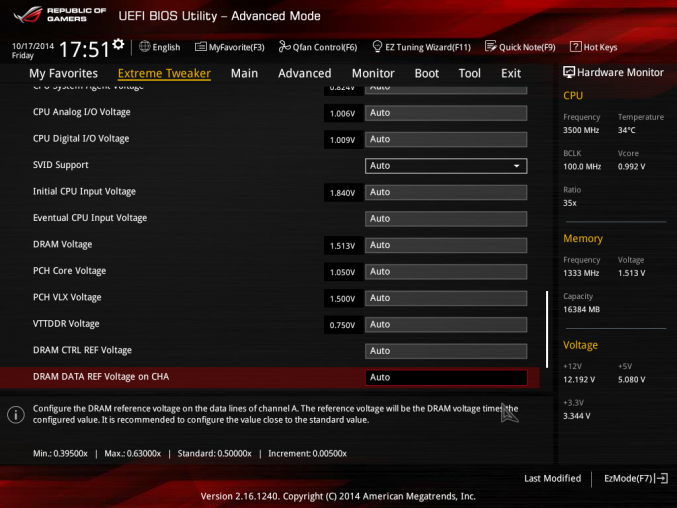
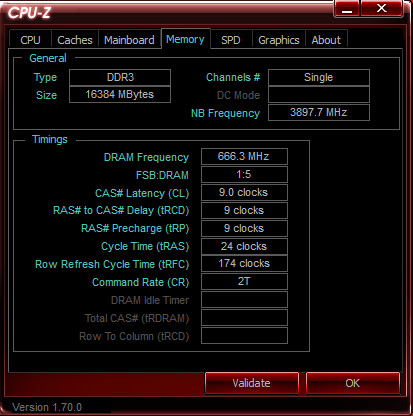
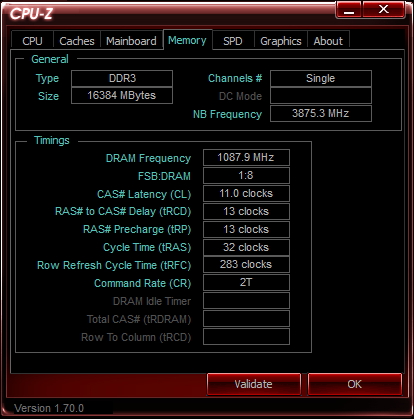
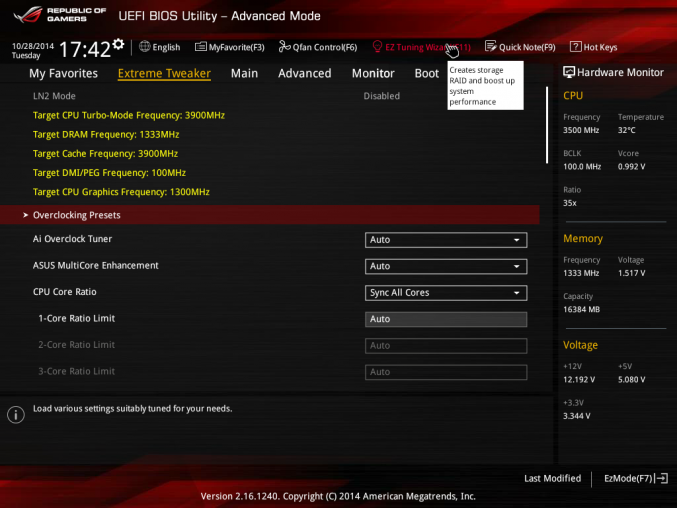
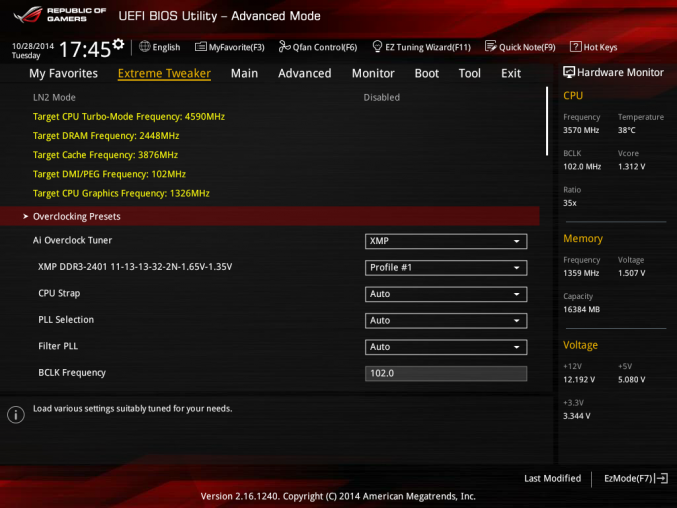
The Extreme Tweaker menu is where the UEFI BIOS defaults to on ROG boards. Tuning from this menu is quite easy. Again everything you highlight is explained in some way via information shown at the bottom left of the screen. Many settings can be found in submenus as usual. One of those things is a plethora of DRAM settings. There are three pages of settings and additional tuning options which are unique to ROG series motherboards. Specifically the DRAM training settings and profile selection for specific memory chips are unique to ROG motherboards in ASUS’ lineup.
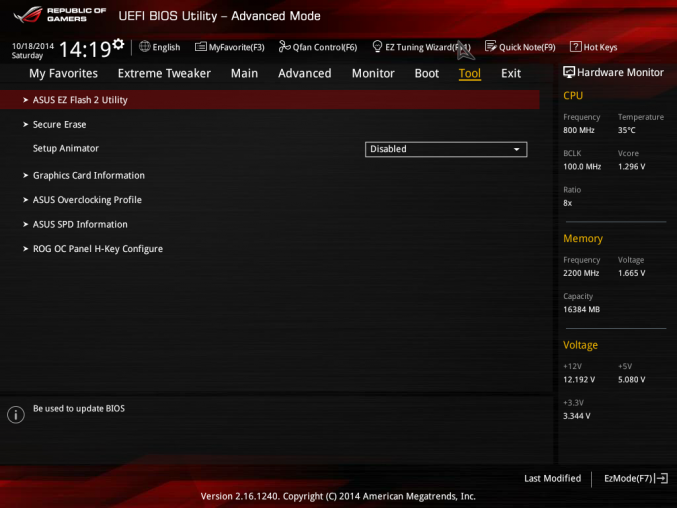
There are truly three things that differentiate ASUS UEFI BIOS ROMs from other brands. First, it’s super easy to use and manuver. It is by far the easiest I’ve had the ability to run through. The second most important thing is the tool set. The tools are among the best in the industry. These include the secure erase function, GPU.DIMM POST, SPD viewers and the Easy Flash 2 utility. The GPU.DIMM POST utility provides you with information concerning what your memory modules are running at on startup. It also shows you who is the manufacturer of the installed GPU (not card, but the GPU itself) and tells you how the PCI-Express lanes are allocated. The tools menu also does contain and overclocking profile menu but this is basic and virtually identical to what everyone else does in the industry.
Click on the thumbnail for a larger image.
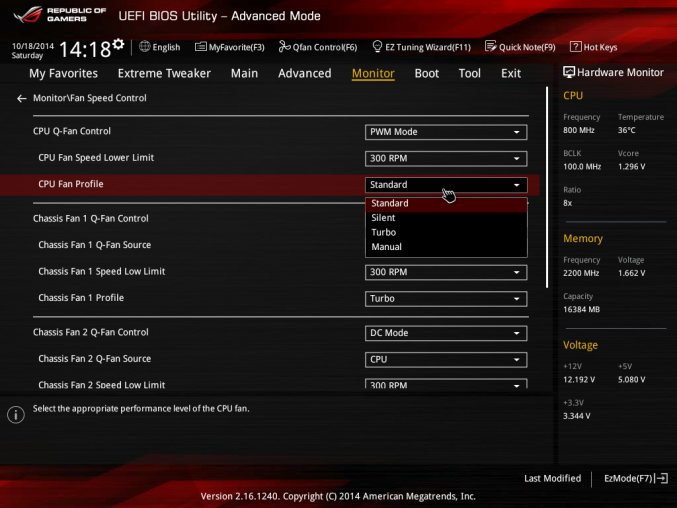
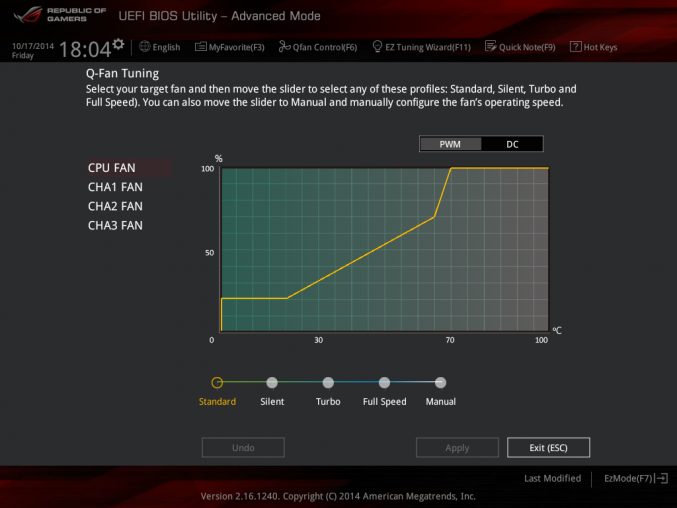
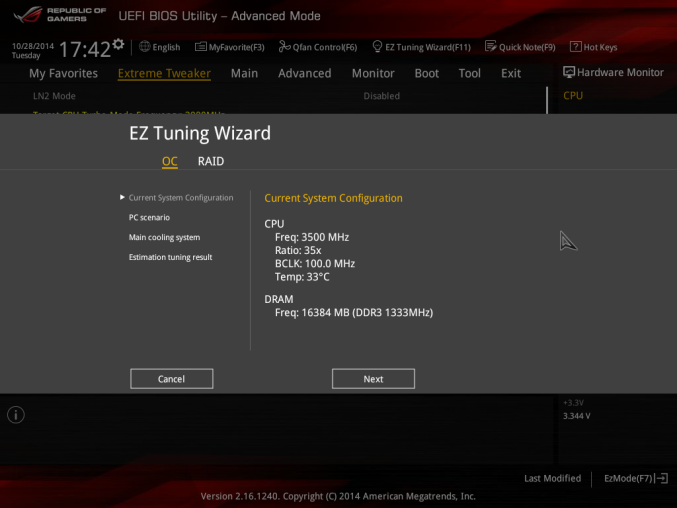
Another thing that truly sets the ASUS motherboards apart is the unrivaled BIOS level fan control. For the most part, what’s offered by ASUS’ AI Suite III is offered here. The main difference is the inability to rename fan headers in the BIOS or to set fan ramp up and ramp down time delays. Those have to be done in the ASUS AI Suite III. The fan controls are accessible via the Q-Fan control menu via the F-6 key or the monitor section. Tuning of the fans can be handled via DC or PWM modes or by profile. Manual control is also an option enabling the user to tune these with precision to match the needs and desires. The EZ Tuning Wizard allows you to start automated overclocking or setup a RAID array. Naturally you can setup the RAID array by setting the BIOS mode and then setting up the actual array inside the ctrl+I menu after the system goes through POST.
OverClocking:

Click on the thumbnails for a larger image.
Click on the thumbnails for a larger image.
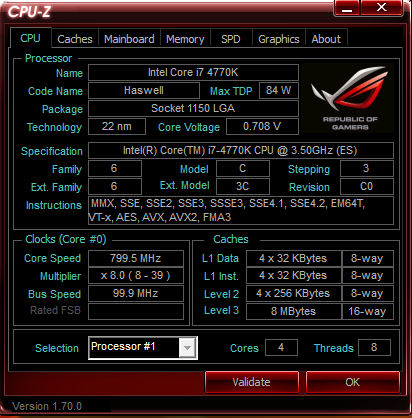
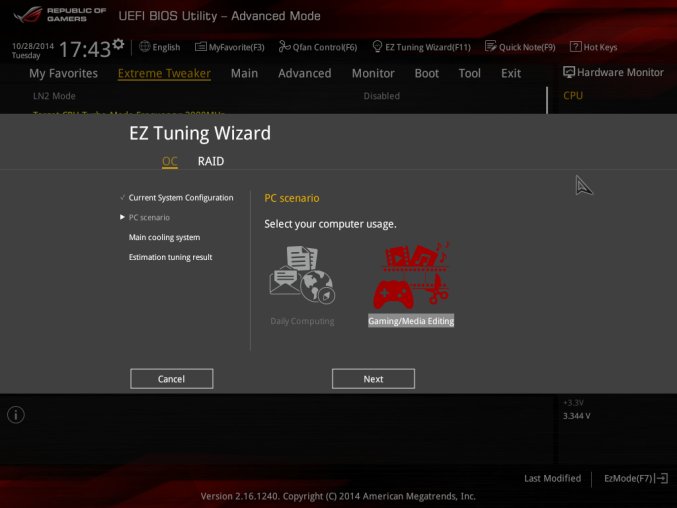
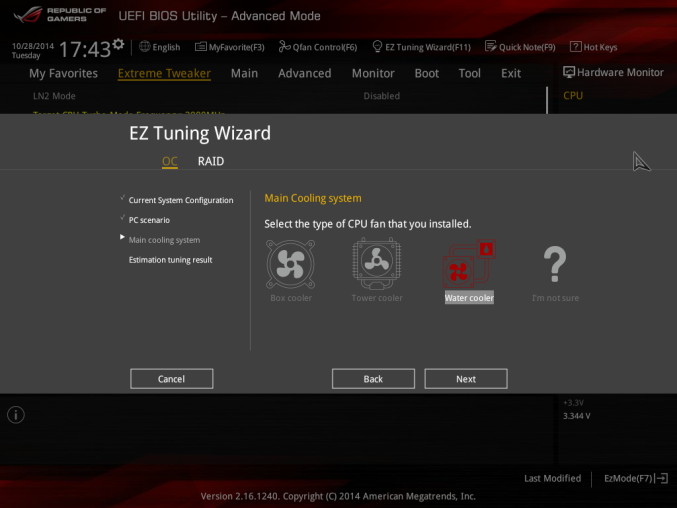
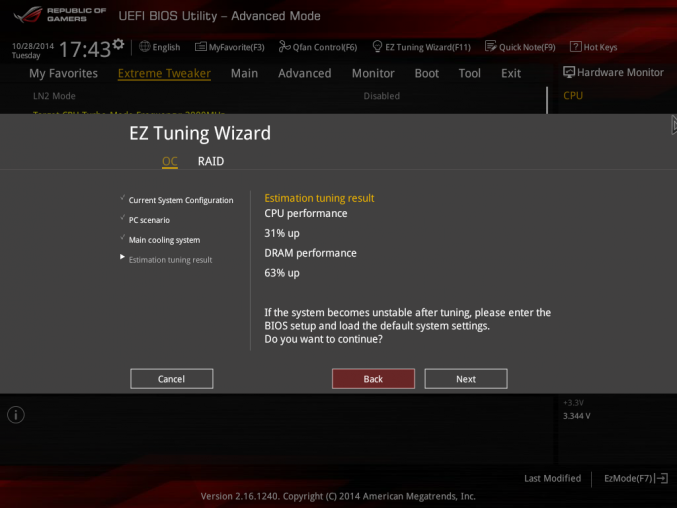
With Overclocking I used the EZ Tuning Wizard to show you how it works, if you aren’t one that tweaks and tunes computers as a hobby and such. The EZ Tuning Wizard asks you a couple questions then utilizes those along with your computer information to better increase the usage of your CPU, RAM and Fans. Before (39 x 99.9MGHz = 3896.1) at .708 V and Afterw (45×102.MHz = 4590 MHz) at 1.302 V. You can use the EZ Tuning Wizard or Manually insert the amount of voltage, CPU ratio and just about anything, but please read up on everything before you attempt anything! Don’t want to fry computer, do you?

[…] TechwareLabs kicks it off with the Asus Maximus VII Gene Motherboard […]
[…] Asus Maximus VII Gene Motherboard Review at TechwareLabs.com […]