Introduction:
The introduction of the Core i7 processors into the market marked the beginning of one of the largest redesign feats for motherboard manufacturers. Because of the new Core i7 architecture, many of the motherboard’s functions had been redefined. The Core i7 processor, in essence, took up almost all major functions of the north bridge. Communication between the RAM and the processor was a major one. The Core i7 set up also introduced the idea of tri-channel RAM in order to increase bandwidth. ASUS was one of these motherboard manufacturers that attempted to redefine the expectations of performance. Today TechwareLabs will take a look at their budget model – P6T. Will it stack up to the expectations or will it be a miss for ASUS?
![]()
Features
- Intel LGA1366 Platform
- Intel® X58/ ICH10R chipset
- ASUS TurboV
- 3-Way SLI & Quad-GPU CrossFireX Support!
- ASUS Drive Xpert
- ASUS EPU
- ASUS 8+2 Phase Power Design
- 100% Japan-made Solid Capacitor
- VRM 5000hrs lifespan @105°C, 500,000hrs @65°C
–~~~~~~~~~~~~–
Specifications
|
CPU
|
Intel® Socket 1366 Core™ i7 Processor Extreme Edition/Core™ i7 Processor/ Processors
Supports Intel® Dynamic Speed Technology |
|
Chipset
|
Intel® X58 / ICH10R
|
|
System Bus
|
Up to 6400 MT/s
|
|
Memory
|
6 x DIMM, Max. 24 GB, DDR3 2000(O.C.)*/1866(O.C.)*/1800(O.C.)*/1600(O.C.)/1333/1066 Memory
Triple channel memory architecture Supports Intel® Extreme Memory Profile (XMP) *Hyper DIMM support is subject to the physical characteristics of individual CPUs. *Refer to www.asus.com or this user manual for the Memory QVL(Qualified Vendors Lidts). |
|
Expansion Slots
|
3 x PCIe 2.0 x16 (at x16/x16/x4 mode)
1 x PCIe x1 2 x PCI |
|
Multi-GPU Support
|
Supports NVIDIA® 3-Way SLI™ Technology*
Supports ATI® Quad-GPU CrossFireX™ Technology |
|
Storage
|
Southbridge
6 xSATA 3 Gb/s ports Intel Matrix Storage Technology Support RAID 0,1,5,10 JMicron® JMB363 PATA and SATA controller 1 xUltraDMA 133/100/66 for up to 2 PATA devices 1 xExternal SATA 3Gb/s port (SATA On-the-Go) JMicron® JMB322 (Drive Xpert technology) – 2 x SATA 3Gb/s – Supports EZ Backup and Super Speed functions |
|
LAN
|
Realtek® 8111C PCIe Gigabit LAN controller featuring AI NET2
|
|
Audio
|
Realtek® ALC1200 8 -Channel High Definition Audio CODEC
Coaxial / Optical S/PDIF out ports at back I/O ASUS Noise Filter Support Jack-Sensing, Enumeration, Multi-streaming and Jack-Retasking |
|
IEEE 1394
|
VIA® VT6315N controller supports 2 x 1394a ports (one at mid-board; one at back panel)
|
|
USB
|
12 USB 2.0 ports (6 ports at mid-board, 6 ports at back panel)
|
|
ASUS Unique Features
|
ASUS Exclusive Features:
– ASUS TurboV – ASUS 8+2 Phase Power Design – Express Gate ASUS Power Saving Solution – ASUS EPU-6 Engine – ASUS AI Nap ASUS Quiet Thermal Solution: – ASUS Fanless Design: Heat-pipe solution – ASUS Fanless Design: Stack Cool 2 – ASUS Fan Xpert ASUS Crystal Sound: – ASUS Noise Filter ASUS EZ DIY: – ASUS Q-Shield – ASUS Q-Connector – ASUS O.C. Profile – ASUS CrashFree BIOS 3 – ASUS EZ Flash 2 |
|
Overclocking Features
|
ASUS TurboV utility
Precision Tweaker2: – vCore: Adjustable CPU voltage at 0.00625V increment – vCPU PLL: 36-step reference voltage control – vDRAM Bus: 49-step DRAM voltage control – vChipset(N.B.): 31-step chipset voltage control – vNB-PCIe: 65-step chipset-PCIe voltage control SFS (Stepless Frequency Selection) – Internal Base Clock tuning from 100MHz up to 500MHz at 1MHz increment – PCI Express frequency tuning from 100MHz up to180MHz at 1MHz increment Overclocking Protection: – ASUS C.P.R.(CPU Parameter Recall) |
|
Special Features
|
Multi-language BIOS
ASUS MyLogo 2 |
|
Back Panel I/O Ports
|
1 x External SATA
2 x S/PDIF Out ( 1xCoaxial & 1xOptical ) 1 x IEEE 1394a 1 x LAN(RJ45) port 6 x USB 2.0/1.1 8 -Channel Audio I/O 1 x PS/2 Keyboard (Purple) 1 x PS/2 mouse port (Green) |
|
Internal I/O Connectors
|
3 x USB connectors support additional 6 USB ports
1 x Floppy disk drive connector 1 x IDE connector 6 x SATA connectors 1 x IEEE 1394a connector 1 x CPU Fan connector 2 x Chassis Fan connector 1 x Power Fan connector 2 x Drive Xpert SATA connectors (orange and white) 1 x S/PDIF Out connector 1 x 8-pin ATX 12V Power connector 24-pin ATX Power connector CD audio in Front panel audio connector Chassis Intrusion connector System Panel (Q-Connector) 1 x Power on switch 1 x Reset switch |
|
BIOS
|
16 Mb Flash ROM
AMI BIOS, PnP, DMI2.0, WfM2.0, SM BIOS 2.3, ACPI 2.0a, Multi-language BIOS, ASUS EZ Flash 2, ASUS CrashFree BIOS 3 |
|
Manageability
|
WfM 2.0,DMI 2.0,WOL by PME,WOR by PME,PXE
|
|
Accessories
|
User’s manual
1 x UltraDMA 133/100/66 cable 4 x SATA cable 2 in 1 Q-connector ASUS Q-Shield 1 x ASUS 3-Way SLI bridge connector 1 x ASUS SLI bridge connector |
|
Support Disc
|
Drivers
ASUS PC Probe II ASUS AI Suite Anti-virus software (OEM version) ASUS Update Image-Editing Suite |
|
Form Factor
|
ATX Form Factor
12 inch x 9.6 inch ( 30.5 cm x 24.4 cm ) |
–~~~~~~~~~~~~–
Packaging
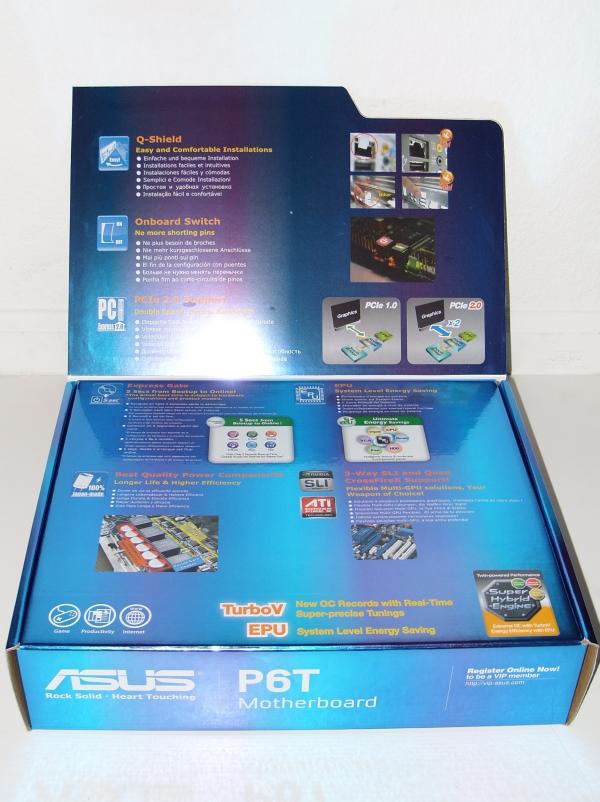
The ASUS P6T came in more or less colorful attire. On the front of the cover there was a name of the motherboard along with the feature highlights such as 3 way SLI and Quad CrossFireX support, 8+2 Phase power design, solid-state capacitors, and the ASUS exclusive Express Gate.
 |
 |
 |
On the inside of the front flap, there were pictures of the particular components stated on the front of the box along with a more detailed explanation of what the feature did. The explanations were in multiple languages including the major ones like English, Spanish and French.
 |
 |
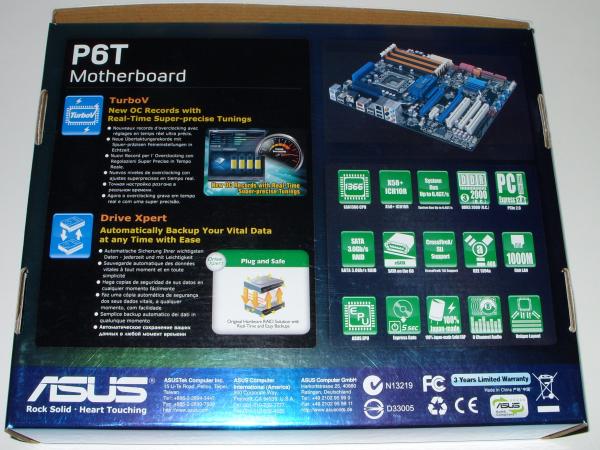
On the back of the box there were more features and their representative thumbnails. Starting at the top left there is a symbol of the LGA 1366 cpu socket followed by the ICH10R south bridge icon. In my opinion if a person is considering buying this motherboard, this visual list would definitely make the decision making process much easier. After looking through the whole list, I feel that despite the fact that the P6T is not the top of the line motherboard currently offered by ASUS the features list of the motherboard is quite extensive.
On the left side of the back of the box, there are two more features, again in several languages. These features are perhaps one of the most important out of the entire motherboard. These two features are Turbo V and Drive Xpert. The Turbo V is a utility that operates from Windows and allows the user to change the BIOS settings on the fly. The Drive Xpert is an option that has already been integrated into the South Bridge controller. With Drive Xpert the user has the ability to plug in two hard drives into the orange colored SATA sockets marked by the “Port 1 and Port 2” signs and have the computer back up the data onto the second hard drive in real time.
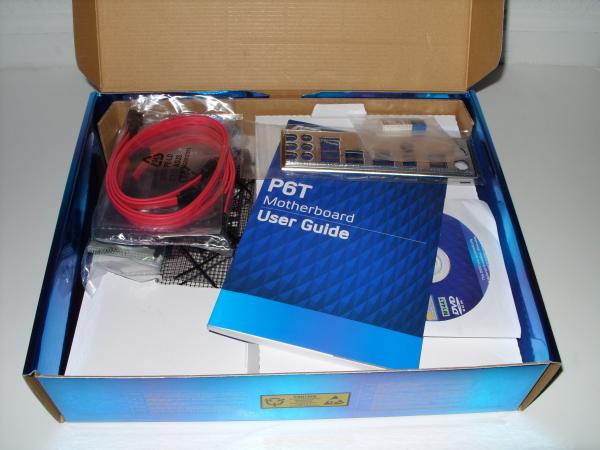
Inside the box there were:
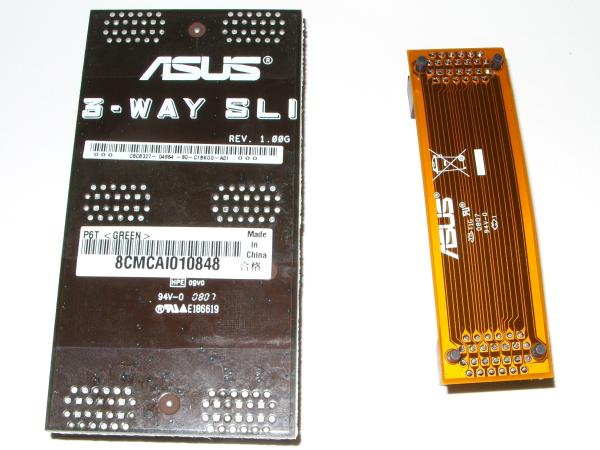
- 3 Way SLI connector
- A CrossFire Ribbon
- A IDE cable
- A Floppy Cable
- 4 SATA Cables
- The Q-Shield (Backplate)
- A Driver DVD Rom
- An Installation Manual
- Q-Connector (An easy connect for the output pins for the front of the Computer case)
- Case Badge
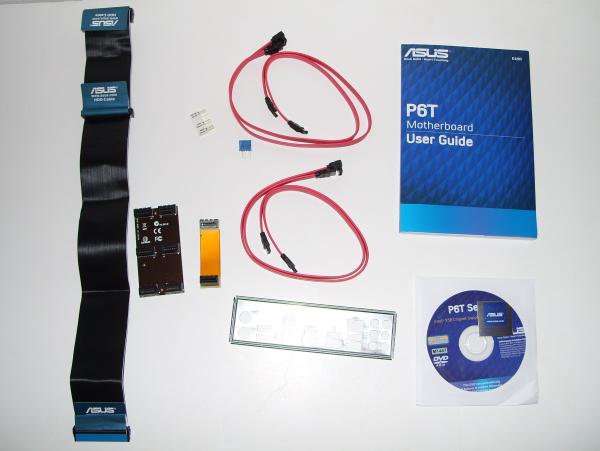
As you can see there is aren’t really any special things to mention here, except for the Q-Connector. The Q-Connector is definitely a time saver, which brings me to wonder of why other companies have not thought of implementing a similar design. Instead of having to plug in all the case cables into their respective sockets on the motherboard, all one has to do is plug them all into the Q-Connector and then plug the connector into the motherboard.

–~~~~~~~~~~~~–
A Closer Look:
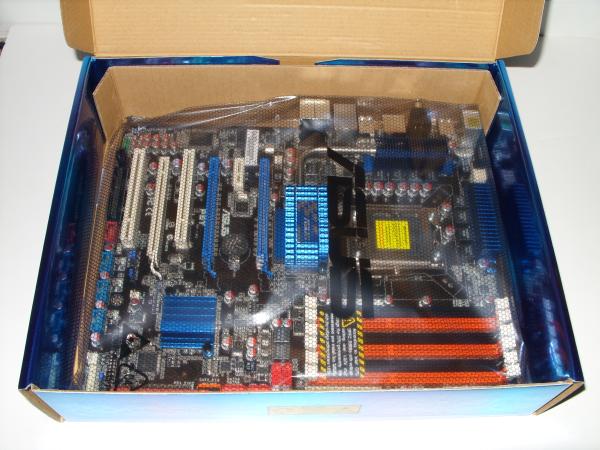
A closer look at the RAM reveals that instead of there being 4 RAM slots like in the traditional motherboards, the Core i7 setup has 6 slots. The slots are tri-channel paired. This means 3 GB is the minimum amount of memory required in order to take advantage of the tri-channel configuration of the Core i7.
 |
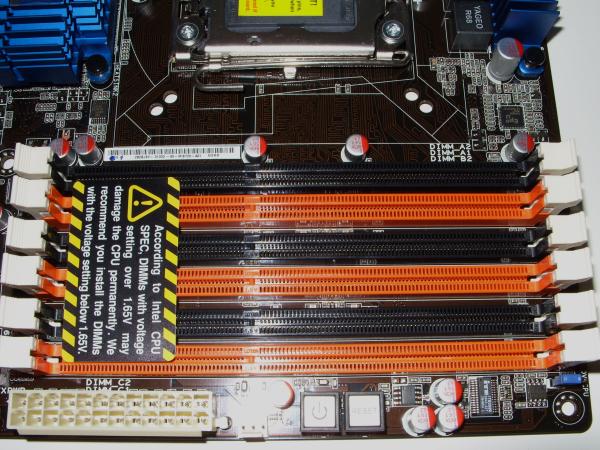 |
To the right of the RAM slots there is a power switch and a reset switch. I found it strange that ASUS did not include a Clear CMOS switch. To clear the CMOS, one would have to resort to the old-fashioned way of shorting pins that are located in a completely different part of the motherboard. Because of this fact I do not believe that ASUS stayed true to their promise of not needing to short pins as stated on the box. The absence of the Clear CMOS bottom makes me feel that I am somehow getting a budget product. Surely the P6T is not the top of the line motherboard, but substituting the 3 pins for a switch would not have been a difficult task at all.
 |
 |
Just below the reset and the power switches there are 6 SATA ports and an IDE port. The orange ports are for use with the Drive Xpert, a function which will be dicussed later in detail.
Taking a look at the backside of the motherboard I noticed that there was only one ethernet port instead of the usual two. There are also PS2 ports for the keyboard and mouse, 6 USB ports, a e-SATA port, a S/PDIF port, an optical port, and 6 audio jacks.

In the middle of the board you will find:
- 3 x PCIe 2.0 x16 (at x16/x16/x4 mode)
- 1 x PCIe x1
- 2 x PCI

The blue colored slots both operate at x16 while the white operates at x4 speeds for the 3Way SLI setup. Similarly, in a Quad CrossFireX setup same configuration is used. The fourth card is placed in the x1 slot.
At the bottom of the board there are 3 USB Connections, a Floppy drive connector, a SPDIF out, Front Panel audio connector, a FireWire Port and a other front panel connections (On Switch, Speaker, HDD LED, Reset Switch, On LED).
 |
 |
–~~~~~~~~~~~~–
Motherboard Features:
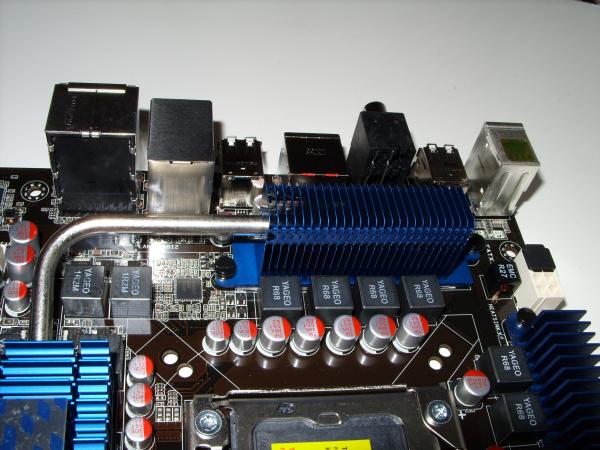
Solid-state Capacitors
After looking thoroughly through multitude of features that this motherboard offers, it would not hurt to further investigate some of them. Firstly, the words “solid-state capacitors” have been plastered all over the box so I figured that it was important.
The difference between the solid-state capacitors and the non-solid-state ones is simple. The non-solid-state capacitors have a fluid called Electrolyte that acts as an insulator between the conducting cores. The solid-state capacitors have a solid material called polymer that also acts as an insulator between the two conducting cores.
 |
 |
So what is the [performance] difference?
Well the difference is that the solid-state capacitors are less prone to damage from overvolting and overheating which results in a longer life span of the capacitor. The longer the life span of the capacitors on the motherboard, the longer that motherboard would be useful. Motherboards with blown capacitors will most likely not be able to function properly and would have to be sent back to the manufacturer in hopes that they could replace the broken board.
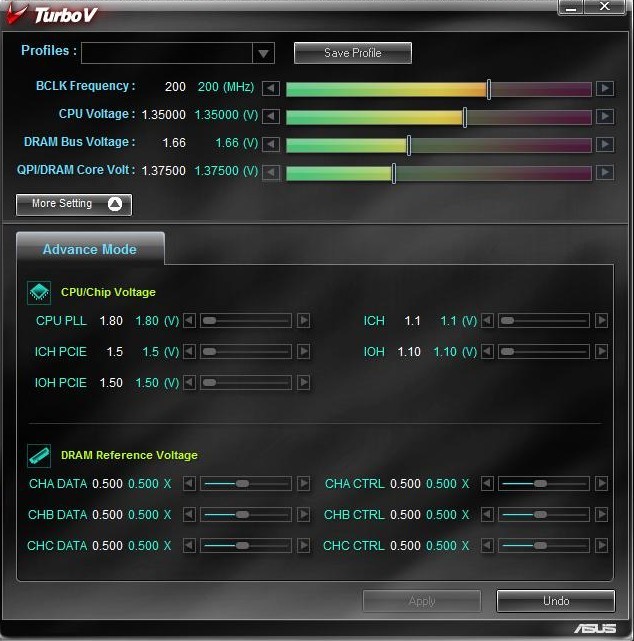
TurboV
For overclockers out there, TurboV is great news. This nifty on the ASUS P6T application is similar to that of nTune for nVidia motherboards. TurboV gives the user the ability to adjust the Voltage and RAM speed among other settings from the Windows environment. The graphical interface was quite easy to understand and provided an excellent overview of the current status of the computer. For extreme edition processors, TurboV will also allow the user to set the multiplier.
3Way SLI and CrossFireX
Just like the title says, the new x58 chipset supports both nVidia and ATI configurations. Now people that are considering upgrading to a Core i7 do not have to worry about buying an ATI setup versus and nVidia setup. After having tested both options, the nVidia in SLI tended to perform slightly better that its ATI counterparts but the difference was almost insignificant.
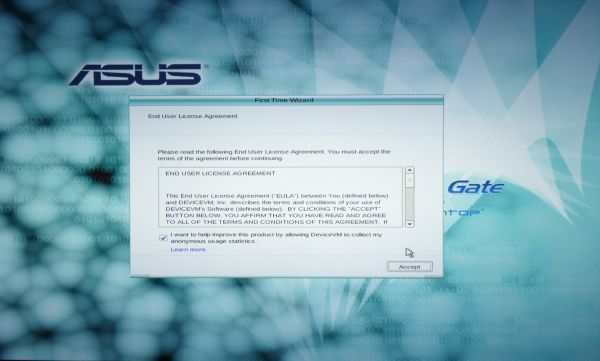
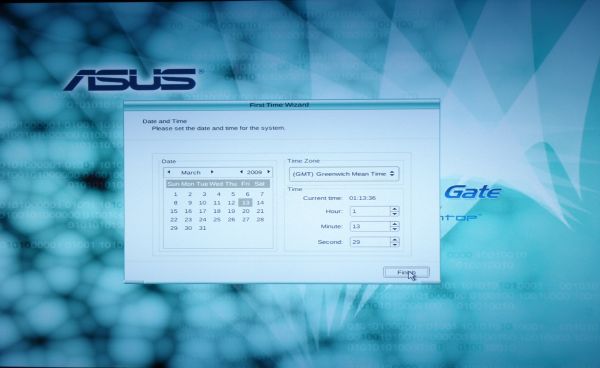
Express Gate
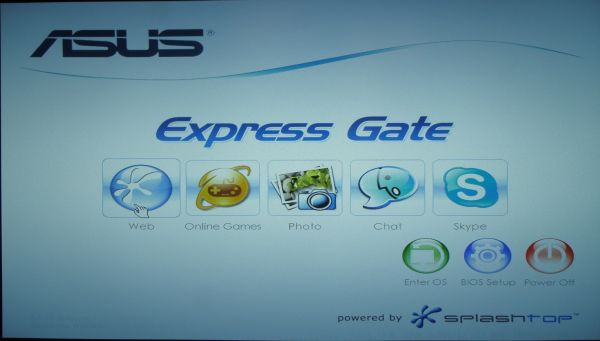
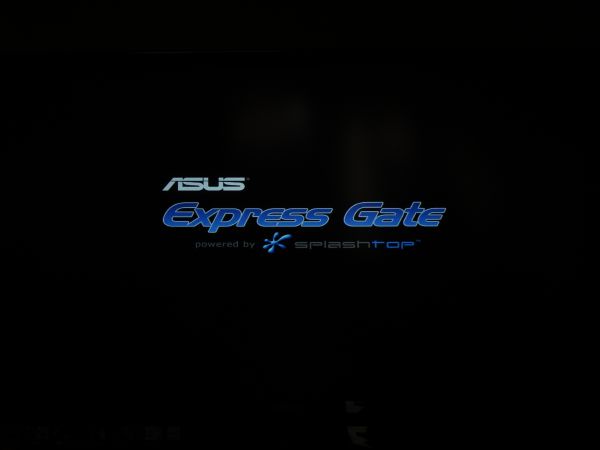
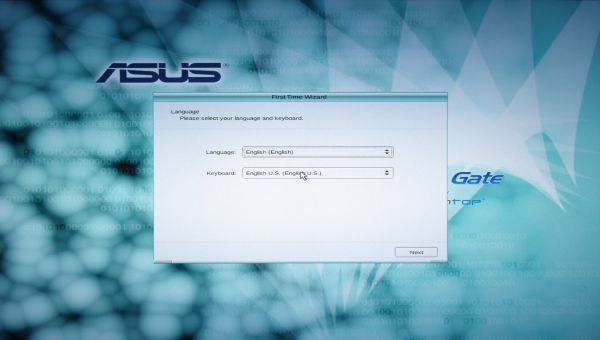
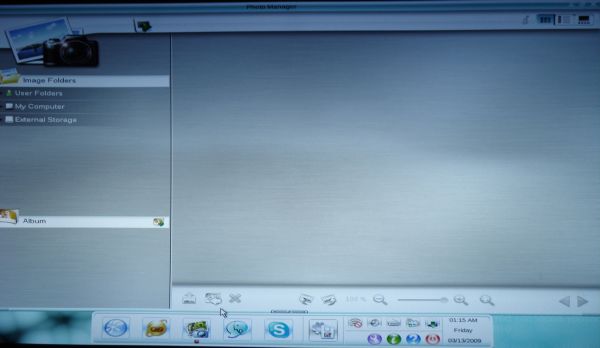
Another function that has been heavily advertised on the box is the ASUS Express Gate. Under the Express Gate title, ASUS P6T boldly declared that with the Express Gate software and select hardware users would be able to access the internet within 5 seconds of turning on the computer. I decided to further investigate that claim. After clicking on the “Internet” icon on that start up screen, I was almost immediately transported into a linux-like environment and asked to confirm Language, EULA, and Date and Time settings. After the confirming those, I was then transported to the desktop out of which several functions became available.
 |
 |
|
|
|
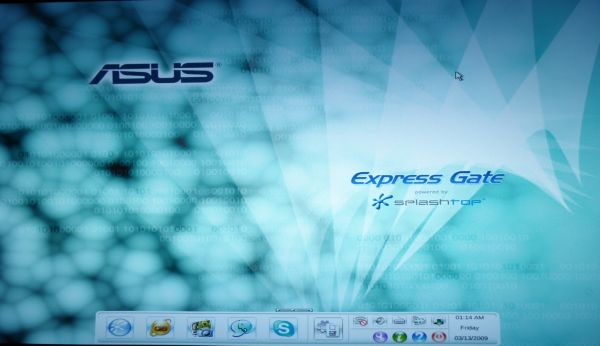
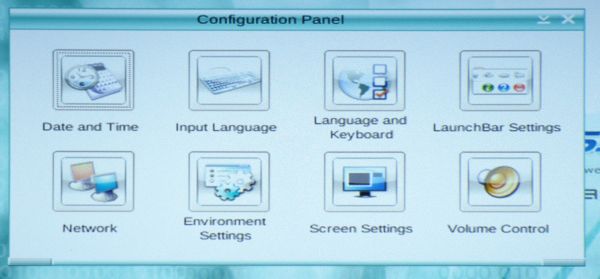
The desktop looked similar to any other desktop but only offered the functions listed at the original boot up screen. In this desktop environment I was able to view images, check my mail, chat with people using messenger, and call people using Skype. These features worked extremely well, though sometimes took a while to load. I regret to say that the display driver was not completely perfect either. I was not able to obtain my monitor’s native resolution of 1680 x 1050. The resolution that I had to seattle for was 1440 x 1050 (max).
 |
 |
|
|
|
 |
 |
 |
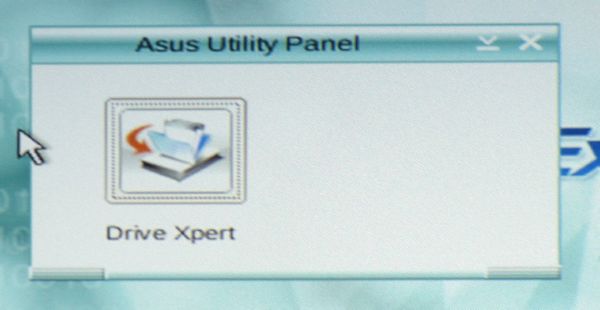
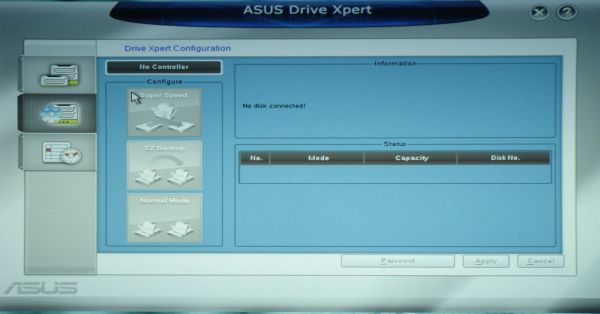
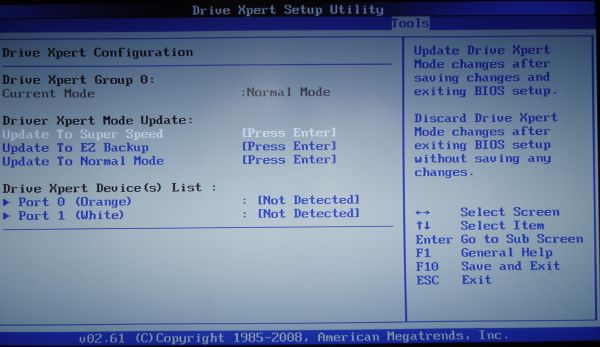
The Drive Xpert feature has also been integrated into the Express Gate. The Drive Xpert settings can be set to enhance speed through a RAID 0 setup, or increase redundancy through RAID 1 setup. Drive Xpert only functions when there are identical hard drives plugged into the two orange-colored SATA ports on the motherboard.
The RAID 0 setup will split the file (almost) evenly and different parts across two hard drives. In this case the data rate almost doubles which is why in the set up it is referred to as the “speed” option.
The RAID 1 setup will take the original file and copy it to the second hard drive. Since two hard drive are less likely to fail than one hard drive, this option enhances reliability of your data.
|
|
|
–~~~~~~~~~~~~–
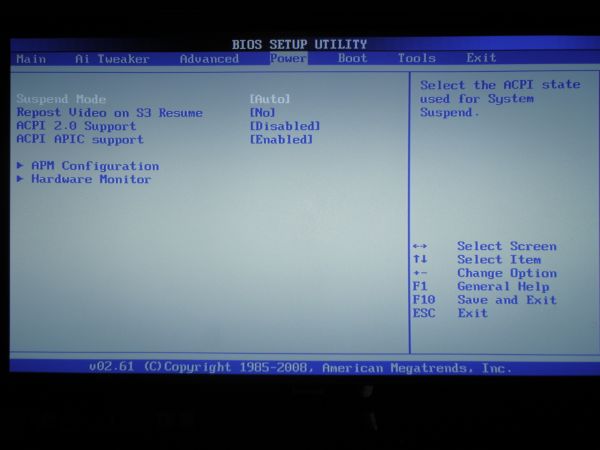
Bios
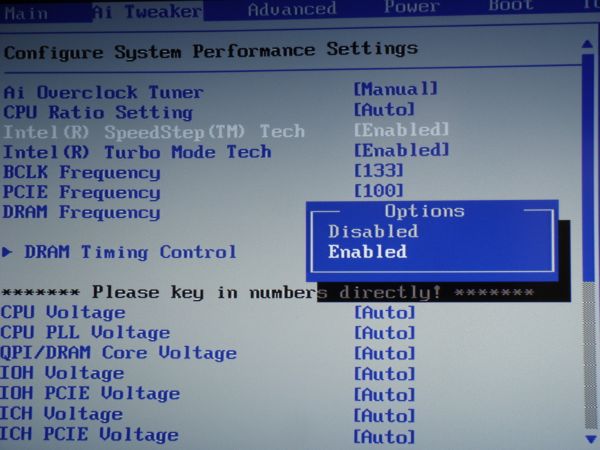
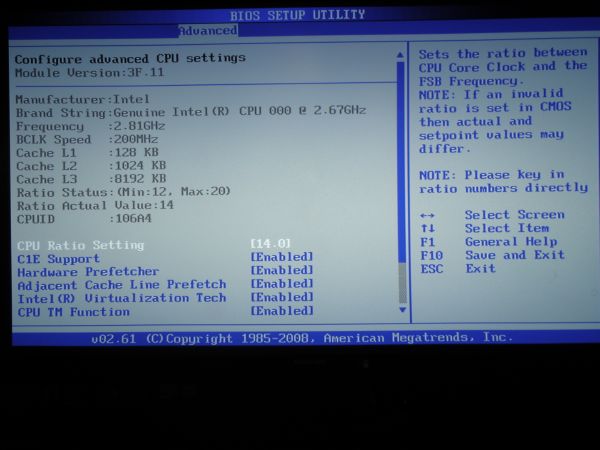
With the introduction of the Core i7 the bios took some drastic changes. With the Nehalem processors there is no more need to modify the Front Side Bus (FSB) to change the speeds. The main settings that affect processor speeds are the multiplier and the base clock setting. The Core i7 920 allows a multiplier of 27 maximum while the 965 is set at 63. The total frequency can be obtained by multiplying the base clock frequency by the multiplier.
 |
 |
 |
|
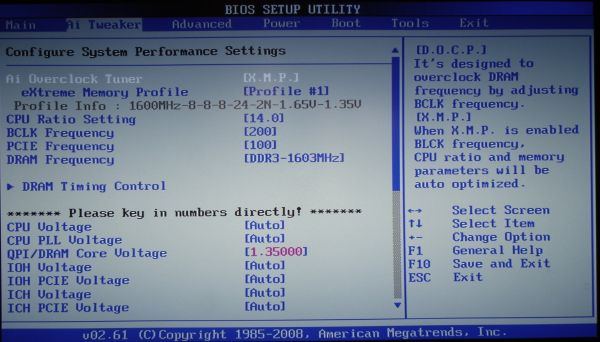
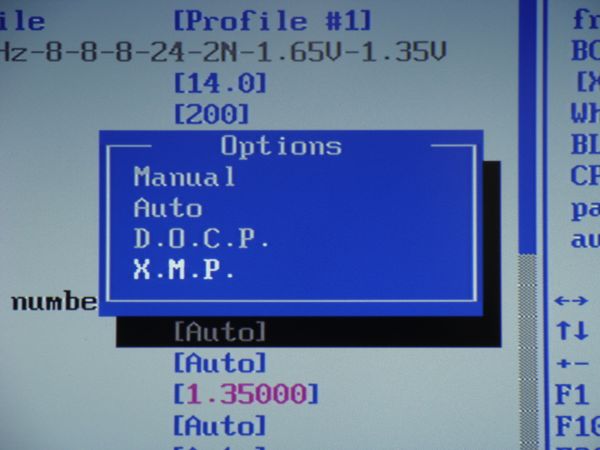
Another set of interesting features on the ASUS P6T is the memory settings. Unlike in the previous bios settings, you can select from 3 automatic settings to operate your RAM or set the RAM settings manually. The three options are “Auto”, “D.O.C.P.”, and “X.M.P.” The “Auto” setting is the setting that everyone starts out with. The “Auto” setting sets all voltages to what would be considered a safe operating conditions. This means that if you have RAM that operates at higher frequencies than 1333 MHz, you will most likely have to reconfigure the settings in the BIOS.
The “D.O.C.P.” or the DRAM Overclock Profile uses the block frequency to overclock the RAM. Since the Block frequency is directly tied into the processor frequency, by increasing the block frequency you are effectively overclocking your processor.
The X.M.P. is probably the most interesting of all the preset settings. “X.M.P.” or eXtreme Memory Profile is similar to the nVidia’s SLI memory and the Enhanced Performance Profiles (EPP). XMP will only work properly with the XMP compatible RAM. XMP ram comes already with preset values for the multiplier, block frequency and voltage settings. All the user has to do to overclock the system to the manufacturer specified settings is to enable the XMP profile. The base clock, the multiplier, and the voltage settings will be automatically set to predetermined values.
 |
 |
More advanced user that do not wish to go along with the manufacturer specified values have the ability to further modify the settings manually. In my personal experience I found that the XMP setting is a good starting point for overclocking. After setting up the XMP, I was able to go down to the voltage and the base clock settings and further alter them to my liking. According to Intel, DRAM voltage should not exceed 1.65 V to avoid damage to the processor. While overclocking, I found that 1.7 V did not fry my processor and made the overclock more stable.
There are also SpeedStep and Turbo Mode Tech options in the AI Tweaker window. The SpeedStep option reduces the consumption of the CPU by decreasing the processor speed when the processor is not being used. The Turbo Mode Tech, on the other hand, increments the speed of the CPU by overclocking it based on the loads on the processor. The speed of the processor is either increased or decreased by adjusting the multiplier. Speed Step and the Turbo Mode Tech options can only be enabled and disabled.
 |
 |
 |
 |
 |
|
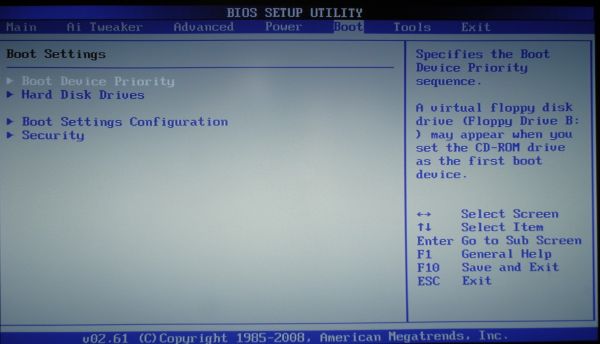
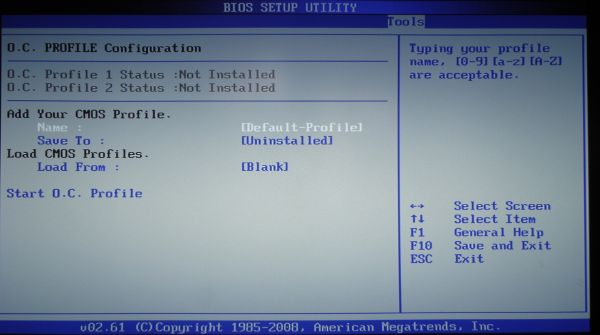
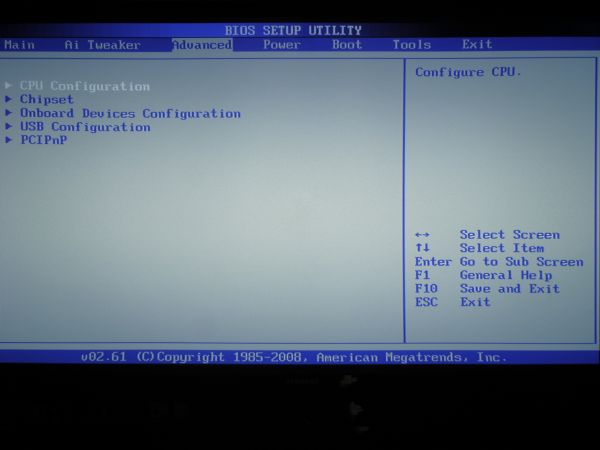
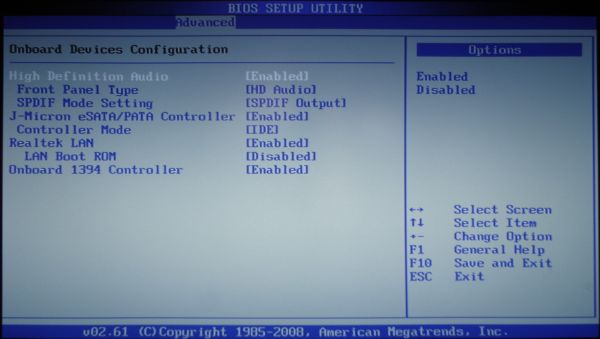
Similarly to the previous bios revisions, there are options to enable and disable the, Virtualization technology among others in the “Advanced > CPU Configuration” menu have not changed much from the previous revisions. The images below display the options available in each of the tabs in the BIOS.
 |
 |
 |
|
 |
|

–~~~~~~~~~~~~–
Overclocking
Testing Bench:
- Intel Core i7 920 Processor
- ASUS P6T Motherboard
- Kingwin MACH 1 700 W Power Supply
- Corasair Dominator DDR3 PC-12800 1600 MHz
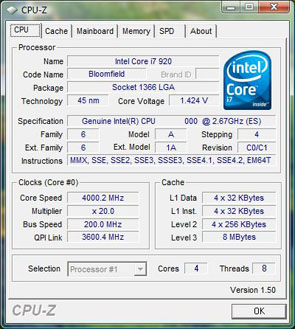
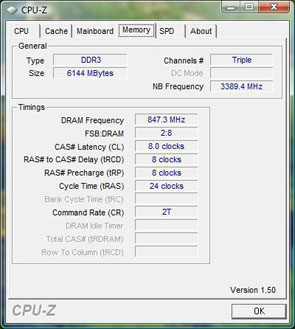
Despite the fact that the ASUS P6T is a more or less a budget motherboard, (in comparison to others at least) it delivered uncompromising results. I was able to overclock the Core i7 920 up to 4.0 GHz from its stock frequency of 2.66 GHz while leaving the voltage set on “Auto”. The RAM also proved to be highly overclockable as it soared up 100 MHz from its original 1600 MHz.
 |
 |
Conclusion
The performance of this board was nothing short of solid and at a price tag of $239.99 (after mail in rebates) from newegg.com you just can not go wrong. The P6T is also one of the few motherboards at its price range that support 2000 MHz RAM speeds. If you are planning to enter into the Core i7 market, ASUS should definitely be at the top of your considerations list.