![]()
Bios
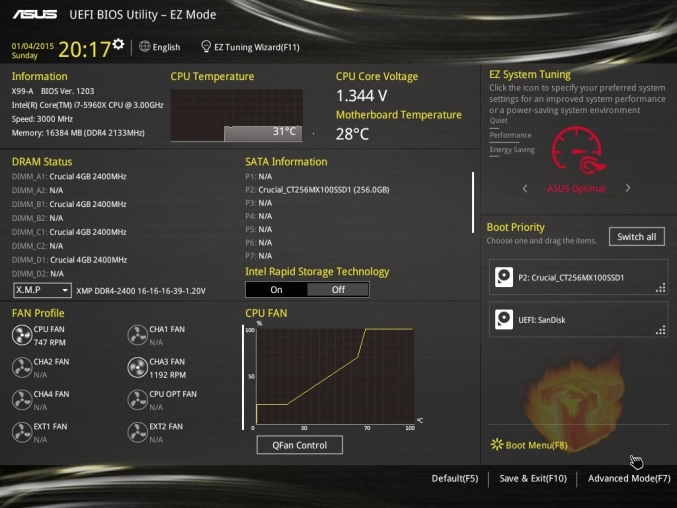
The UEFI for this board is pretty standard which means you spend less time trying to find things and more time trying to squeeze that last megahertz out of your chip. There is an “EZ mode” which gives you key info like temps, voltage, etc and allows you to do simple things like change boot order. The mode we are most interested in though is the “Advanced mode” where we have access to every possible adjustment available.
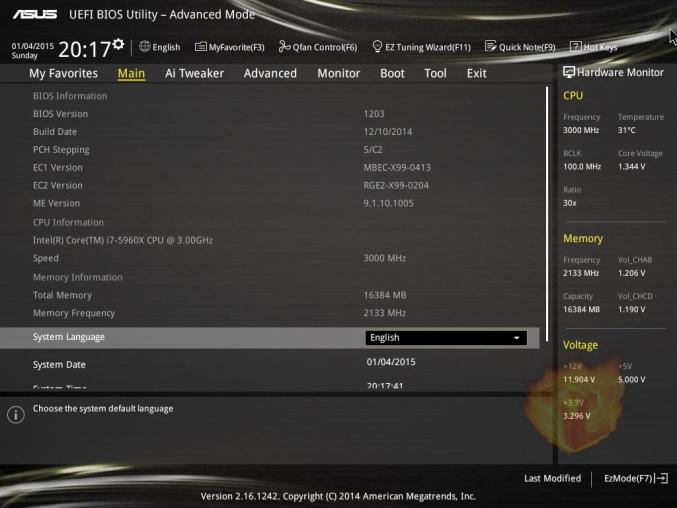
Between the advanced mode and our unlocked processor we are able to change just about any setting you could possibly need. The basics such as core ratio, base clock, core voltage, RAM timings, etc are all easy to find and allow for a wide range of adjustment. Digging further we can even get in to the minute tweaking details such as VCCSA voltage, load line calibration, etc. You won’t leave the BIOS thinking, “Man I wish there were more settings to tweak.”
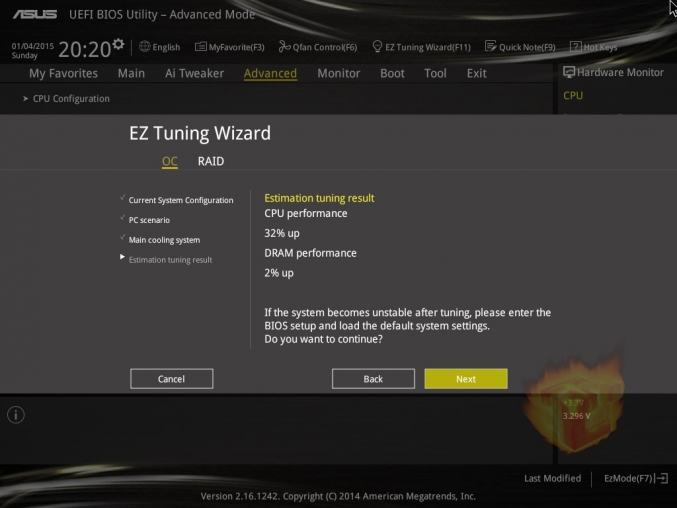
Asus has always had an incredible layout that is easy to navigate and has all and any options under the sun. The main addition in bios for the X99-A has been the EZ Tuning Wizard, a helpful tool for novice overclockers. Although the EZ Tuner did not achieve the same or better CPU overclock as a manual overclock it did a heck of a decent job and remained at an acceptable V-core voltage which kept the temperature down for the.
Overclocking
Test System
- CPU: 5960X
- Motherboard: Asus X99-A
- RAM: Crucial 16GB DDR4 @ 2400
- PSU: Corsair RM850
- Video Card: R9 290 @ 1200/1450
- Cooling: Custom Watercooling Loop
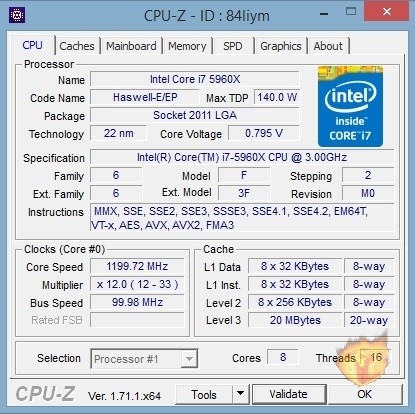
- (picture of CPU-Z
 |
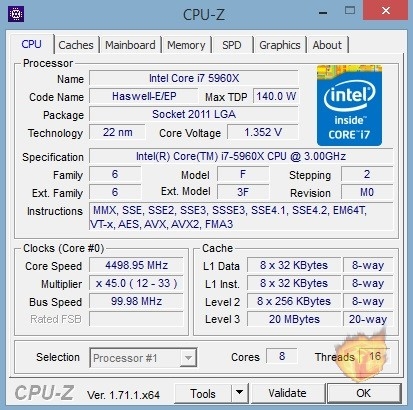 |
Overclocking with the Asus X99-A was very simple and straightforward, no micro management with things such as PLL voltage were necessary to reach a decent overclock of 4.5 Ghz. Every CPU is different any my engineering sample was not exactly top notch as anything above 4.5GHz required a V-core voltage of over 1.4 volts. Such a high voltage value for overclocking gets into dangerous territory temperature wise even with a full custom water loop. At the base clocks of 3.0 GHz and a turbo of 3.5GHz the voltage stayed at around 1.1V at full load and temperatures remained under 55 degrees Celsius when performing an Aida 64 CPU stress test. With the obtained OC clock of 4.5 GHz voltage remained at 1.33V and temperatures reached a max of 71 degrees Celsius. The Asus X99-A allowed for some massive amount of tweaking, was 4.6Ghz possible? Yes, but not with a stable system at a voltage that won’t set the test rig on fire.
After long term testing and benchmarking with the Asus X99-A with an 8 core behemoth CPU at 4.5Ghz I can safely say that the motherboard remained stable 100% of the time, it is hard to tell weather this is Asus’ great bios or the extra CPU pins that the Asus X99 boards have.
Installation
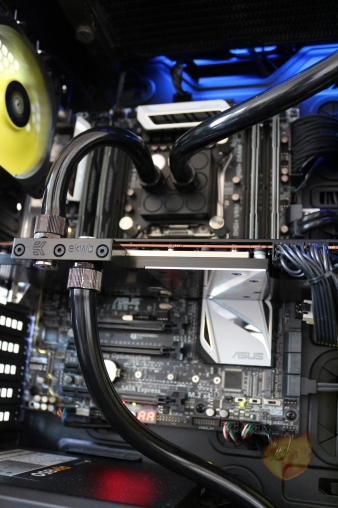
Installing a CPU on the Asus X99-A was the same as any other 2011 socket processor, a couple of precautions need to be taken due to the large size of the die and its orientation found on Haswell-E. Unlike any mainstream processor, 2011 socket processors need to be installed with the words upside down on the motherboard which is a bit counter intuitive and may confuse beginners. Other things to keep in mind is the cooler mounting, all variants of Haswell-E do not include a stock cooler, one will have to provide their own aftermarket alternative. Other than that installing the X99-A on a case is much like any other motherboard, just make sure to use standoffs to avoid any short circuits. The addition of a I/O plate with a cushion made installing that a breeze, a process that usually left me with a couple of cuts and many frustrating moments.

You must be logged in to post a comment.