Set Up
|
Create a Self Signed Certificate |
First time use password |
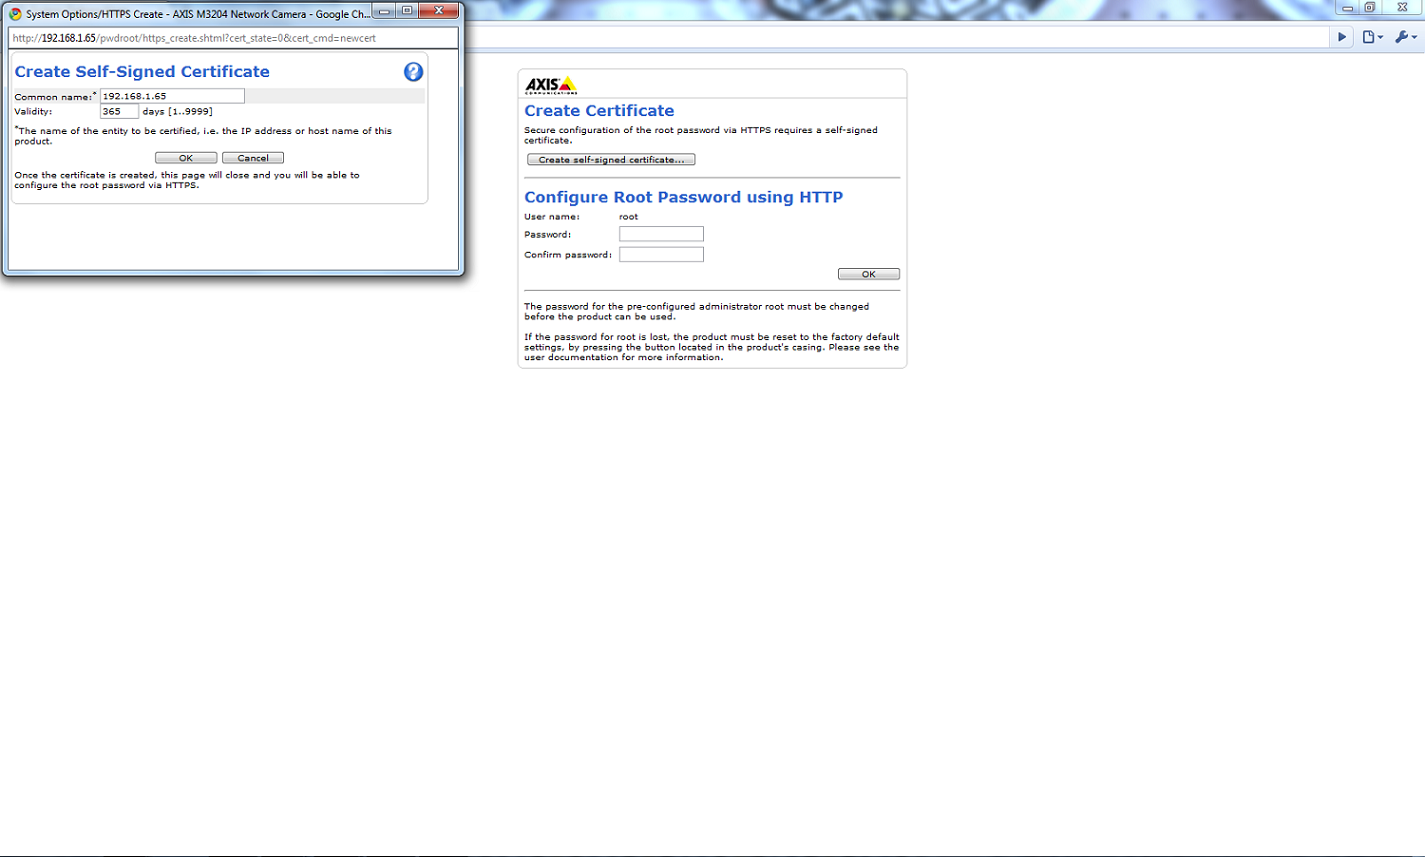

The set up is fairly straight forward. From the hardware side, the only thing that you would need to do is plug the camera into the network. Note that the switch that the camera will be connected to must be a POE switch, otherwise the camera would not work. After everything is hooked up, you are good to go. Locate the camera on the network and type in the IP address. Once you are in the camera page, you are automatically asked to create a self signed certificate for SSL access and a password for the root (default Administrator) account. After you have entered the passwords, you are then forwarded to the Live View of the camera.
Basic Setup
Users
Once the camera is installed the set up prompts you to create a password for the first account on the camera. The account is added with administrator privileges and uses “root” as the user name. Once the root user has been established, you can then add more user accounts with privileges ranging from “Viewer”, “Operator”, or “Administrator”. Administrators have full control over the camera as well as the settings, they can also add other users to the user list. “Operators” and “Viewers” have similar privileges, however, they can be differentiated with the “PTZ” (Pan Tilt Zoom) option access. You can select the security under each of the users logs in form “Encrypted”, “Unencrypted”, and both. If you are using encrypted connection the the wizard will take you to the page where you would generate either a self signed SSL Certificate or create an SSL request which you would need to send to a CA (Certificate Authority).

Basic Setup – Users
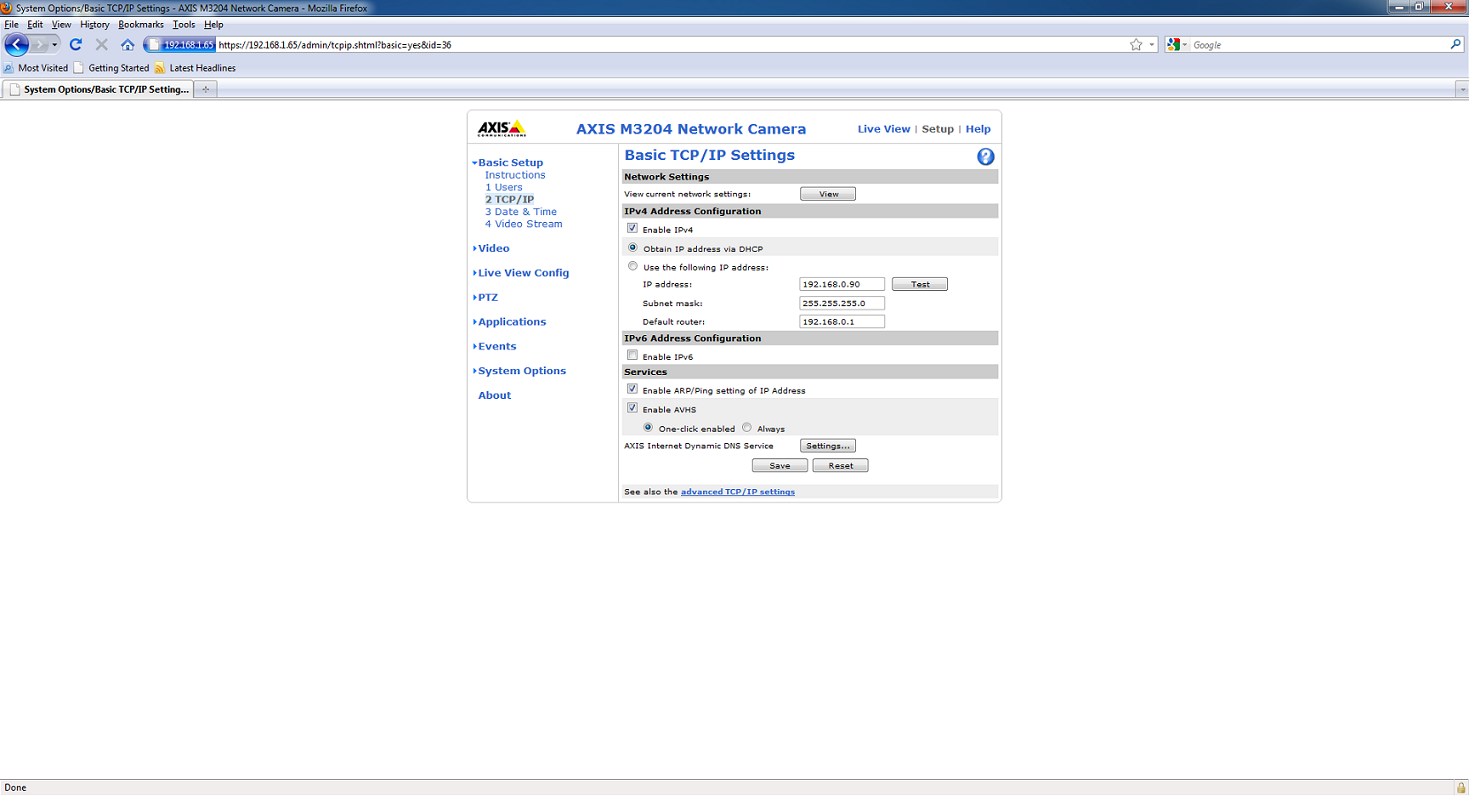
TCP/IP
The TCP/IP menu lets the user select the IP settings of the camera. You can either chose to assign the IP settings manually or leave the settings in default in which case the router will assign the settings for the camera. It is important to know that if you chose the manual option to later go into the advanced settings tab to set the DNS address, otherwise the camera will be accessible on the network but inaccessible from the the outside. The AXIS camera offers a Dynamic DNS service which would obtain the new DNS address and set it to a static address.
Basic Setup -TCP/IP

away at the Arctic Cooling K381
Excellent features for a dome IP camera! Another highly recommended camera besides the VIVOTEK one!
Hi, we have new ip camera,touch screen dvr and Effio model ,Pixem model Camera.
pls contact with me if you interesting in it. Thanks
http://www.sanan-cctv.com
kathy@sanan-cctv.com
Not quite a cheap camera! Another alternative is VIVOTEK FD8134!
Great shots on the inside of the camera. Thanks for sharing. We sell this camera and more on our site. Check out our Axis Camera Superstore
The best part about this camera is that it is super affordable considering how powerful it is. Small business looking for futureproof surveillance should turn to the new Axis M Series. Plus, it comes in black — How sleek!