Introduction
In recent years, a number of PC hardware manufacturers have latched onto the eSports phenomenon. Whether it comes from a desire to connect with the gamer crowd, or the simple economic imperative of “give the customer what he wants,” many companies are embracing the hardcore PC gamer, and Cooler Master is no exception. Under the CM Storm imprint, Cooler Master has been putting out a variety of products aimed specifically at the hardcore gamer, including mouse pads, case fans, and of course, cases. Today will be looking at the entry-level slot in the Storm case lineup: the Scout. This case is aimed not at the hardcore enthusiast, but at J. Random LAN Gamer. This case was designed for looks, LAN party convenience, and affordability, in roughly that order. Today we’ll take a look at this case, and see if it meets those objectives.
Packaging
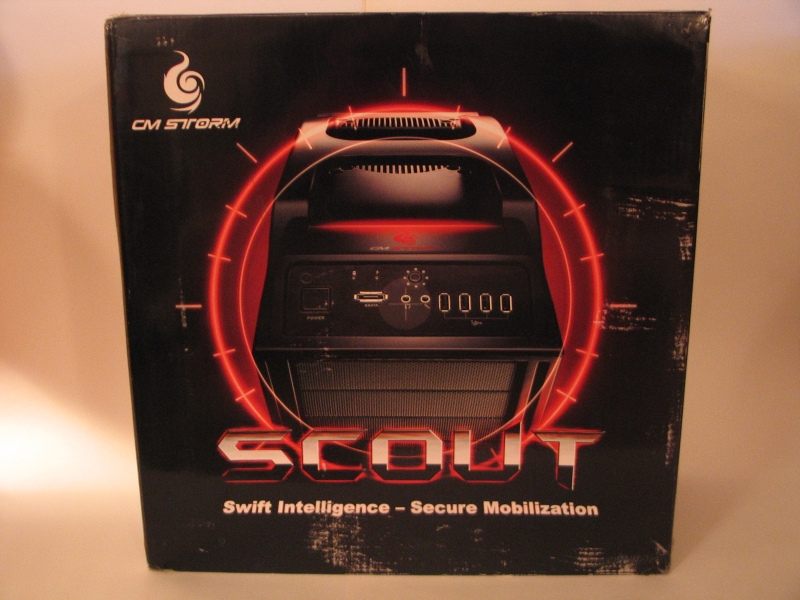
Here, Cooler Master decided to show off the two features you’ll interact with most on this case: the top-mounted port array and the integral carry handle. The red reticle surrounding the shot is clearly meant to evoke the view through a rifle scope, which fits with the military theme of the CM Storm line.
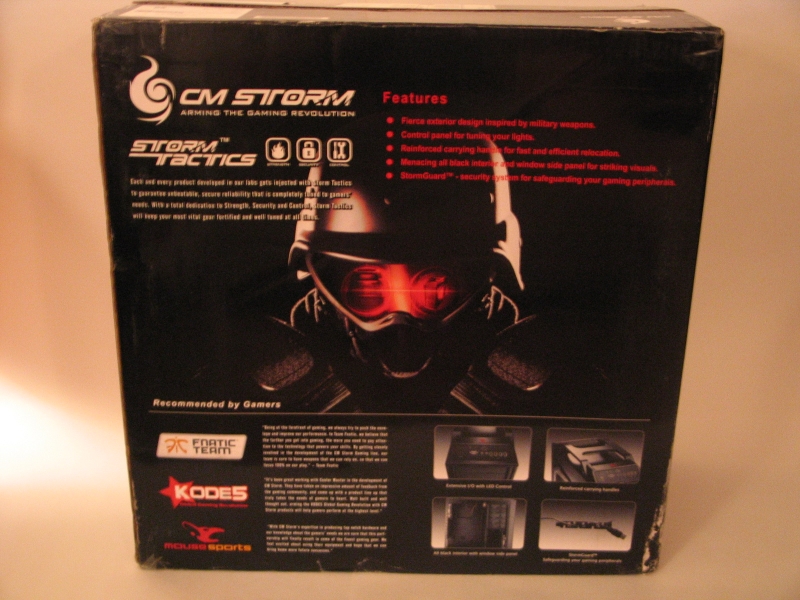
The back of the box further continues the military theme, with a faintly menacing fellow in black riot gear and red-tinted goggles in the center. Below that, we see a few detail shots of the case itself, alongside testimonials from a few of the pro gamer teams Cooler Master sponsors.
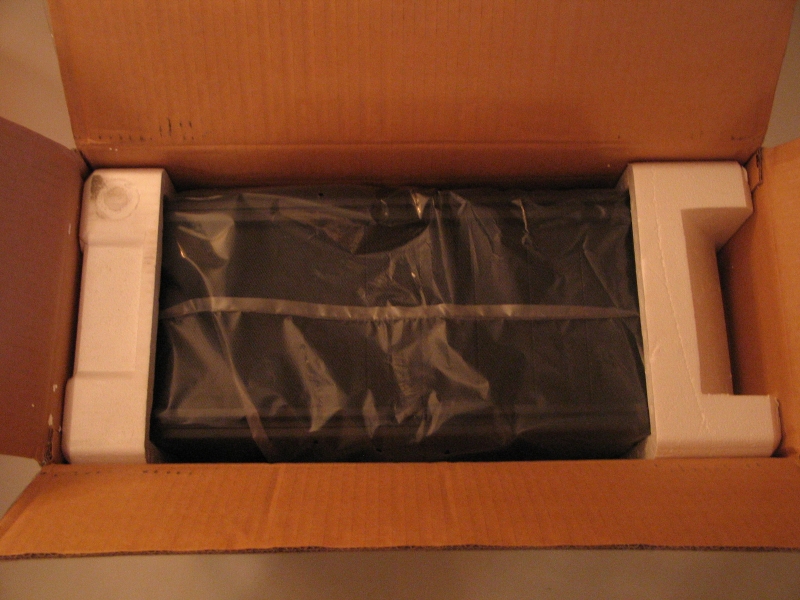
Packaging is a pretty standard affair, with a plastic dust-cover and hard styrofoam “bookends” to protect the case in-transit. The box was slightly crushed in one corner during shipping, but the case itself was undamaged.
A Closer Look
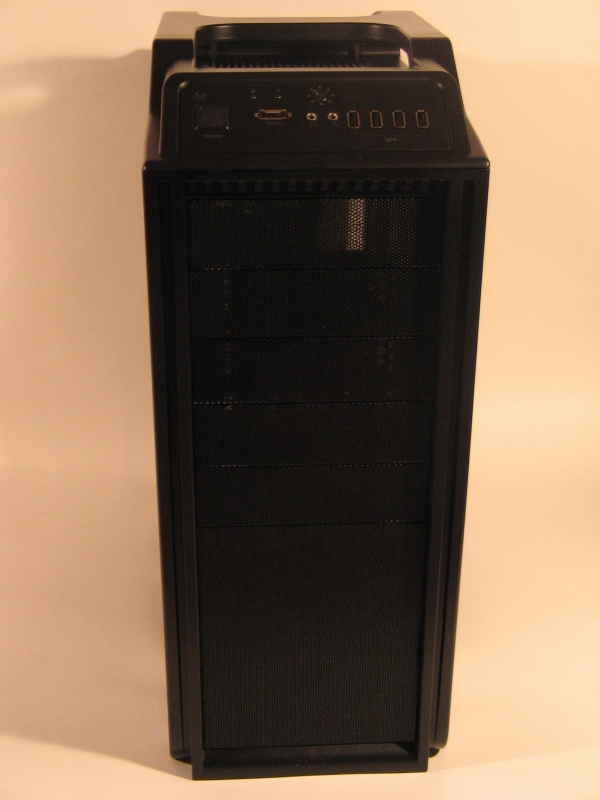
The front of the case is fairly nondescript, with a black, perforated steel mesh covering both the unused drive bays and the front intake fan. The bezel surrounding this is plastic, and must be removed before any drives can be swapped into or out of the 5.25″ bays.

A look at the top reveals a few more points of interest. First, we have the I/O panel, which features four USB 2.0 ports, headphone and microphone 3.5mm jacks and one eSATA port. The large square button to the left is the power switch, with the small recessed circle above serving as the reset switch. The slightly larger circular button in top-center toggles the LED lights in the front and rear fans on and off. Sadly, this is the whole extent of the “customizeable lighting” promised on the packaging.
The carry handle, seen here in the center, is made of a hard plastic, but is quite solid. Unless you’re in the habit of hauling miniature bowling balls around inside your case, the weight of the system should present no issues. In the top rear, we see ventilation slits for the top exhaust fan. The mounting screws that hold it to the inside of the case can be accessed with a long bladed Philips head screwdriver. The preinstalled fan measures 140 mm, but there are mounting holes for a standard 120 mm fan as well.
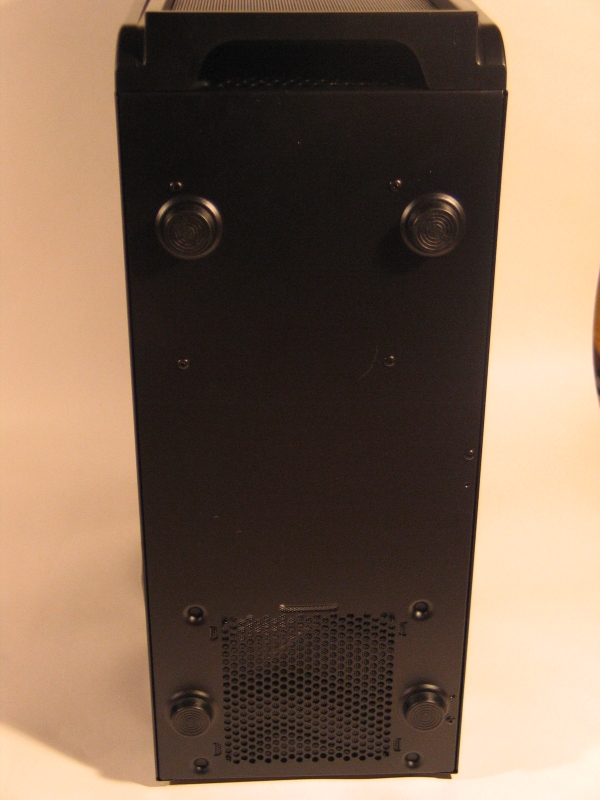
The bottom of the case is fairly unremarkable: four hard plastic feet and a perforated mesh that allows the power supply to draw in cool air from outside of the case. Obviously, this only works with power supplies that feature a bottom mounted intake. This has become something of a de facto standard, but it is still worth noting. The bottom of the front bezel has a large cutout for supplying air to the front intake fan.
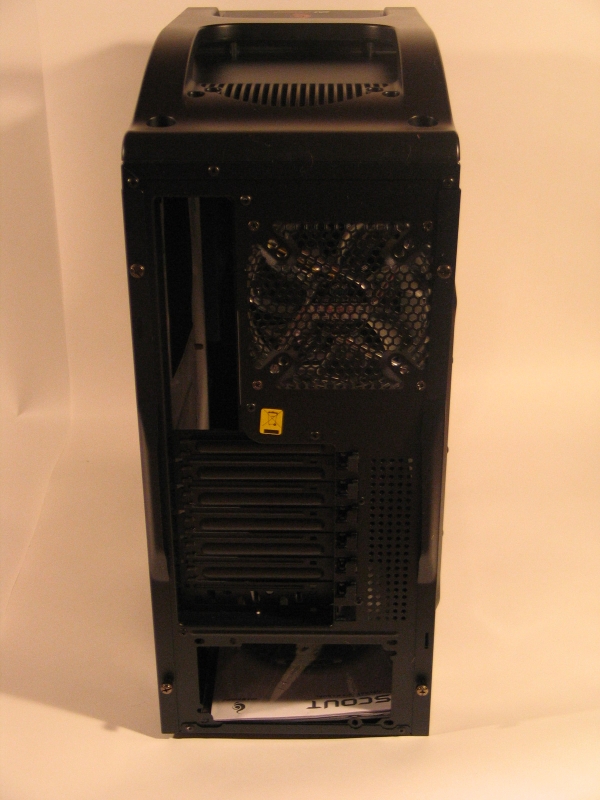
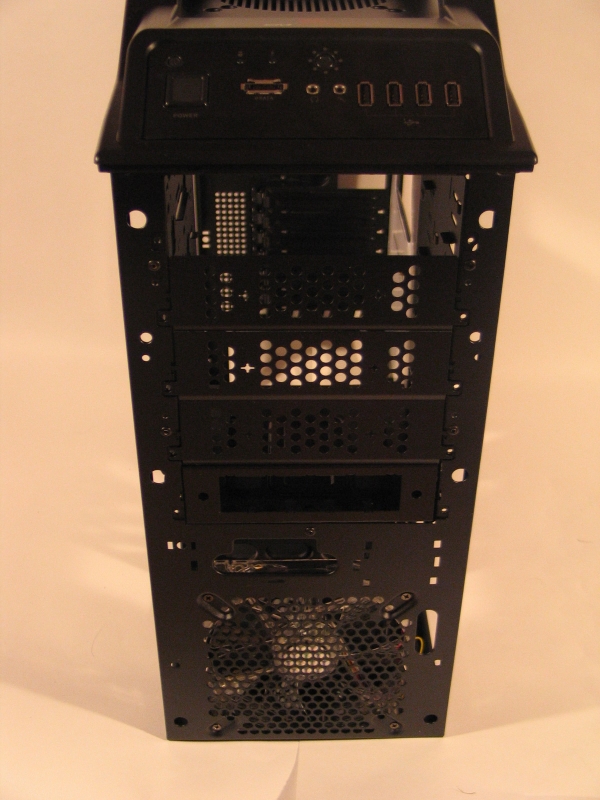
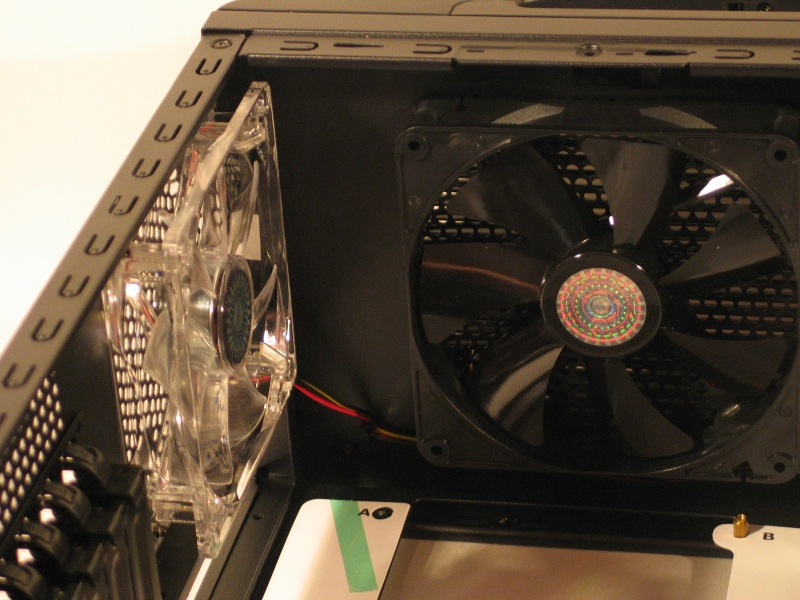
The layout of the case rear is fairly standard. No I/O backplate was provided for the motherboard; given that most motherboards come with their own, this should not be a major issue. Next to the backplate, Cooler Master has mounted a clear 120 mm fan which glows red when the lights are turned on. The two 140 mm fans also do this, but are somewhat more covered up.
One part of a case that doesn’t usually get much attention is the expansion slot covers. Cooler Master has done something unusual with one of these–they have shaped it such that a couple of cords can be wrapped around it and left to trail out the back. Presumably this is to discourage casual theft of peripherals at a LAN party; realistically speaking the only defense against that is having a buddy watch your stuff when you’re not there. Still, it does the job it was designed to do, so I can’t fault them for that.
Expansion cards and slot covers both are held in by a series of pivoting latches that can be removed if you prefer to use screws. The “StormGuard”–CM’s baroquely named cable-holder slot cover, is secured with a thumbscrew.
A Closer Look, part 2
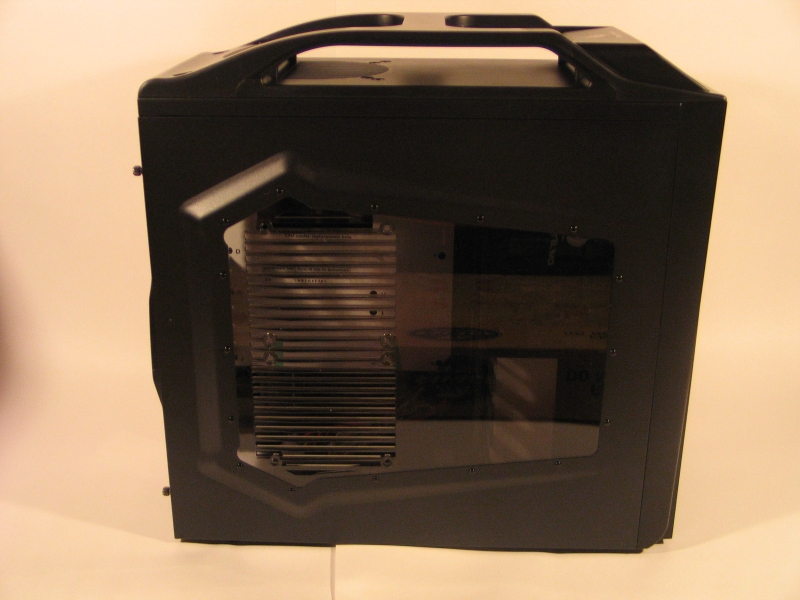
The two side panels are held on each with a pair of thumbscrews. Getting the side panels off is a matter of removing the thumbscrews and pulling back on the handle until the panel falls off. As with many new cases, a Philips head screwdriver may be needed to break the static friction on the thumbscrews the first time. After that, getting into the case is an entirely toolless affair.
The left side panel features a large polygonal window that takes up most of its area. The back half of the window features ventilation slots and screw holes for mounting a pair of 120 mm fans. There is no provision for blocking these holes however, which may present a problem if you live in an especially dusty environment. Given that there were no dust filters on the front intake fan however, it’s probably safe to assume excessive dust was not one of their design considerations. The right side panel is identical to the left, save that it lacks the window.
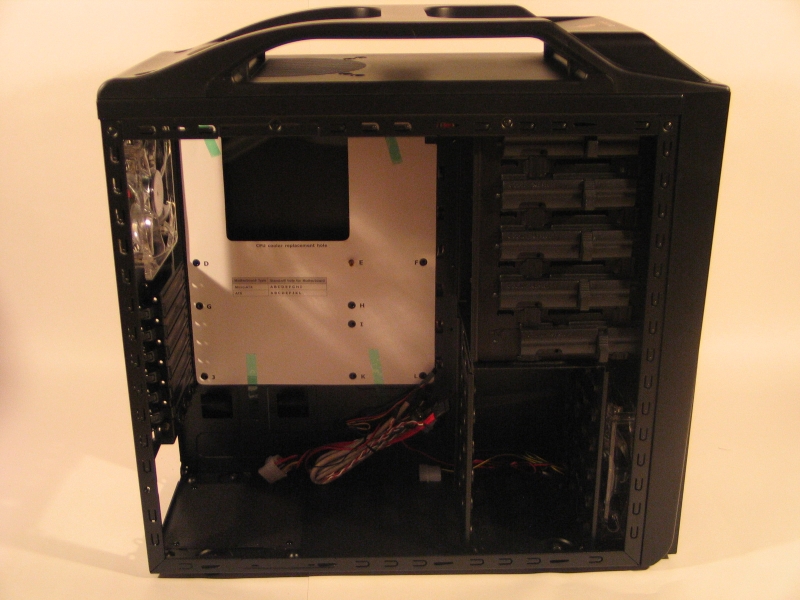
Looking inside the case, we see a layout that will look very familiar to users of past Cooler Master cases. The hard drive cage is welded in place at bottom front, and utilizes a toolless rail system. Each rail holds itself in place with a pair of straight, rough-textured posts that go into the screw holes without engaging the threads. In practice, this means holding the rails to the side of each drive as it is slid into place. Once installed, the drives do stay put, but an incautious user will find the rails popping right back off when the drive is removed from the cage.
The motherboard tray is large enough to accommodate a standard ATX motherboard, but just barely. If your motherboard has the drive connectors lined up along the front edge, as is fairly common with enthusiast-class motherboards, getting the data cables lined up and connected properly will be quite a chore. Taking off the right side panel will gain you some maneuvering room, but don’t expect to set up any kind of hot swap array in this case.
The 5.25″ bays use a somewhat smarter system than their smaller cousins; each of the bays has a mechanism attached that slides forward to engage a pair of locking pins. Once engaged, a small latch slides downward to lock it in place. In practice, it was a bit difficult to line the drives up correctly with the pins, largely due to the necessity of removing the front bezel entirely in order to install the drives. The lowest bay comes preinstalled with a mounting bracket that allows for a 3.5″ or 2.5″ drive to be installed there. This is meant to hide behind a dummy faceplate however, so it is not much help in positioning an optical drive.
Looking behind the front bezel also gives us a clearer look at the front intake fan. At 140mm, it is slightly larger than the fans we’re used to, but not by much. When the lights are turned on with the switch on the front I/O panel, this fan glows a bright red that can be seen clearly through the perforated mesh and thin foam that makes up most of the front bezel.
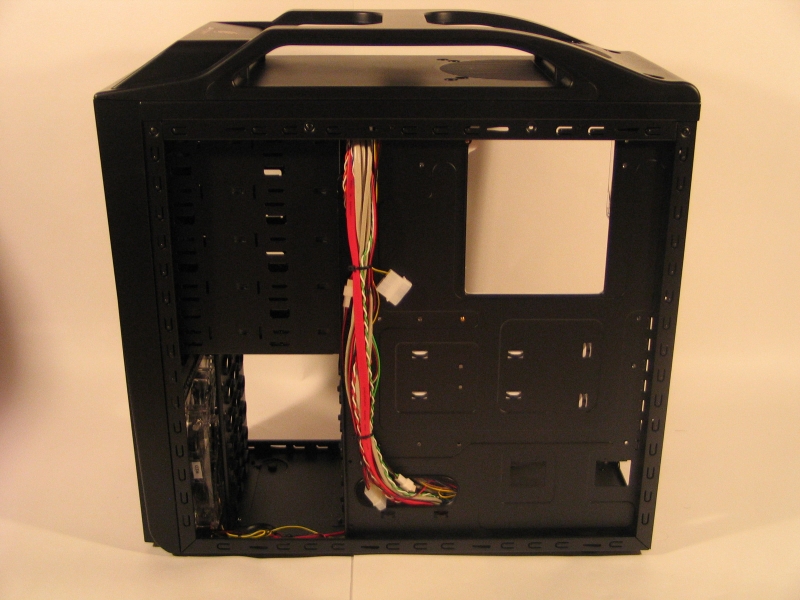
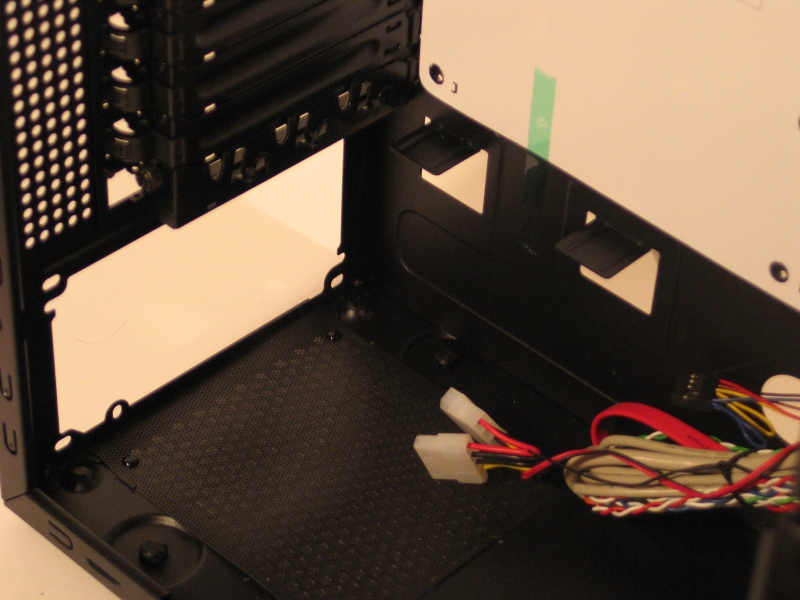
Looking underneath the motherboard tray, we see a couple of interesting features. First, and perhaps most noticeable, is the large cutout in the upper portion of the tray itself. This cutout gives direct access to the motherboard underneath the CPU socket, enabling the user to change out CPU coolers without removing the motherboard from its mounting. This particular feature is actually fairly uncommon in cases in this price range, for no reason I can fathom. Adding it here was a nice touch.
The other feature is perhaps less prominent, but definitely more generally useful: zip tie anchors. With these, taming an unruly tangle of power supply cables is much simpler. The included zip ties are a bit too flimsy for this task, especially when the 24-pin motherboard power cable is involved, but a trip to the local hardware supply store can easily fix this deficiency.
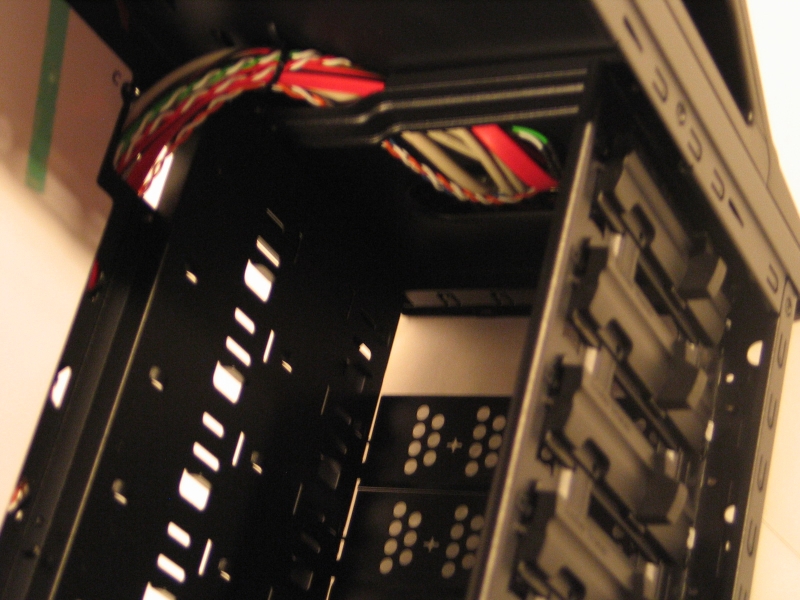
Also quite prominent is the thick bundle of cables coming down from the front I/O ports. These cables come already tied down and positioned where you will most likely need them. This sort of thing is expected from an aftermarket chassis these days; it’s nice to see that Cooler Master does not disappoint in this regard.
A Closer Look, part 3
The power supply mount is fairly standard, with the usual provisions for mounting it right side up or upside down. There’s no way to mount an oversize power supply, but in a case this size you probably wouldn’t want to. Given that the bottom of the motherboard and the top of the power supply are separated by less than a centimeter of distance, installing a triple-SLI rig–or even a dual-SLI rig, on some motherboards–is not recommended.
In the top rear, you are given the choice of top exhaust or rear exhaust. Running both simultaneously is possible, but pointless, as they are close enough together to interfere with each other’s airflow. Top is usually more efficient, as it aids hot air’s natural tendency to rise, but your setup may call for rear instead. By including both fans, Cooler Master has made the choice easy and quick; just plug in the one you want to use.
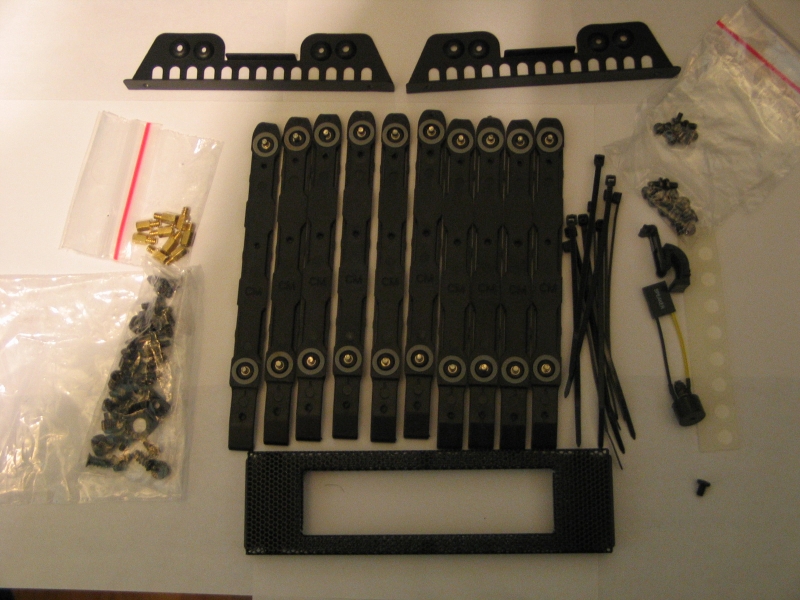
Of course, no case is complete without all the little fiddly bits that help you put everything together. The accessory box included with the Scout includes screws, silicone washers, extra motherboard stands, zip ties, drive rails, a spare expansion card latch, a motherboard speaker, accessory rails for mounting a 2.5″ drive in the 3.5″ to 5.25″ mounting bracket, and a faceplate for mounting a floppy drive or other 3.5″ external drive in a 5.25″ bay. Sturdier zip ties would have been nice, but aside from that everything you’ll need is here.
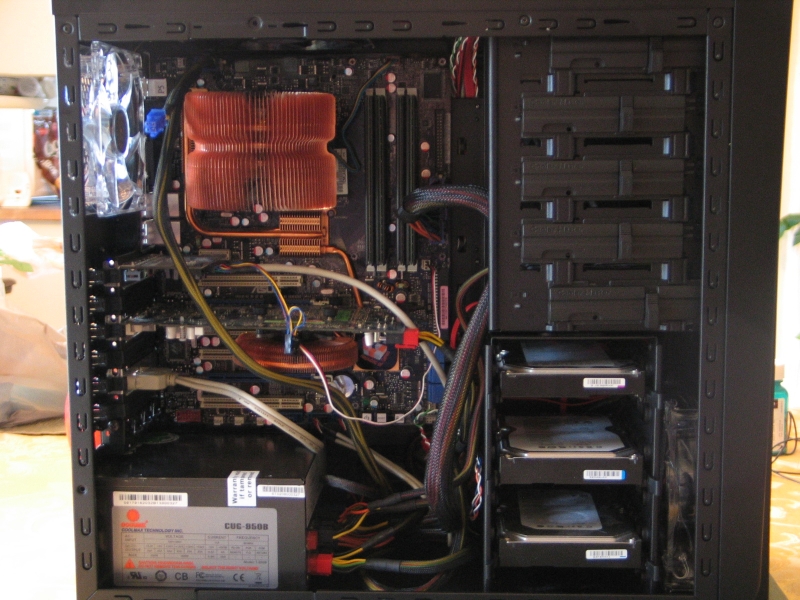
Here’s a shot of the case with everything installed. The black anodized interior certainly looks nice, but the lack of cable management features makes the end result somewhat less than pleasing. I was able to move the SATA cables out of the way by routing them behind the hard drive cage, but there was no way to run the power cables behind the motherboard tray, where they would have been out of sight. Clearing up cable clutter in this case is certainly possible, but it will take some careful planning and diligent effort to succeed.
The arrangement of the hard drive cage also deserves some mention. While there’s certainly space to mount five drives, the design of the cage walls will severely restrict air flow to the drives. Additionally, the front intake fan is not correctly aligned with the drive cage. As a result, the drive mounted in the uppermost slot receives barely any airflow. This could cause issues with overheating, which would negatively impact the drive’s health and long-term performance. Most 7200 RPM drives can tolerate being mounted in the lower slots; but if you’re planning to use a hot, high performance drive such as a Velociraptor, you will absolutely want to avoid using this cage.
Conclusion
So what do I think of the CM Storm Scout? The included feature list is certainly quite comprehensive for a budget case. The overall design clearly shows that they had gamers in mind. The integrated handle is an especially nice feature for people who frequent LAN parties, making the task of carrying your computer from the car to the game much easier. The look and feel are certainly distinctive: the Scout won’t be winning any industrial design awards, but no one will mistake it for mom’s crappy old Dell box.
Unfortunately, it feels like they got a bit rushed when it came to laying down the fine details. The CPU cooler cutout and zip tie anchors on the motherboard tray point towards a desire for good cable management, but the cable channels and strategic cutouts that should have accompanied them are strangely absent. The drive bay design is clearly taken wholesale from earlier Cooler Master cases: this is a good thing for the 5.25″ bays, not so much for the 3.5″ hard drive bays. The chassis as a whole is compact, but compact can also mean cramped if your system has grown much beyond the basics.
So is it worth buying? The answer is: it depends. Someone looking to construct a quad-SLI, overclocked, watercooled beast is certainly going to look at something else. The young high school or college student constructing his first gaming rig, however, will have a different set of needs. If you’re looking to construct a decent gaming machine for LAN parties, and want a case that does the job without breaking the bank, the Scout might fit your needs. With an average online price of $92.41 before shipping (as of 9/2/2009), the Scout does offer a value that is hard to beat in the sub-$100 range.

[…] Techware Labs (+) […]
[…] Cooler Master Storm Scout Case @ Techware Labs – Thermaltake Evo Blue 750W PSU @ DriverHeaven – XFX 850 W Black Edition Power Supply @ Hardware […]
[…] techwarelabs reviews the Cooler Master Storm Scout Case […]