Introduction
In this followup to part 1, we’ll be going over the remaining components that are essential to building a system from scratch. Grab your thinking cap and your anti-static wrist strap, and let’s get started!
Power Supply
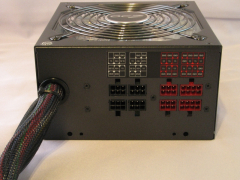
A power supply is like the transmission in your car, in that you never notice it when it’s working, but if it has a problem you come to a sudden halt. Choosing the right power supply can mean the difference between a stable system and a maddeningly inconsistent one riddled with heisenbugs. Figuring out exactly what you need may be difficult, but there are a few things you can look for to help narrow it down.
First, your processor’s spec sheet will include a stat called Max TDP, measured in watts. TDP stands for Thermal Design Profile, and directly it tells you how many watts of heat your CPU cooler will need to dissipate to keep things running cool at maximum load. Indirectly, it also gives you a worst-case estimate of how much power your CPU will draw. Most desktop CPUs range from 65W on the low end to 125W for the thirstiest CPUs. Overclocking can increase a CPU’s power consumption by ~25%, so bear that in mind if you’re planning to push your system past stock speed.
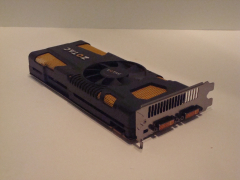
Your video card is going to be the other main variable in the power-draw equation. Thankfully, most video cards will tell you right on the packaging what the minimum recommended power supply is. Note that this assumes a minimal system with one video card, one hard drive, one optical drive, and no other expansion cards. As a quick rule of thumb, most mid-level cards draw between 100W and 150W, while the high-end cards can draw as much as 300W. If you’re going for a SLI or Crossfire setup, you’ll obviously need to double that number.
The other components don’t draw as much, but they have to be factored in nonetheless. Hard drives can draw ~30-50W at peak, depending on how performance-oriented the drive is. Optical drives draw ~25-30W on average, but only when spun up. You won’t hit peak all the time, but it will happen. Motherboards tend to draw ~40-50W per, and even the thirstiest ram won’t pull more than ~2W per module.
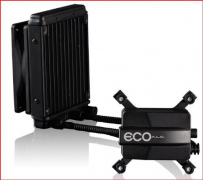
With all of those numbers added up, you’ll have arrived at a rough figure for power draw. All good to go, right? Not quite. If you’re going to use a water cooling system to keep your components cooled, you’ll have to factor in that as well—check the packaging on your pump for the relevant numbers. In addition, power supplies lose efficiency as they age. In general, you’re going to want to add about 25-35% to your initial estimate to compensate for this.
If all this is making your head spin, don’t worry—you’re in good company. There are tools online that can automate this to some extent (here’s one), but remember that these are only rough estimates. When in doubt, up the estimate.
Aside from wattage, there are a few things to look for. 80Plus Gold certification is one of them; this ensures that the PSU has been tested and will deliver at least 80% of its rated wattage under load. Another important consideration, weirdly enough, is weight. In general, a heavy power supply is going to have more reliable components inside than one that is light for its size. I know, this isn’t the most precise of metrics, but this is a practical guide.
While they aren’t necessary, sleeved cables and modular plugs are helpful from a quality of life standpoint. Sleeved cables are easier to keep bundled up and out of the way, which helps with airflow. Modular plugs are helpful, especially with 600W+ power supplies, for reducing in-case clutter by keeping unneeded device cables out.


[…] Building Computers for the Weekend Geek, Part 2 Techware Labs :: Monday, April 04, 2011 A power supply is like the transmission in your car, in that you never notice it when it’s working, but if it has a problem you come to a sudden halt. Choosing the right power supply can mean the difference between a stable system and a maddeningly inconsistent one riddled with heisenbugs. Figuring out exactly what you need may be difficult, but there are a few things you can look for to help narrow it down. […]
[…] Quote: In this followup to part 1, we’ll be going over the remaining components that are essential to building a system from scratch. Grab your thinking cap and your anti-static wrist strap, and let’s get started! LINK: http://www.techwarelabs.com/building-computers-for-the-weekend-geek-part-2/ […]
[…] Quote: In this followup to part 1, we’ll be going over the remaining components that are essential to building a system from scratch. Grab your thinking cap and your anti-static wrist strap, and let’s get started! LINK: http://www.techwarelabs.com/building-computers-for-the-weekend-geek-part-2/ […]
[…] system from scratch. Grab your thinking cap and your anti-static wrist strap, and let's get started!http://www.techwarelabs.com/building-computers-for-the-weekend-geek-part-2DiggLeave a Reply Click here to cancel reply. Name (required) Mail (will not be published) […]
[…] or Desktop Environment? @ Computing On Demand .:. ASUS Routers: Wireless Elegance @ InsideHW .:. Building Computers for the Weekend Geek, Part 2 .:. iBUYPOWER Chimera 901 Evaluation @ […]