Closer look(Exterior)
 |
 |
 |
 |
 |
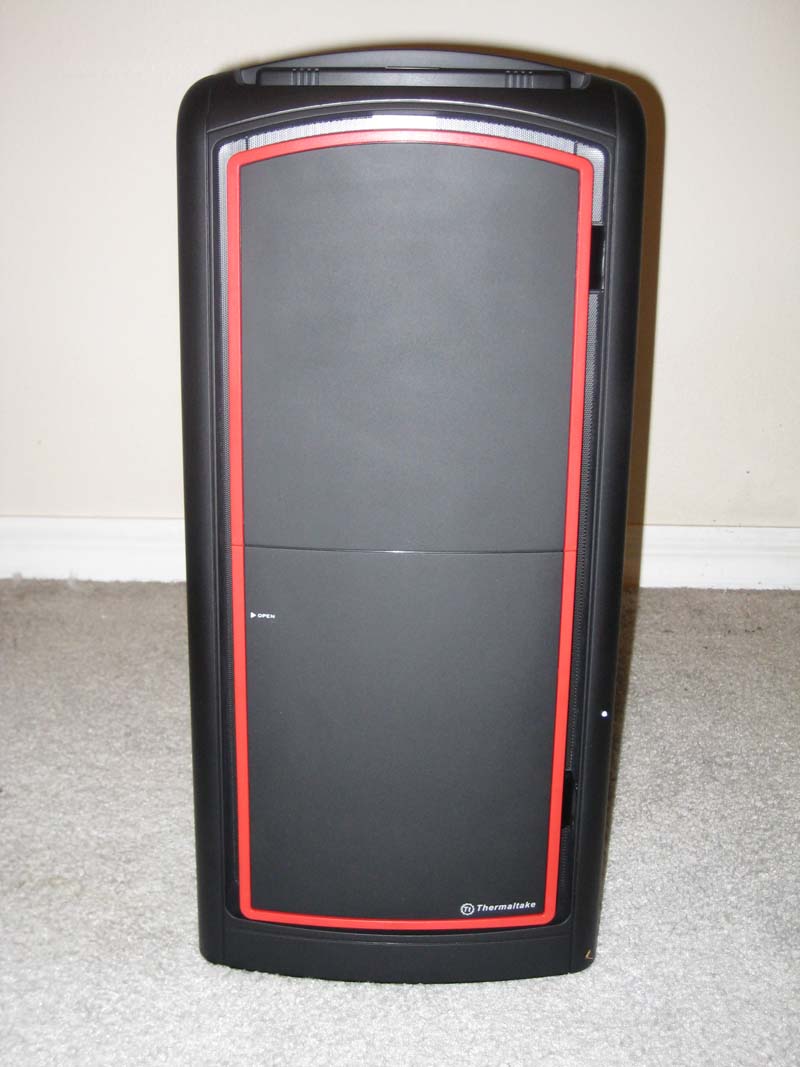
When I took off the cloak the first impression was, in a word, simple. There was no ridges, random indents, or random holes. I admit sometimes I want that design but this simplicity touches different part of ones personality. I suspect it’s the same part that wants to win ten million dollars, do nothing, and think it’s the best time ever. Thermaltake are known for their design and effeciency. The effeciency we’ll talk about later, but as far as design Thermaltake was going for simple. I must note here that by simple I don’t mean boring, by simple I mean straight forward and not overdone. It still has design, the fans will still light up.
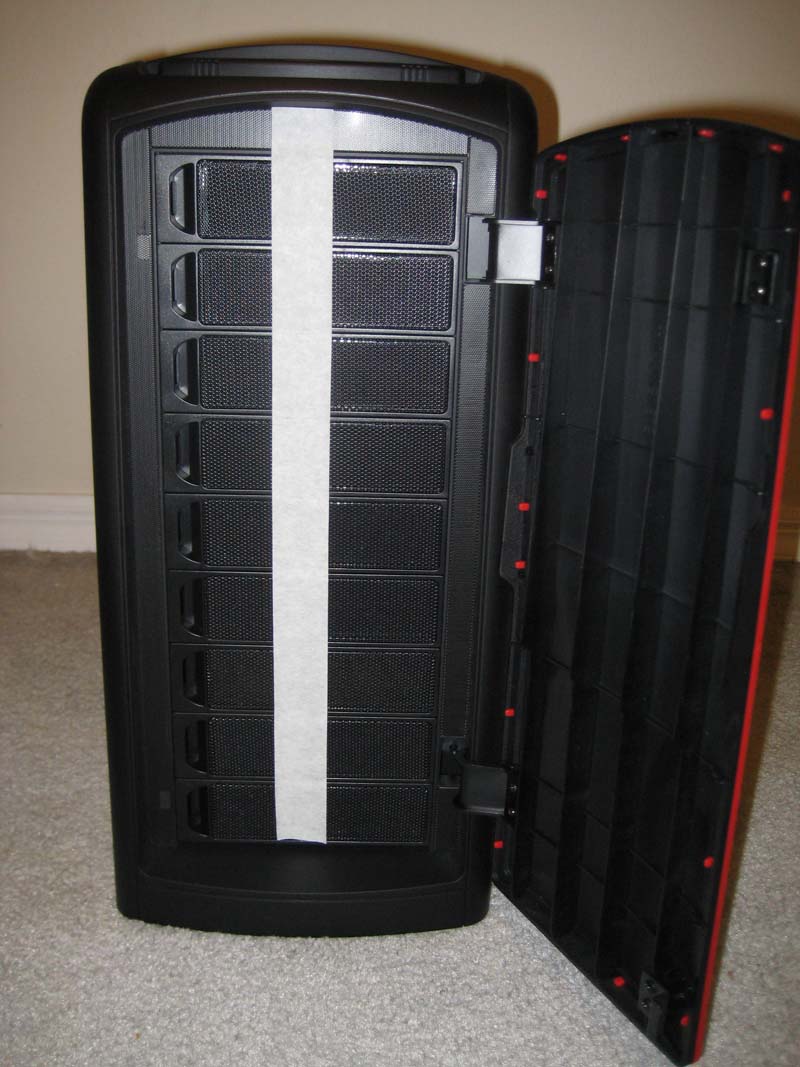
The first thing to note here is that front door does not really have a handle or a ridge to grab on to. Even though it sticks out to the point where you can press your fingers on the side of the door it’s not very comfortable. The door still opens easily but you have to open it by pressing the fingers against the flat and smooth side and via the friction of your fingers and the surface open the the door. In most cases the doors would have some kind of an indent or at least ridges for effortless opening. Again, even though it opens pretty easily it still feels awkward. Next, when you open the door you will see 9 5.25″ drive bays which is not the actual fit. The bottom six drive bays are for the front panel fans. Again Thermaltake took a shortcut and made a simple and honestly, in this case, boring design. It’s also should be noted that the front panel comes with one standard fan with 120mm 1300rpm and one optional fan which you have to mention in your order. If you’re planning on running high end hardware or multiple hard drives I strongly suggest getting the second fan also. Even though you can flip the fans to suit your intake/outtake needs, the front panel fan is the only one for intake on this chassis.
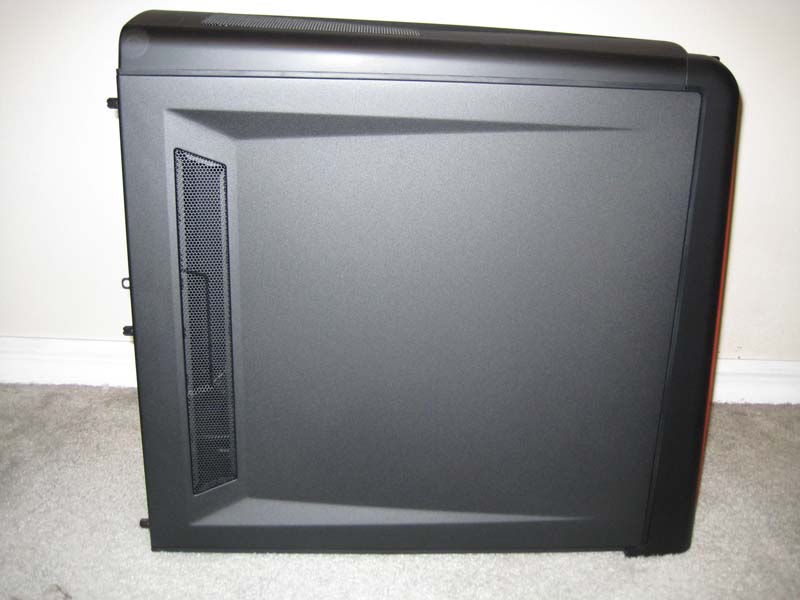
The side panel on Element S VK60001N2Z has only the air vent while on the VK60001W2Z the side panel will also have a 240mm fan for VGA cooling.
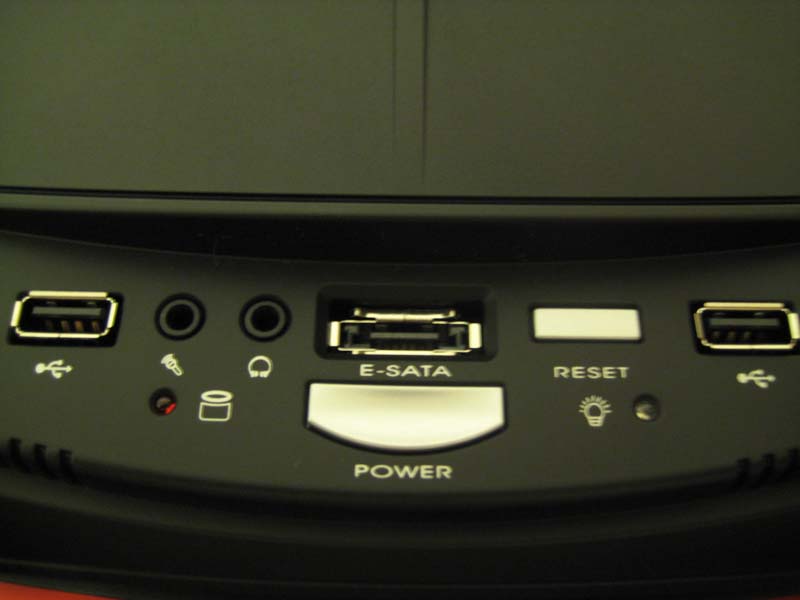
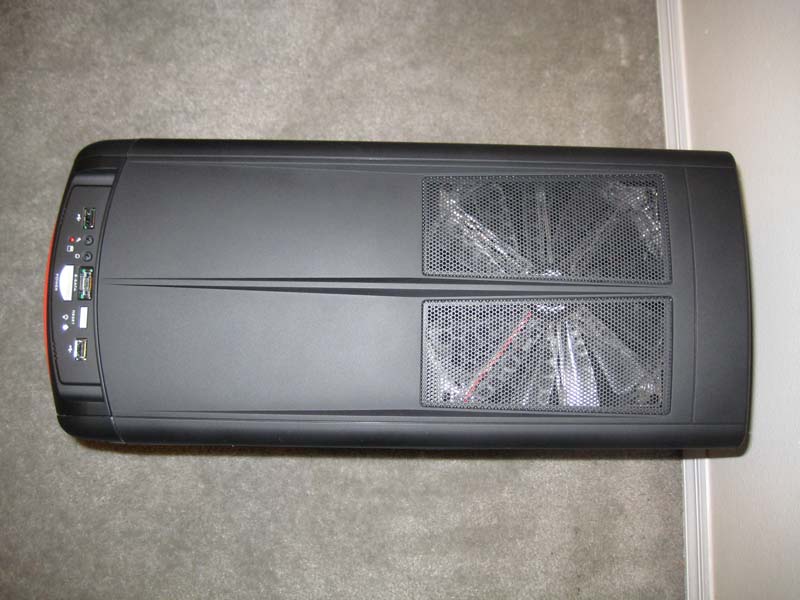
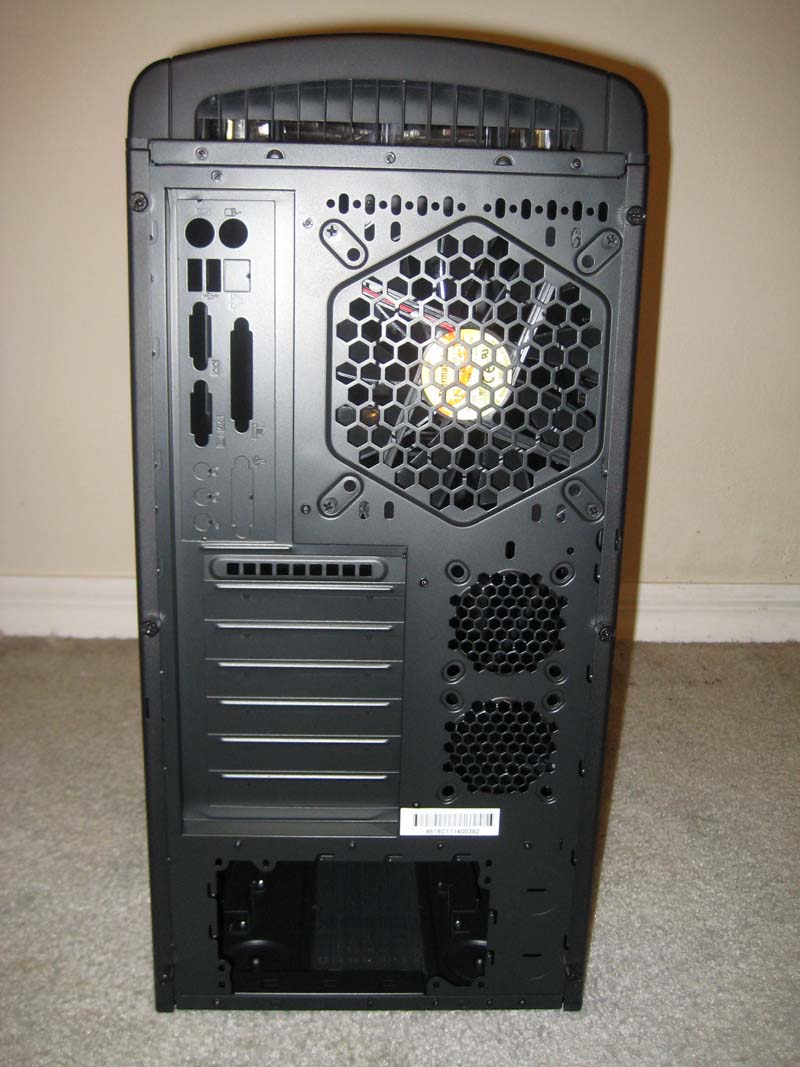
The top part of this case has the biggest fan of this chassis. With 230mm and 800rpm this fan is as wide as the computer itself. With this exhaust fan there will be no problem keeping the heat out of your computer. The top panel also includes a standard expansion panel with USB, audio, Reset and Power buttons, and E-SATA.
The back panel has the standard PCI and mother board slots. The PSU trey is on the bottom of the case. The top of the back panel has an interesting air vent right behind the top fan and right above the back fan. Interesting because this vent might provide extra air from the outside. Thus lessening the negative pressure created by the 2 large fans. The back panel includes the140mm 1000rpm exhaust fan. There are also 2 spots available for small 60mm fans. These fans should also be set up for exhaust if you decide to get them. Even though it seems too much for exhaust the general consensus is that the back fans should be set up for the out take. The biggest reason being is that back of the computer will generally face a wall of some kind and the PSU fans are exhaust. Since the air in the back of the computer will always be warmer because of the PSU exhaust it’s not a good idea to set up back fans for intake. If you think that having more for intake will improve the temperature you will be better off trying to flip the top fan instead. Overall, getting one more 1300rpm intake fan on the front is best.
